This post may contain affiliate links . Read my full Disclosure Policy.


Flaky, tender, and buttery, these quick and easy Sourdough Buttermilk Biscuits come together in under 45 minutes. Made with sourdough discard, they bake up tall with delicate layers and a soft, melt-in-your-mouth texture.

Save & Summarize
With just a few simple ingredients, you can have warm, flaky homemade biscuits on the table in no time, perfect for busy mornings or easy weeknight dinners. This Sourdough Buttermilk Biscuit recipe is one you’ll find yourself making again and again. If you love this recipe, don’t miss my Sourdough Cheddar Biscuits and Sourdough Chicken Pot Pie with Sourdough Biscuits.
Why you will love this recipe
- Under 45 minutes – Just like my Cheesy Garlic Sourdough Scones, this is the perfect no-wait sourdough recipe to get a delicious bread on the table when you are pressed for time.
- Beginner-friendly – These biscuits come together easily and are great for beginners.
- Tender flaky layers – These Sourdough Buttermilk Biscuits have a soft and tender texture with buttery flaky layers. For a sweet version, check out my Sourdough Strawberry Shortcake recipe.
Important Ingredients and Substitutions
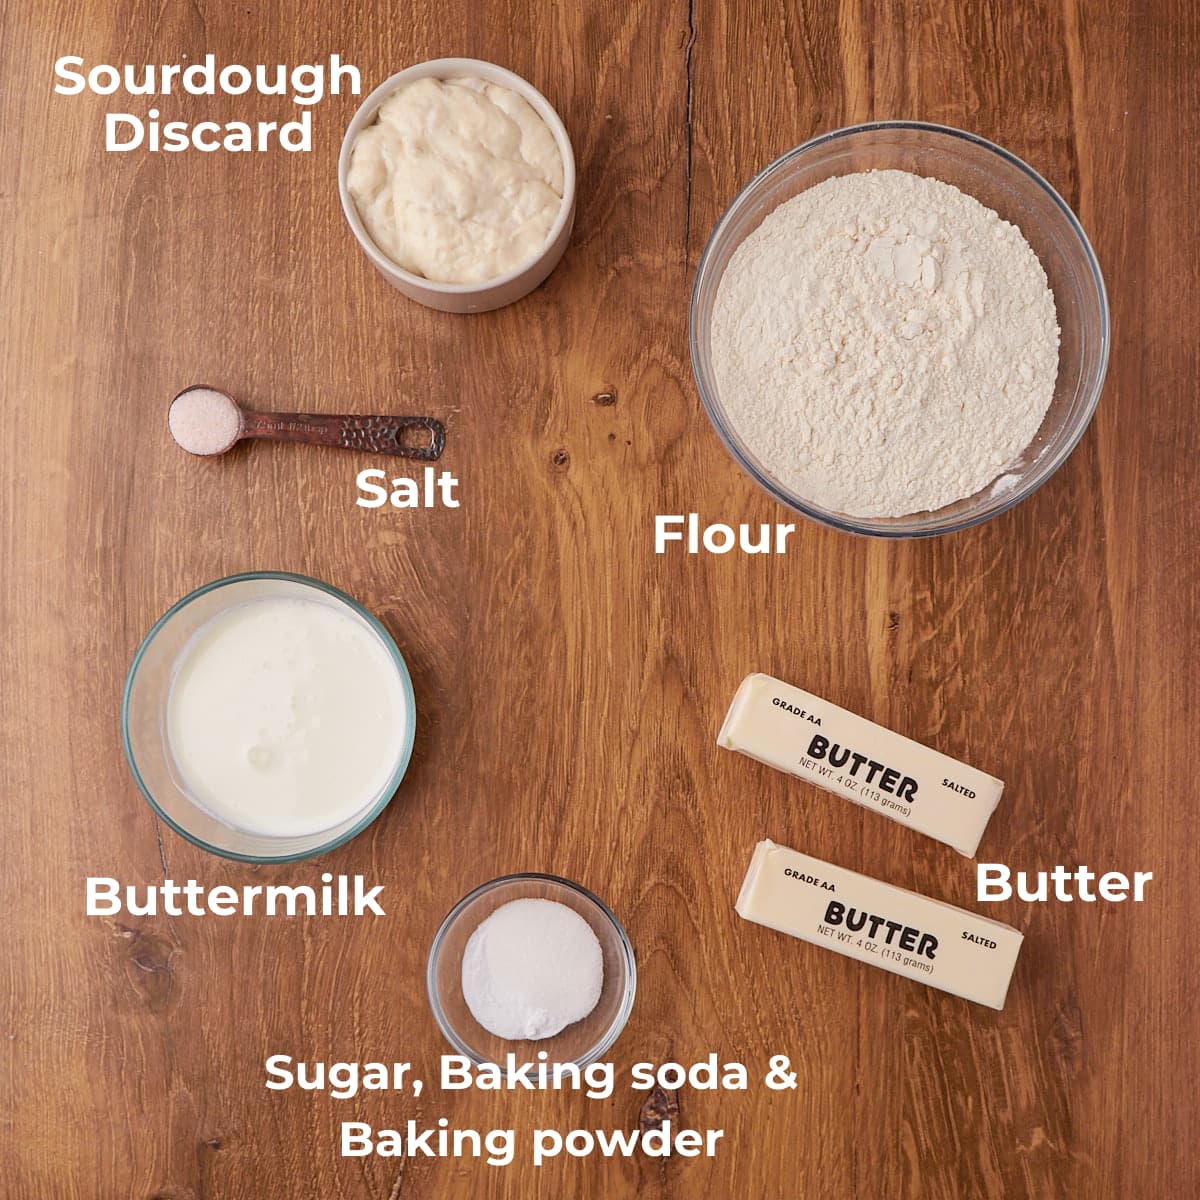
- Butter – You can use either salted or unsalted butter. Placing the butter in the freezer for at least 20 minutes before making the dough will help keep it cold throughout, resulting in flaky layers. After it is frozen, grate the butter using a cheese grater, this cheese grater is my favorite.
- Sourdough discard – Be sure to use cold sourdough discard to ensure the butter stays cold in the biscuits.
- Buttermilk – Using buttermilk creates a tender biscuit. If you prefer, you can substitute it with regular milk or create your own buttermilk by adding 1/2 tablespoon of lemon juice or vinegar to 1/2 cup of milk. After 5-10 minutes, the milk will start to thicken and slightly curdle, and then you can add it to the biscuit dough.
See all the ingredients and amounts in the recipe card below.
Instructions for Sourdough Buttermilk Biscuits
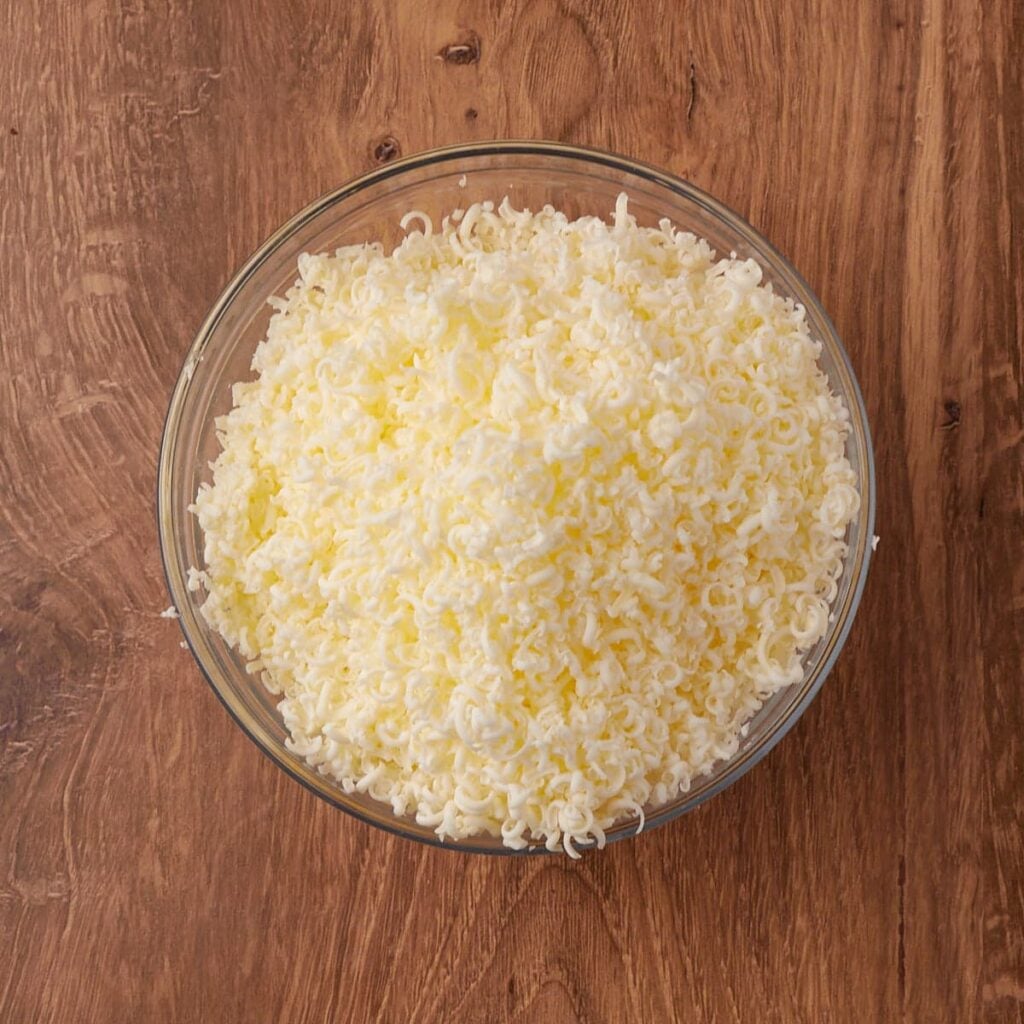
Step 1 – Prep butter
Place 2 sticks of butter (1 cup) in the freezer for 20-30 minutes to ensure the butter is very cold when making these biscuits. Cold butter is key to a good biscuit. Shred the frozen butter with a cheese grater.
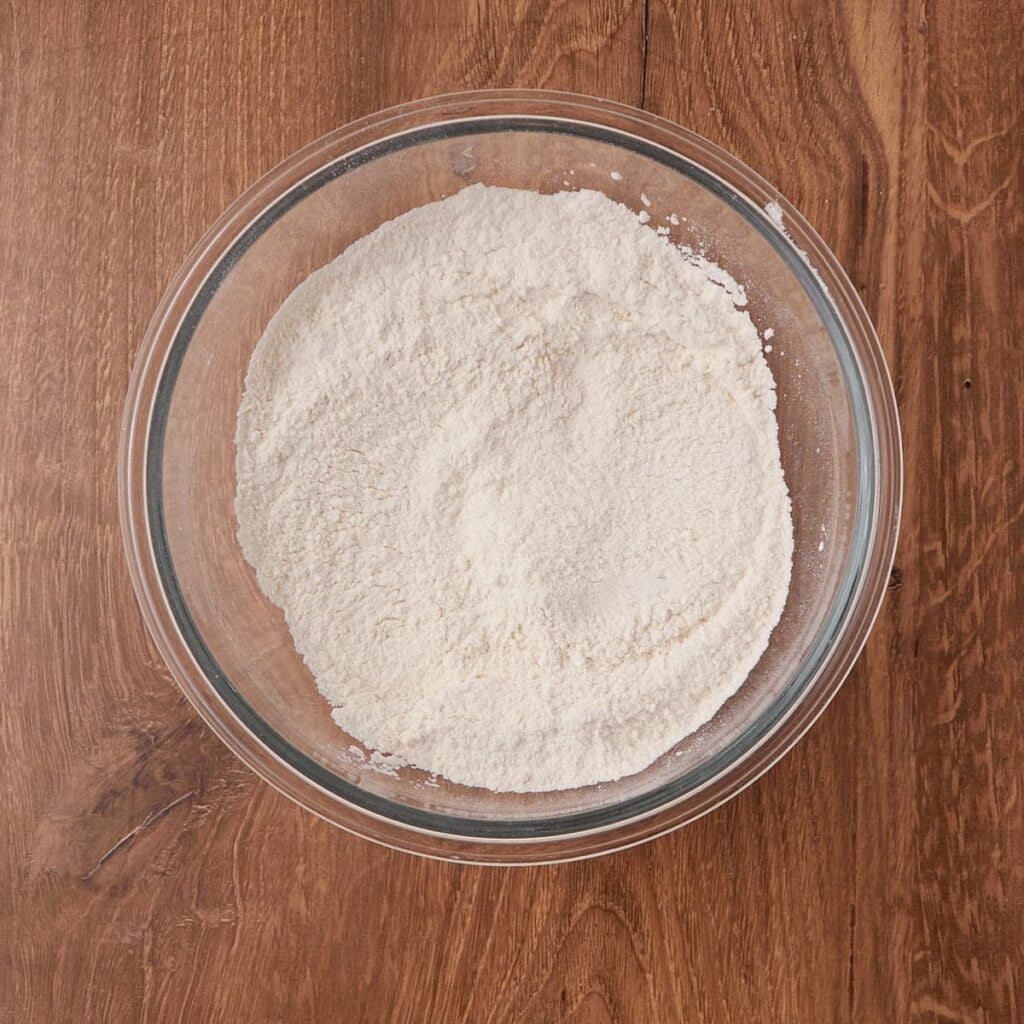
Step 2 – Mix dry ingredients
In a large bowl, combine the dry ingredients.
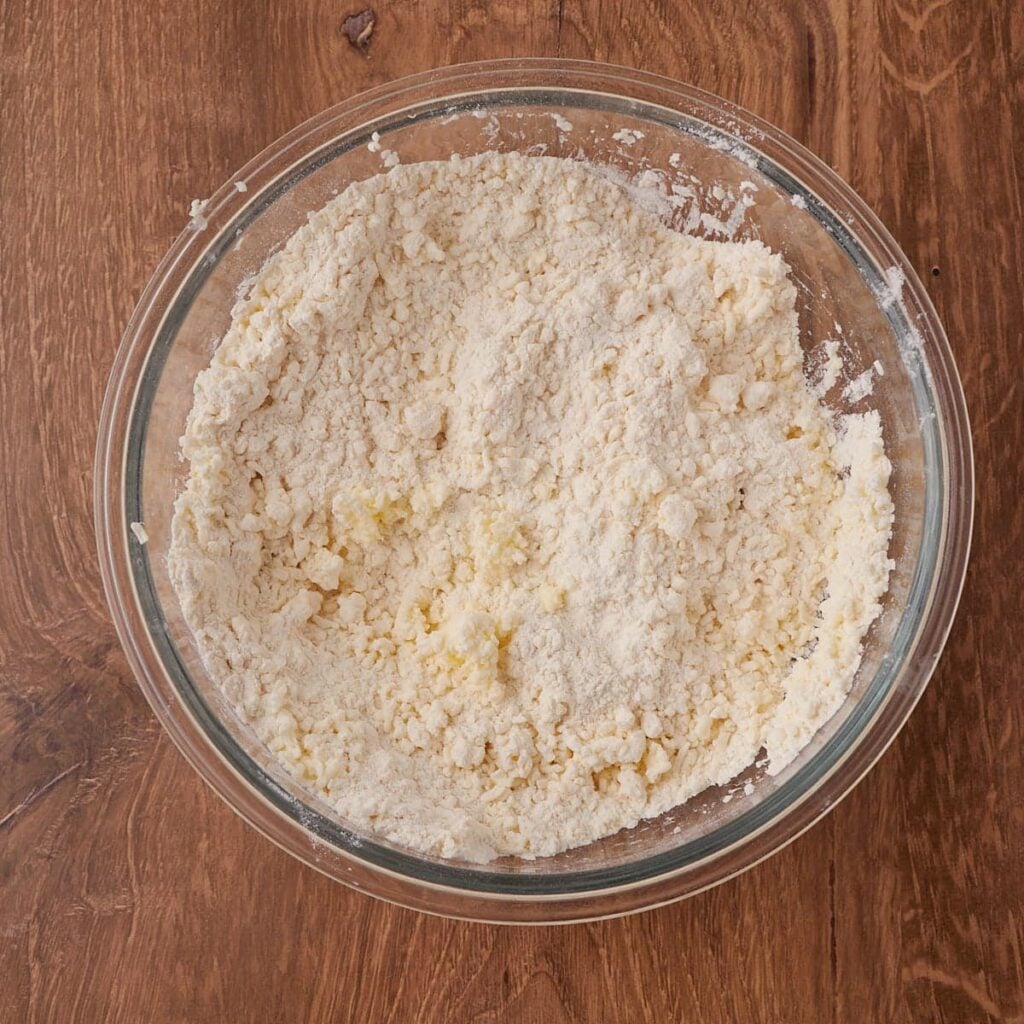
Step 3 – Add butter
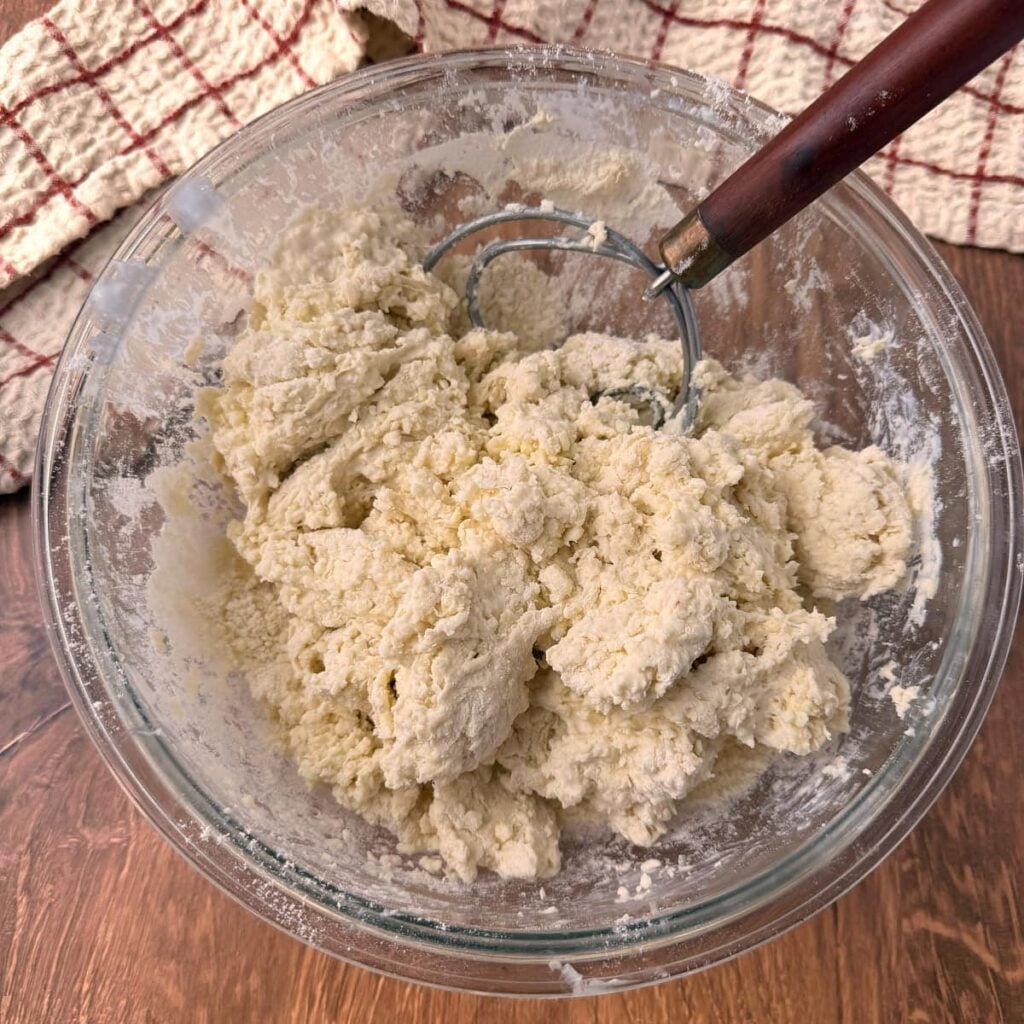
Toss the butter it into the dry ingredients, coating the butter in the flour.
Step 4 – Add wet ingredients
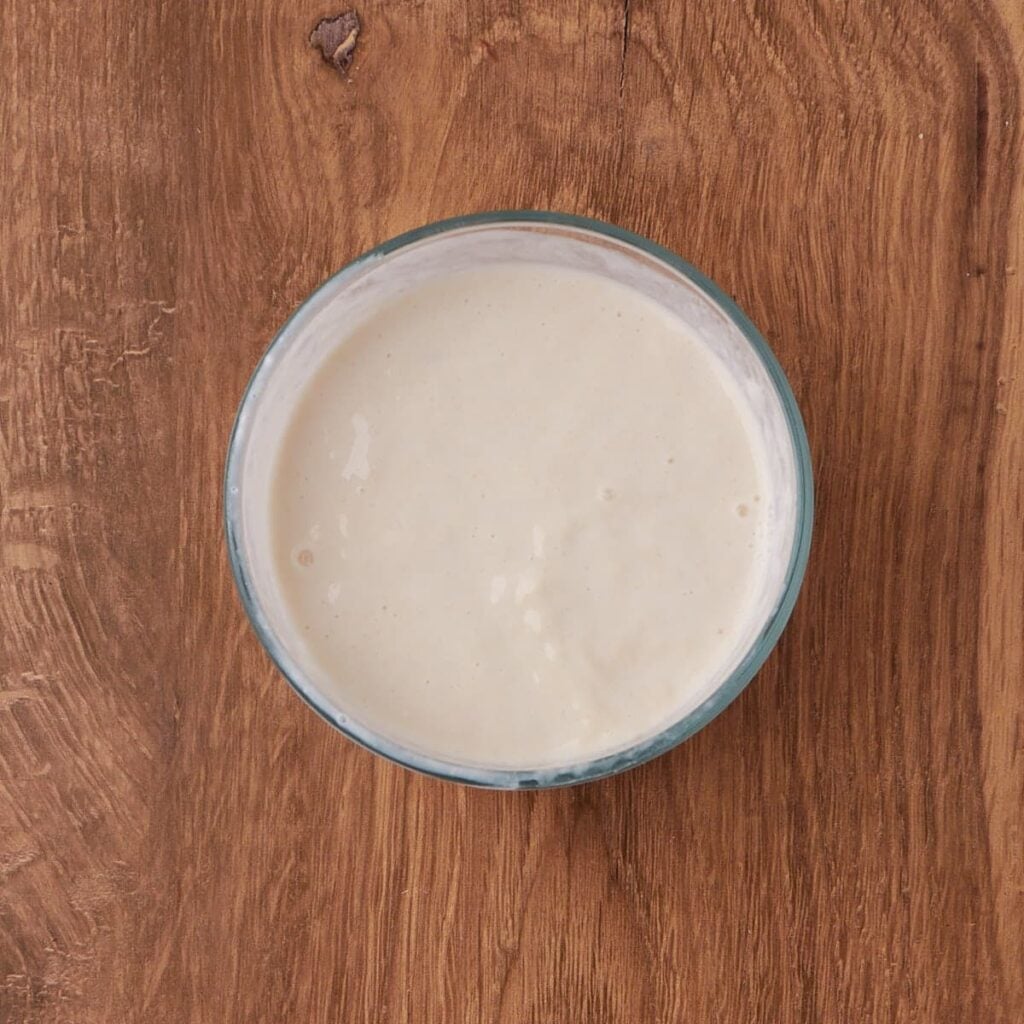
In a separate bowl, mix together the cold sourdough discard and buttermilk.
Step 5 – Combine wet and dry ingredients
Pour the wet ingredients into the dry ingredients and mix with a fork or Danish dough whisk until the dough begins to come together.
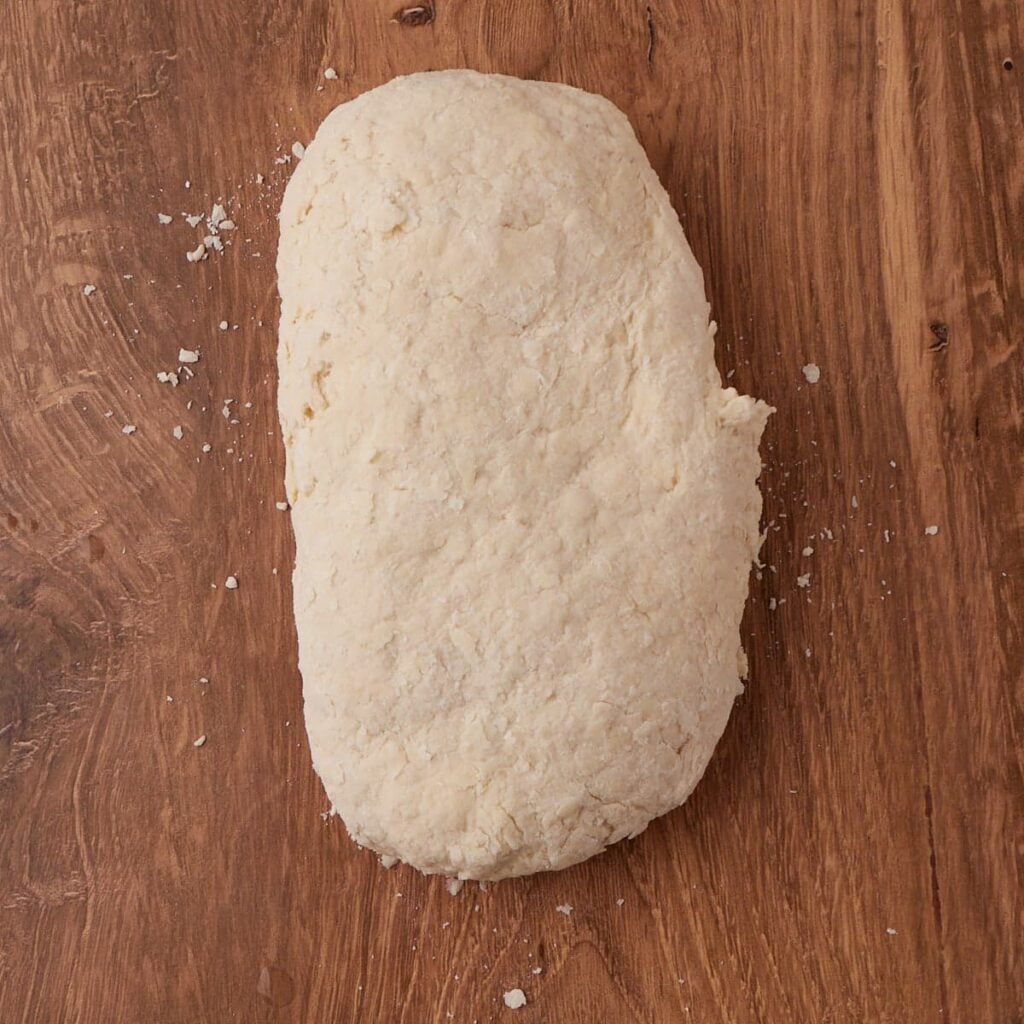
Step 6- Turn out the dough
Once mixed, turn the dough out onto the counter and gently press and knead it together, incorporating the flour as you go. Work the dough just until most of the flour is mixed in, it will not be smooth. Be careful not to overwork it, as this can melt the butter and lead to tougher biscuits.
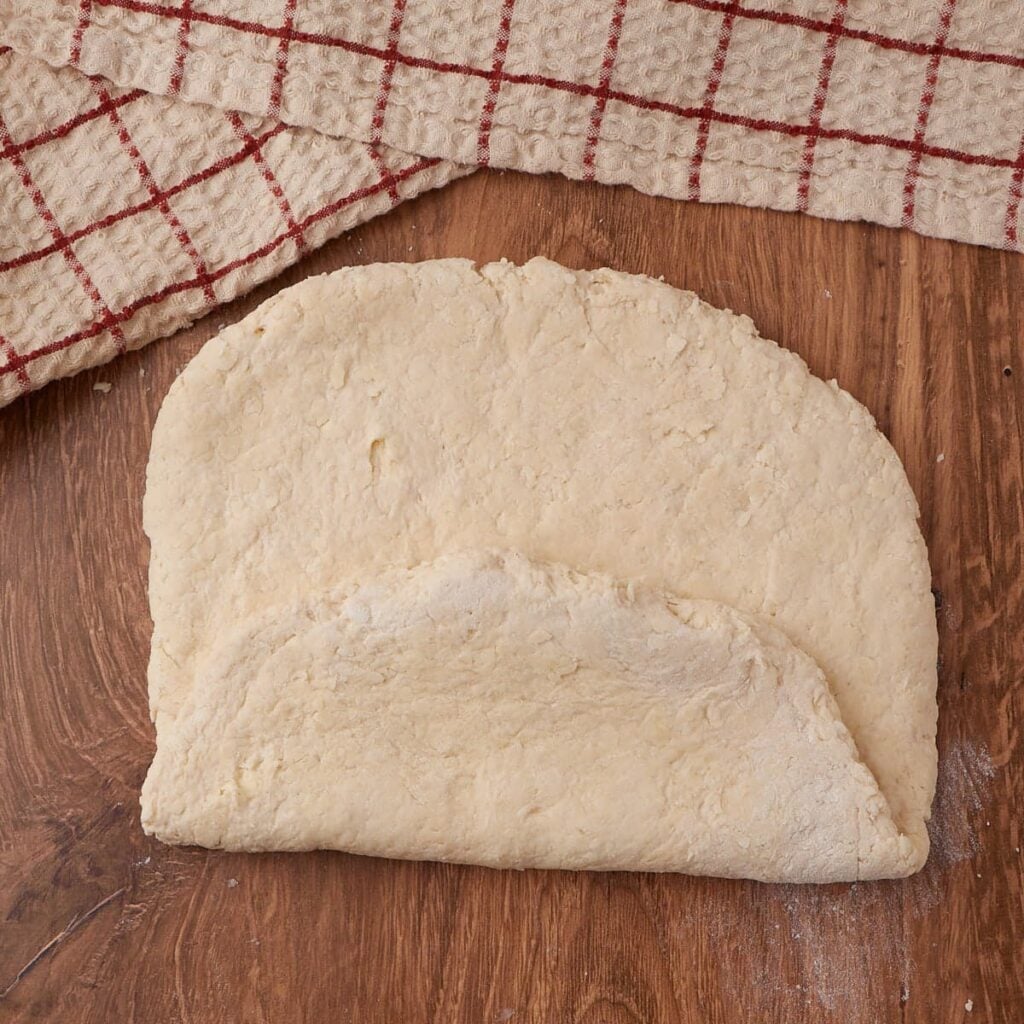
Step 7- Folds
Roll the dough out on a lightly floured surface into a rectangle. Fold it into thirds, like a letter, bringing one side over the center and then the other on top. Lightly flour the top of the dough as needed if the rolling pin starts to stick.

Step 8 – Folds
Roll the dough out again to flatten it. These folds help create layers in the dough, giving you tender, flaky biscuits.
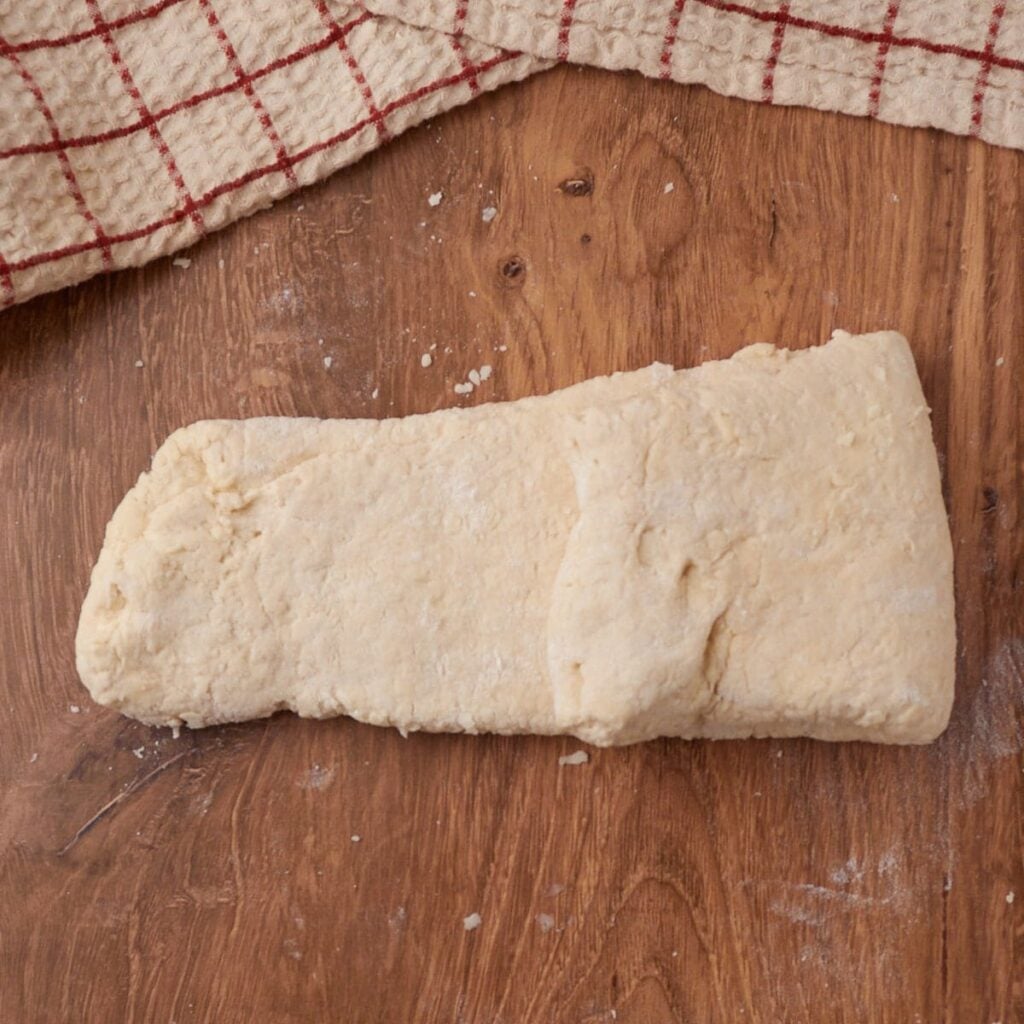
Step 9 – Folds
Fold the dough into thirds one more time, bringing one side over the center and then the other on top.
Wrap the dough in plastic wrap and place it in the freezer for 15 minutes. This helps keep the butter cold, which creates tall, flaky biscuits. You can skip this step if you’re in a hurry, but it’s worth it for the best results.

Step 10 – Roll
Roll the dough out on a lightly floured surface into a 9×12-inch rectangle, or until it is about ½-inch thick.

Step 11 – Cut
Cut the dough into 2.75-inch rounds using a biscuit cutter or a mason jar lid. Gather and reroll the scraps to cut out more biscuits. I typically get about 14 biscuits after two rounds, then shape any remaining scraps into balls and flatten them to bake.
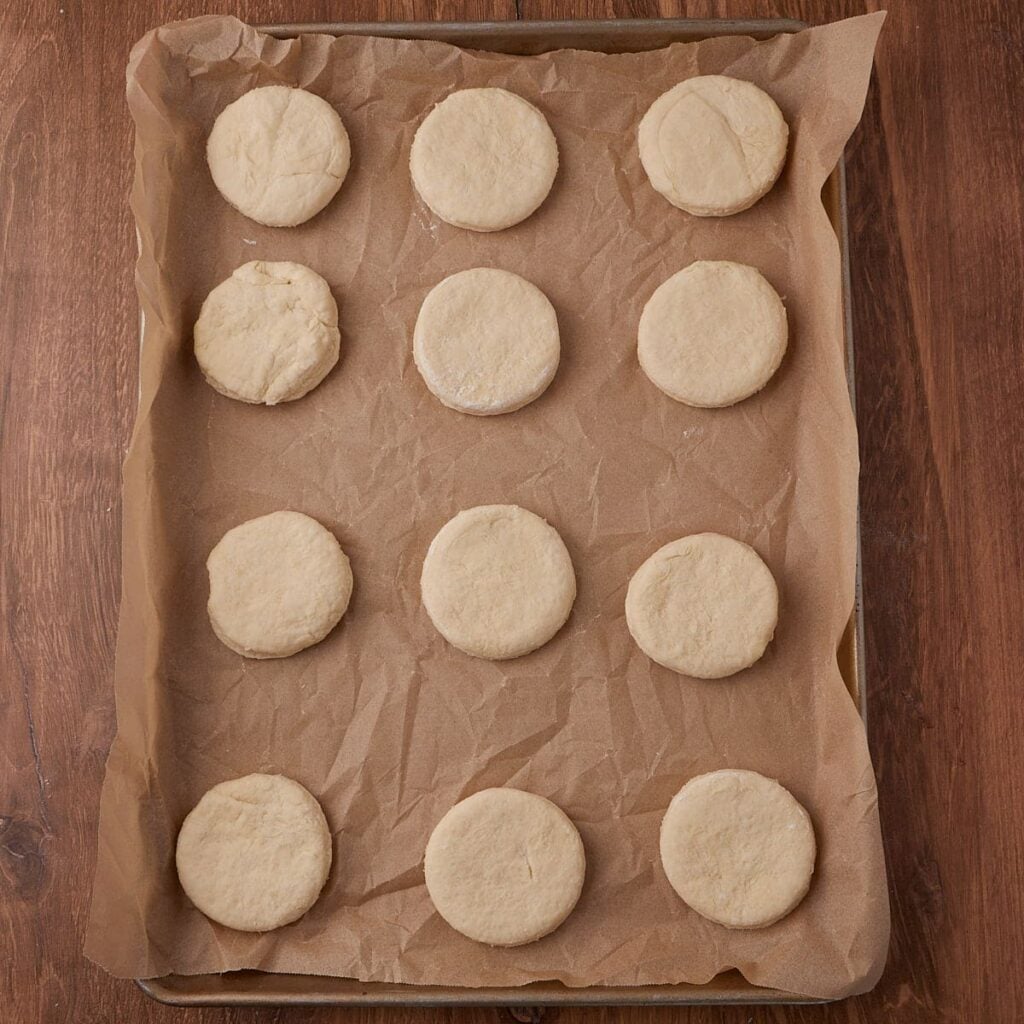
Step 12 – Place on baking sheet
Place the biscuits on a baking sheet lined with parchment paper or a silicone baking mat.
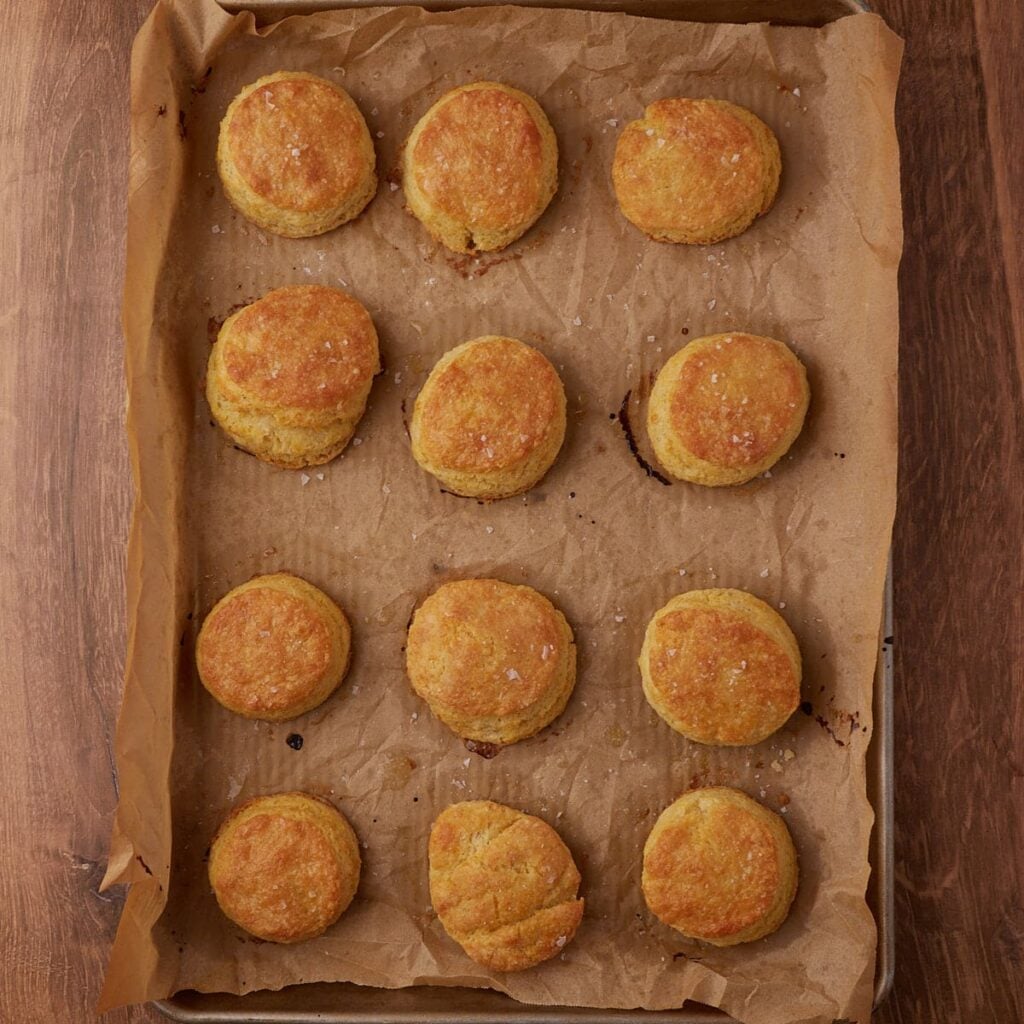
Step 13 – Bake
Bake the biscuits in a preheated 425°F oven for 15–17 minutes, or until they are lightly golden and baked through.
Brush the tops with melted butter using a pastry brush and sprinkle with flaky salt if desired, then remove the biscuits from the pan and place them on a cooling rack to finish cooling.
Recipe Tips
- Make sure the butter you use for the biscuits is very cold, frozen is best. Like my white chocolate almond sourdough scones, the key is to keep the butter from melting so that you get tender and flaky biscuits.
- Use cold sourdough discard to help keep the butter from melting.
- Don’t work the dough too much. Doing so will heat up the dough and cause the butter to melt.
- Do not twist the cutter when cutting the biscuits. Cut straight down and pull straight up without twisting. Twisting the cutter can seal the edges together, which can prevent the flaky layers from forming.
- If you don’t have a biscuit cutter, you can use mason jar rings instead. Or, cut them into a square shape using a bench scraper or knife.
- Don’t let these biscuits bake too long. If they are overbaked, they can become dry.
- Use a rimmed baking sheet when baking the biscuits.
Storage Instructions
These Sourdough Buttermilk Biscuits can be stored in an airtight container at room temperature for up to 3 days. Keep in the refrigerator for up to a week but do note the fridge will likely dry them out some.
These biscuits can also be frozen. Simply place them in a freezer-safe bag or wrap them in plastic wrap and freeze them for up to 3 months. Leave them out to thaw overnight or pop them in the microwave to heat up quickly.

Recipe FAQ
If you do not have buttermilk, you can substitute it with regular milk. You can also make your own buttermilk by taking 1/2 cup of regular milk and adding 1/2 Tablespoon of lemon juice or vinegar. Stir the mixture and let it sit at room temperature for 5-10 minutes. You’ll know it is ready because the milk will thicken and become slightly curdled.
Yes, active starter or discard will work in this recipe. I recommend using it straight from the fridge so that it is cold.
Yes! You can freeze the unbaked biscuit dough. To freeze before baking, cut out the biscuits, place them on a sheet pan to freeze until solid, then transfer to a freezer bag. Bake straight from frozen, adding a few extra minutes to the bake time.
Absolutely. You can make the dough a day or two ahead and keep it in the fridge covered until ready to bake.
Yes, if you’d rather use a food processor, you absolutely can. Just follow the instructions for my Sourdough Cheddar Biscuits.
If your biscuits leak a lot of butter while baking, the butter was likely too warm when the dough was made. To prevent this, wrap the dough and place it in the freezer for 15 minutes before cutting into rounds and baking that way the butter stays cold.
There are a few reasons your biscuits may be flat or lacking layers:
1. The butter was too warm. Cold butter creates steam and gives you tall, flaky layers. Use very cold or frozen butter, work quickly, and chill the dough.
2. The dough was rolled too thin. Make sure to keep the dough around ½-inch thick.
3. Not enough folds. The folds create layers in the dough, so skipping them or not doing enough will result in fewer flaky layers.
4. The dough was overworked. Overworking develops the gluten and makes the biscuits dense instead of tender. Mix just until the dough comes together; it shouldn’t be smooth.
5. Expired leavening agents. Make sure your baking powder and baking soda are fresh, as expired leavening won’t give a proper rise.
More sourdough Bread Recipes

Soft Sourdough Bread Recipes
Same Day Sourdough Dinner Rolls

Sourdough Discard Recipes
Easy Sourdough Cheddar Biscuits

Sourdough Discard Recipes
Cheesy Garlic Sourdough Scones (30 minutes)

Soft Sourdough Bread Recipes
Sourdough Garlic Bread (Ready in 20 minutes!)
Tried these Sourdough Buttermilk Biscuits or another recipe from the site? I’d love to hear about it! Drop a star rating and share your thoughts in the comments—can’t wait to see what you’re baking!

Sourdough Buttermilk Biscuits
Ingredients
- 227 grams butter, frozen, 1 cup
- 280 grams all purpose flour, 2 cups
- 5 grams baking soda , 1 teaspoon
- 10 grams baking powder, 2 teaspoons
- 10 grams sugar, 2 teaspoons
- 10 grams salt, 2 teaspoons
- 180 grams buttermilk, ¾ cup
- 175 grams sourdough discard, ¾ cup
Instructions
- Prep: Place 2 sticks of butter (1 cup) in the freezer for 20-30 minutes to ensure the butter is very cold when making these biscuits. Preheat the oven to 425℉.227 grams butter, frozen
- Combine dry ingredients: In a large bowl, combine the all-purpose flour, baking soda, baking powder, sugar, and salt. 280 grams all purpose flour, 5 grams baking soda , 10 grams baking powder, 10 grams sugar, 10 grams salt
- Add butter: Shred the frozen butter using a cheese grater, then toss it into the dry ingredients, coating the butter in the flour.
- Add wet ingredients: In a separate bowl, whisk the cold sourdough discard and buttermilk. Pour the wet ingredients into the dry ingredients and mix with a fork or Danish dough whisk until the dough begins to come together. 175 grams sourdough discard, 180 grams buttermilk
- Turn out the dough: Once mixed, turn the dough out onto the counter and gently press and knead it together, incorporating the flour as you go. Work the dough just until most of the flour is mixed in, it will not be smooth. Be careful not to overwork it, as this can melt the butter and lead to tougher biscuits.
- Folds: Roll the dough out on a lightly floured surface into a rectangle. Lightly flour the top of the dough as needed if the rolling pin starts to stick. Fold it into thirds, like a letter, bringing one side over the center and then the other on top. Roll the dough out again to flatten it. Fold the dough into thirds one more time, bringing one side over the center and then the other on top.
- Roll: Roll the dough into a 9×12” rectangle or until the dough is ½” thick.
- Cut: Cut the dough into 2.75-inch rounds using a biscuit cutter or a mason jar lid. Dip the cutter in flour before each cut to prevent sticking, and press straight down without twisting so the layers don’t seal. Gather and reroll the scraps to cut out more biscuits. I typically get about 14 biscuits after two rounds, then shape any remaining scraps into balls and flatten them to bake. Place on lined baking sheets.
- Bake: Bake the biscuits at 425°F for 15-17 minutes, or until lightly browned and baked through.
- Cool: Brush the tops with melted butter using a pastry brush and sprinkle with flaky salt if desired, then remove the biscuits from the pan and place them on a cooling rack to finish cooling. Serve warm with butter, honey, or jam.
Notes
- Make sure the butter you use for the biscuits is very cold, frozen is best. The key is to keep the butter from melting so that you get tender and flaky biscuits.
- Use cold sourdough discard to help keep the butter from melting.
- Don’t work the dough too much. Doing so will heat up the dough and cause the butter to melt.
- Do not twist the biscuit cutter when you are cutting the biscuits. Cut straight down and pull straight up without twisting. Twisting the cutter can seal the edges together, which can prevent the flaky layers from forming.
- If you don’t have a biscuit cutter, you can use mason jar rings instead. Or, cut them into a square shape using a bench scraper or knife.
- Don’t let these biscuits bake too long. If they are overbaked, they can become dry.
- Use a rimmed baking sheet when baking the biscuits.
- Store in an airtight container at room temperature for up to 3 days, keep in the refrigerator for up to a week or freeze for up to 3 months.
Nutrition
Nutrition information is automatically calculated, so should only be used as an approximation.


Hi. I recently discover that I have a gluten sensitivity. Can I use the Bob’s Redmill gluten free 1:1 flour instead?
Have you tried making this with active starter and fermenting?
You can swap for active starter and leave them in the fridge for up to 48 hours before baking!
These buttermilk biscuits are so buttery and flaky! So quick and easy to make and so delicious. These will be a family favorite.