This post may contain affiliate links . Read my full Disclosure Policy.


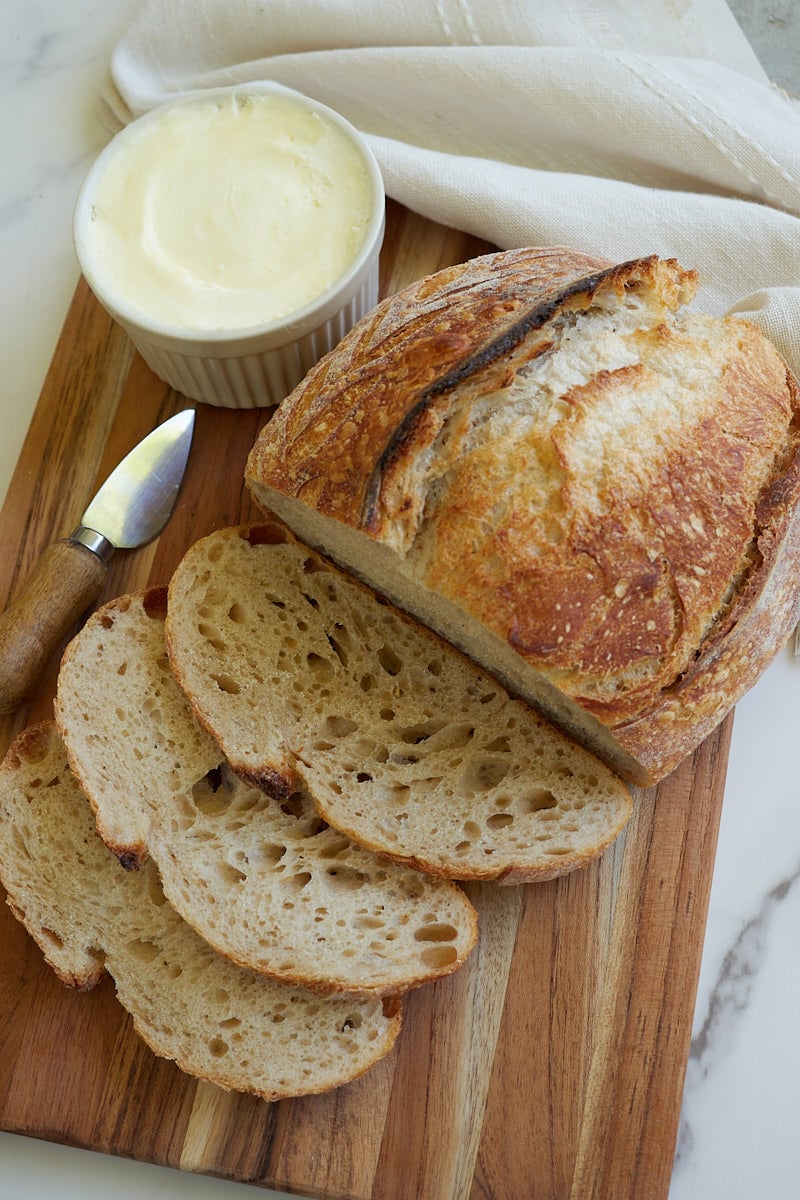
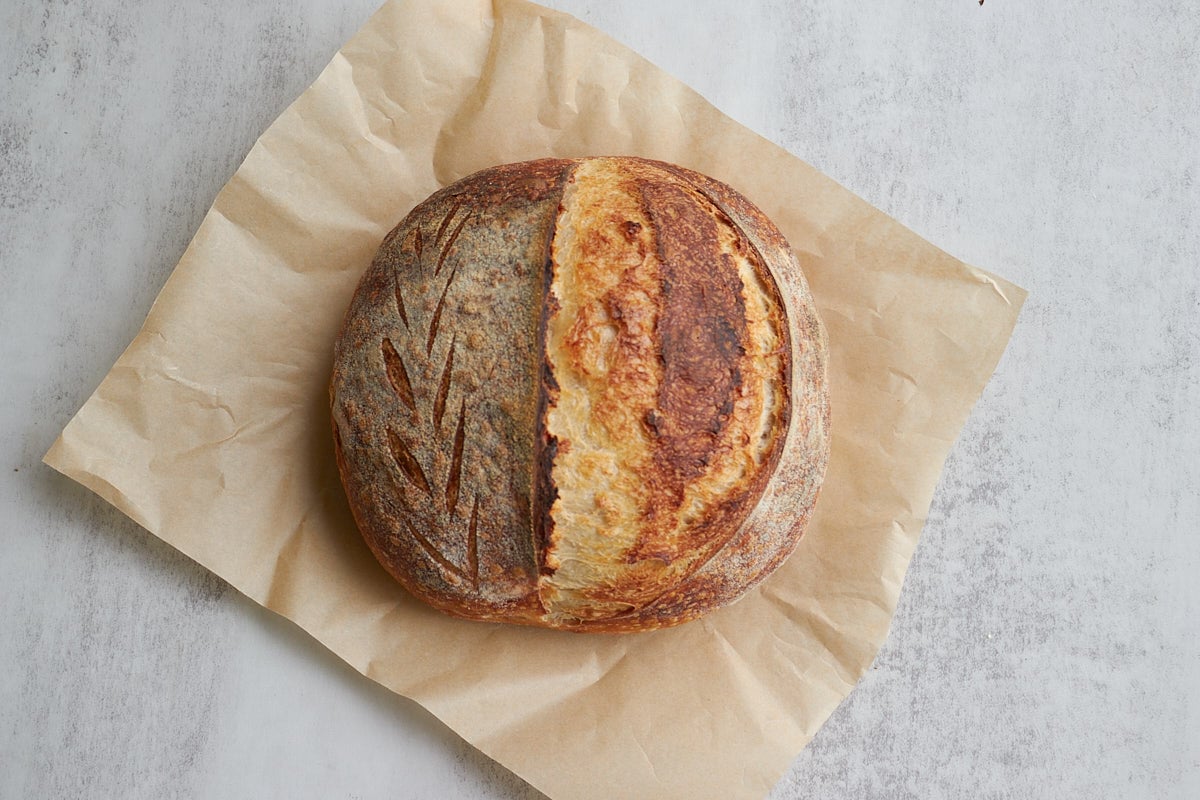
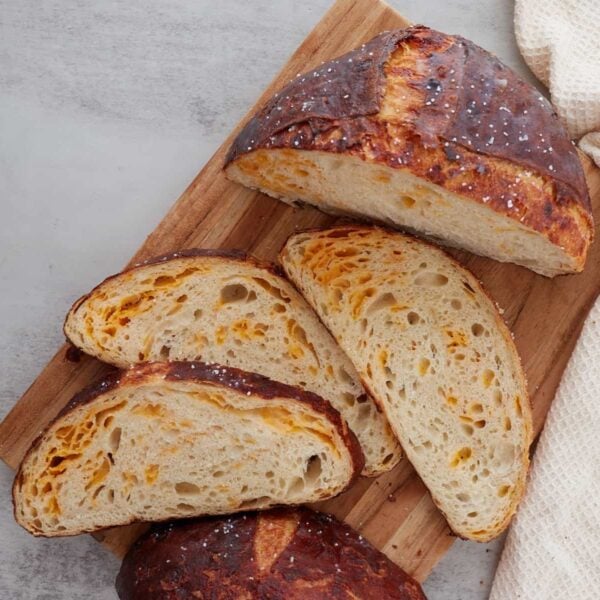
This quick, beginner-friendly Same Day Sourdough Bread recipe makes a crusty, golden brown loaf with a soft, fluffy interior. After trying countless sourdough recipes and methods over the last 6 years, this is the recipe I keep coming back to because it is simple, reliable, and always gives me a good loaf.
Save & Summarize
This Same Day Sourdough Bread is also the recipe I teach in my sourdough classes, and hundreds of home bakers have successfully made their first loaves with this exact method. One of the reasons sourdough can feel intimidating is the schedule, but this recipe is flexible enough to fit into real life. It can be made same day, or refrigerated overnight and baked the next morning. You can even feed your starter the same day you bake. And if you prefer a fully overnight option, check out my Overnight Sourdough Bread Recipe.
If you would like to try other types of flours, check out my Einkorn Sourdough Bread and Whole Wheat Sourdough Bread recipes.
“This recipe is phenomenal. I have failed for about a year of making sourdough with other recipes. Mostly I have made dense gummy loaves. I tried this recipe and it’s amazing. It has great flavor and rise. I finally got it!” -Kari
Table of Contents
- Why You Will Love This Sourdough Recipe
- How sourdough bread is made in one day
- What makes this recipe different?
- Sourdough Bread Recipe Ingredients
- How to Make Sourdough Bread
- Recipe Tips
- Storing Same Day Sourdough Bread
- Sample baking schedule
- Using sourdough mix-ins
- New to sourdough?
- Troubleshooting Sourdough Bread
- Recipe FAQ
- More sourdough Bread Recipes
- Same Day Sourdough Bread Recipe
- More Favorites from Country Roads Sourdough
Why You Will Love This Sourdough Recipe
- Quick & forgiving timeline – This sourdough recipe can be made in less than 7 hours, so you can have homemade bread in time for dinner. Or, you have the option for a cold ferment to bake the next day.
- Beginner-friendly – The step-by-step instructions make this recipe great for beginner bakers.
- No kneading required – You will do 3 sets of stretch and folds, but no kneading or stand mixer is required to make this artisan sourdough bread.
How sourdough bread is made in one day
This Same Day Sourdough Bread rises faster thanks to a higher amount of starter and a warm dough temperature. For best results, keep the dough around 75°F; warmer dough ferments more quickly, while cooler temperatures will slow things down. If your kitchen is warm, letting the dough rise on the counter should work just fine. Otherwise, you can use a bread mat (use code country10 for 10% off) or proofing box to keep the dough warm. Learn more tips on how to keep your dough warm.
What makes this recipe different?
This Same Day Sourdough Bread has a quicker rise time and has a mild flavor due to the shorter fermentation period, but you can add more tang by swapping the second rise on the counter for a longer rise in the fridge. If you prefer more tang or need a recipe with a longer fermentation period, especially good for those with gluten sensitivities, check out my Overnight Sourdough Bread Recipe. Both recipes will yield delicious bread, so try them both out to figure out which schedule works better for you and your lifestyle.
Sourdough Bread Recipe Ingredients
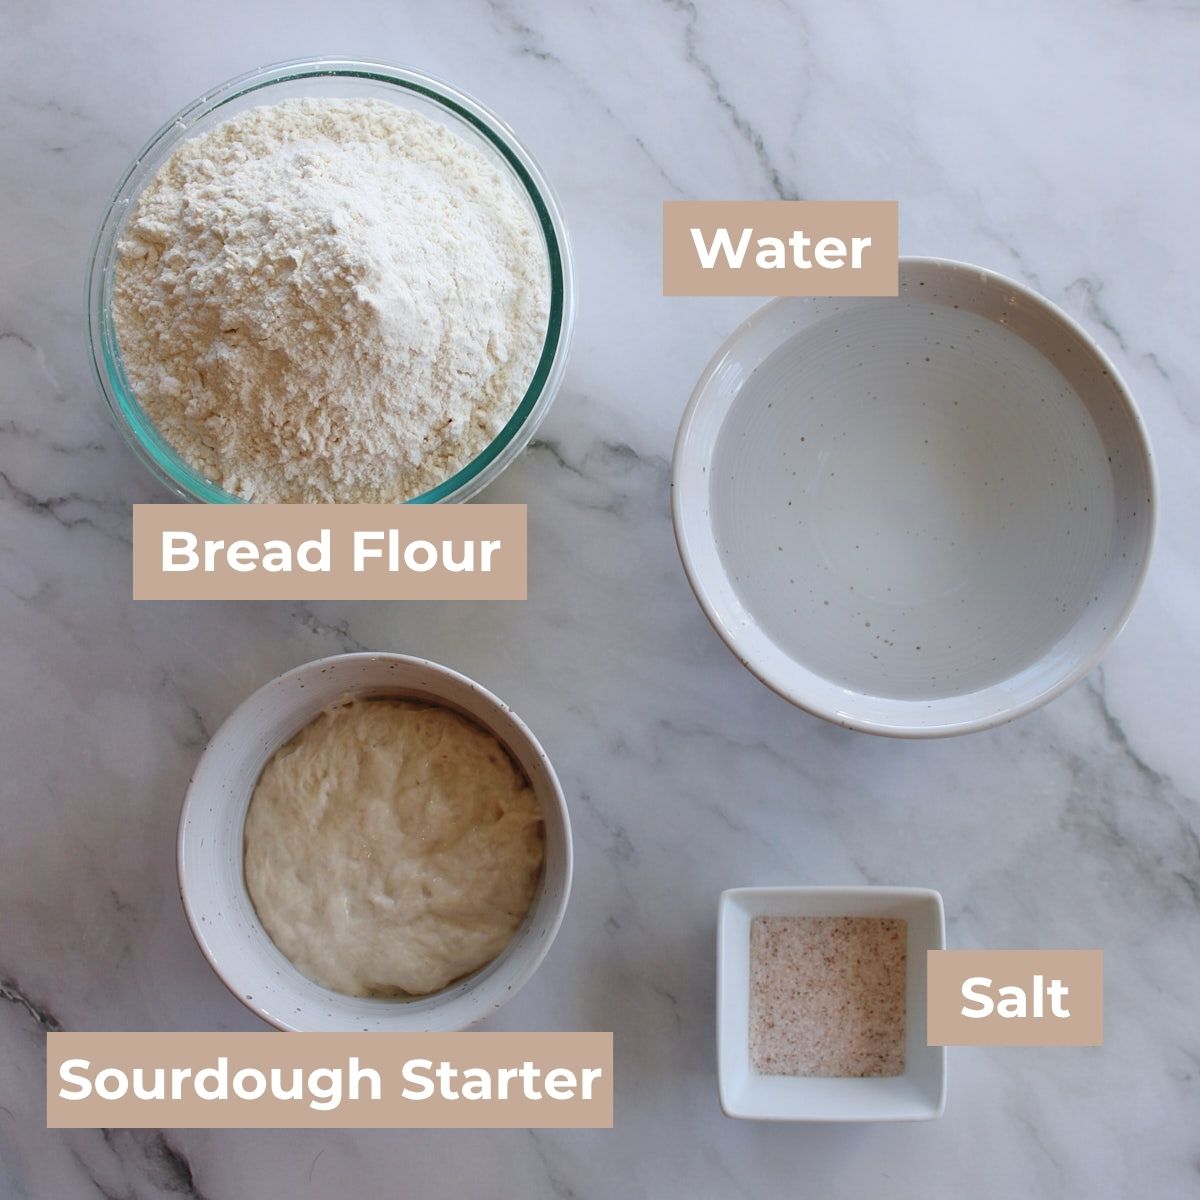
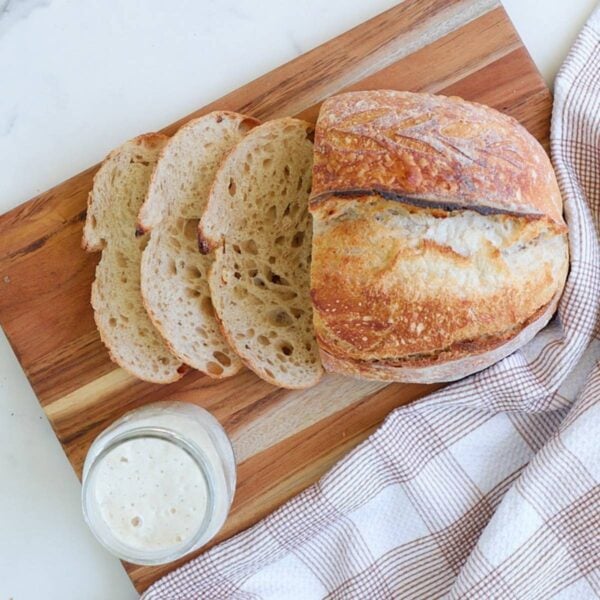
- Active Sourdough Starter – An active sourdough starter is one that has been recently fed, has doubled in size, and is bubbly. To learn more about your sourdough starter or how to make one at home, refer to my Easy Sourdough Starter Recipe. This recipe uses 150 grams of sourdough starter to help to dough rise within one day.
- Bread Flour – Flour with a higher protein content, like bread flour, is ideal for sourdough bread. Sourdough bread is a higher hydration dough so it needs a flour that is efficient at absorbing water like bread flour is. Since I know I will get asked, you can use all purpose flour although it’s not ideal. For all purpose flour reduce the water by 25 grams.
- Water – Despite what some people say, I find that using tap water in sourdough bread works just fine! You can use filtered water if you prefer, but I do not think it is necessary.
- Salt – Any type of salt you have on hand works great.
See the full recipe in the recipe card.
Sourdough Tools
You don’t need a lot of tools to get started, but the ones I find most helpful are a proofing basket in a round (boule) or oval (batard) shape, a bread lame for easy scoring, dutch oven or bread oven that is 5-7 qt, parchment paper or a reusable bread sling for easy transfer, and a good bread knife for slicing. You can find a list of all of my favorite tools and why I love them with my 14 Sourdough Tools To Make Your Life Easier.
How to Make Sourdough Bread
1. Feed sourdough starter
About 4 hours before making the loaf, build a levain or feed your sourdough starter at a 1:1:1 ratio (5o grams sourdough starter: 50 grams flour: 50 grams water). Cover and let it rest at 77–80°F until bubbly and doubled in size.
If you don’t have extra starter, add an extra 5–10 grams to each portion (starter, flour, and water) so you have enough to bake with and still keep your starter going.
Skip this step if your starter is already activated and ready to bake with.
Note: If you want to start the loaf in the morning, you can feed your starter a 1:5:5 ratio (15 grams active sourdough starter, 75 grams flour, 75 grams water) the night before and leave it covered for about 10 hours at 70-72℉.
2. Mix ingredients
With a danish dough whisk (10% off with link) hands, or large spoon mix together active starter, water, and salt in a container with straight sides or a medium clear bowl. Add the flour and mix until the dough is shaggy and the flour is incorporated. Cover with a lid or dinner plate so the dough doesn’t dry out and let sit for 30 minutes in a a warm spot. For a similar timeline as listed below keep the dough temperature at 75°F.
3. Stretch and folds
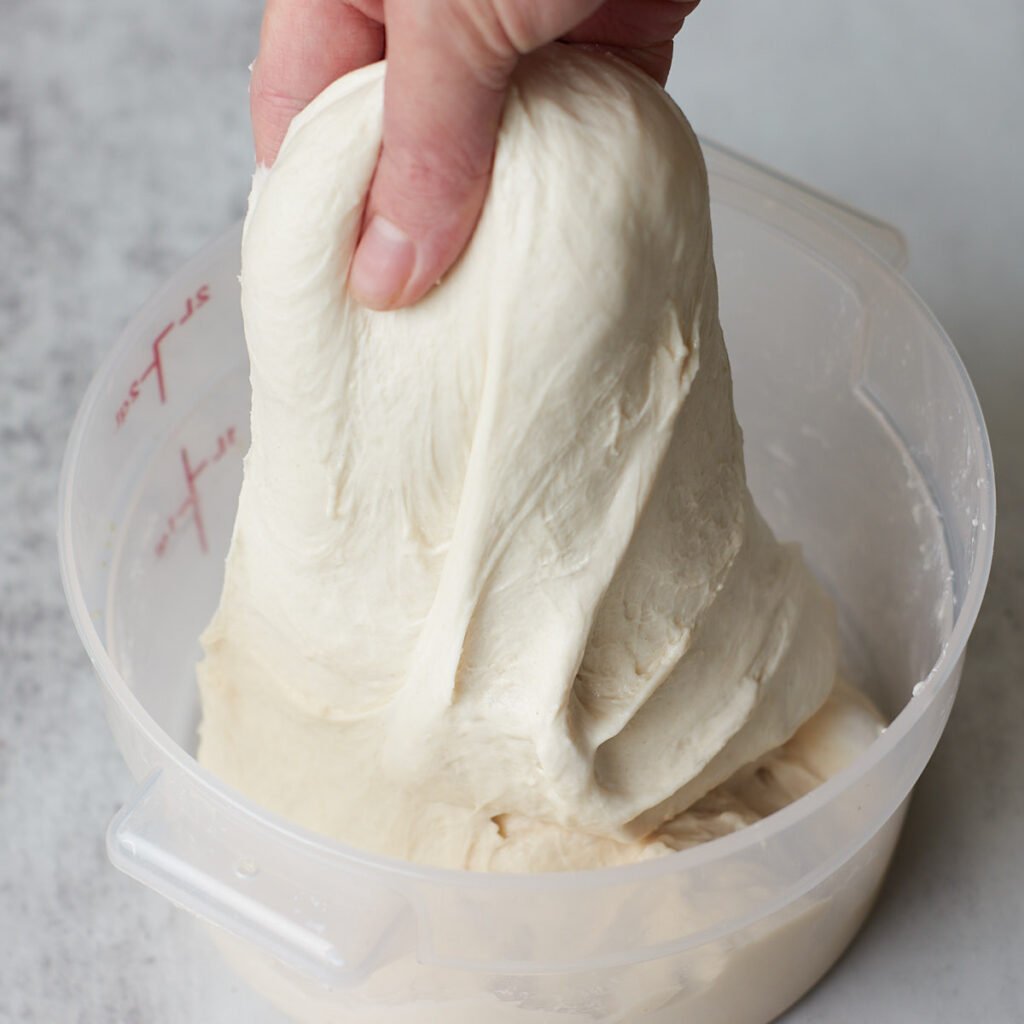
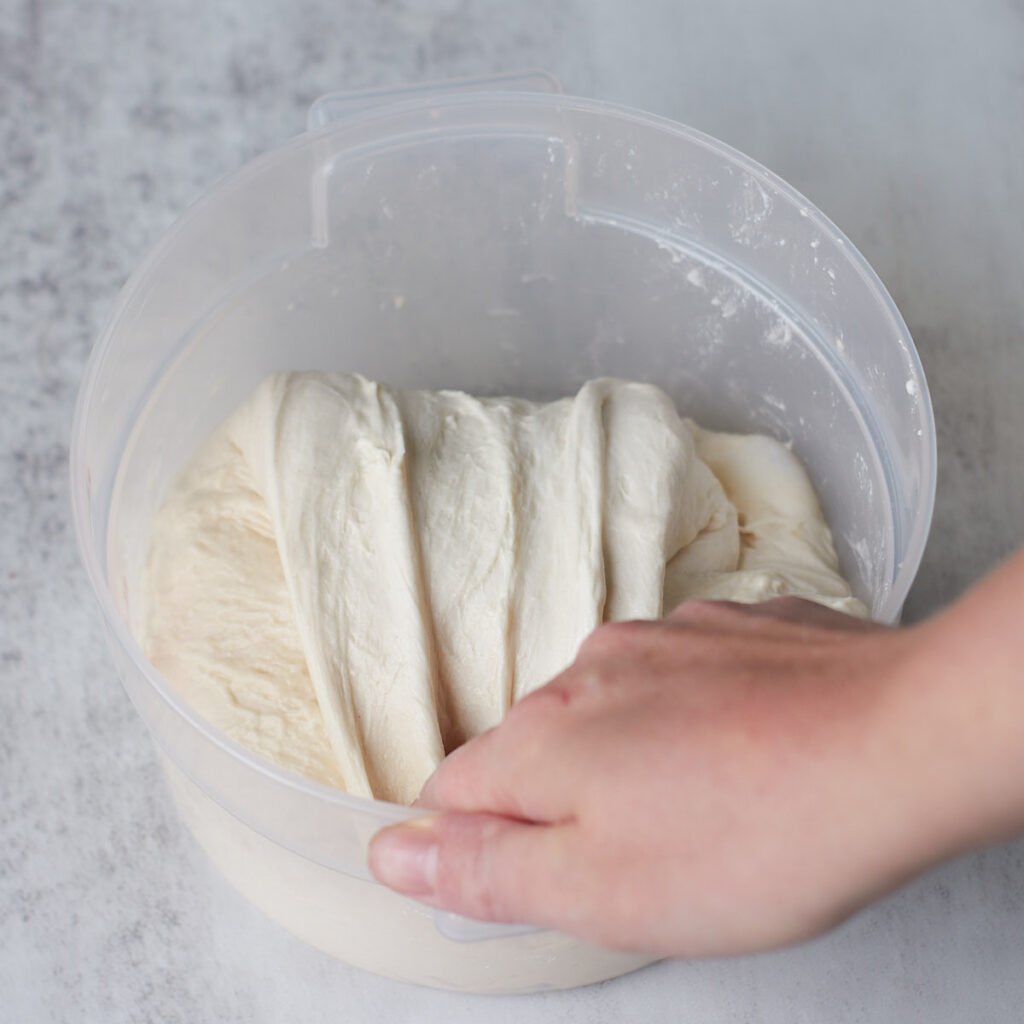
Perform a set of stretch and folds every 30 minutes. It is ok if it is not exact but try to get 3 sets in with a break in between each set. To stretch and fold, grab one side of the dough with a damp hand and gently shimmy the dough up, and then fold it on itself. Repeat this 3 more times rotating the bowl 90 degrees each time. If you are adding mix-ins you can add them during the first stretch and fold.
The goal is to get the dough to pass the “windowpane test”. To perform the windowpane test gently spread a piece of the dough between your pointer fingers and thumbs. You want it thin enough to see light through without it tearing. This tells you the gluten is developed. If it is not passing windowpane after 3 set of stretch and folds I recommend adding a 4th set.
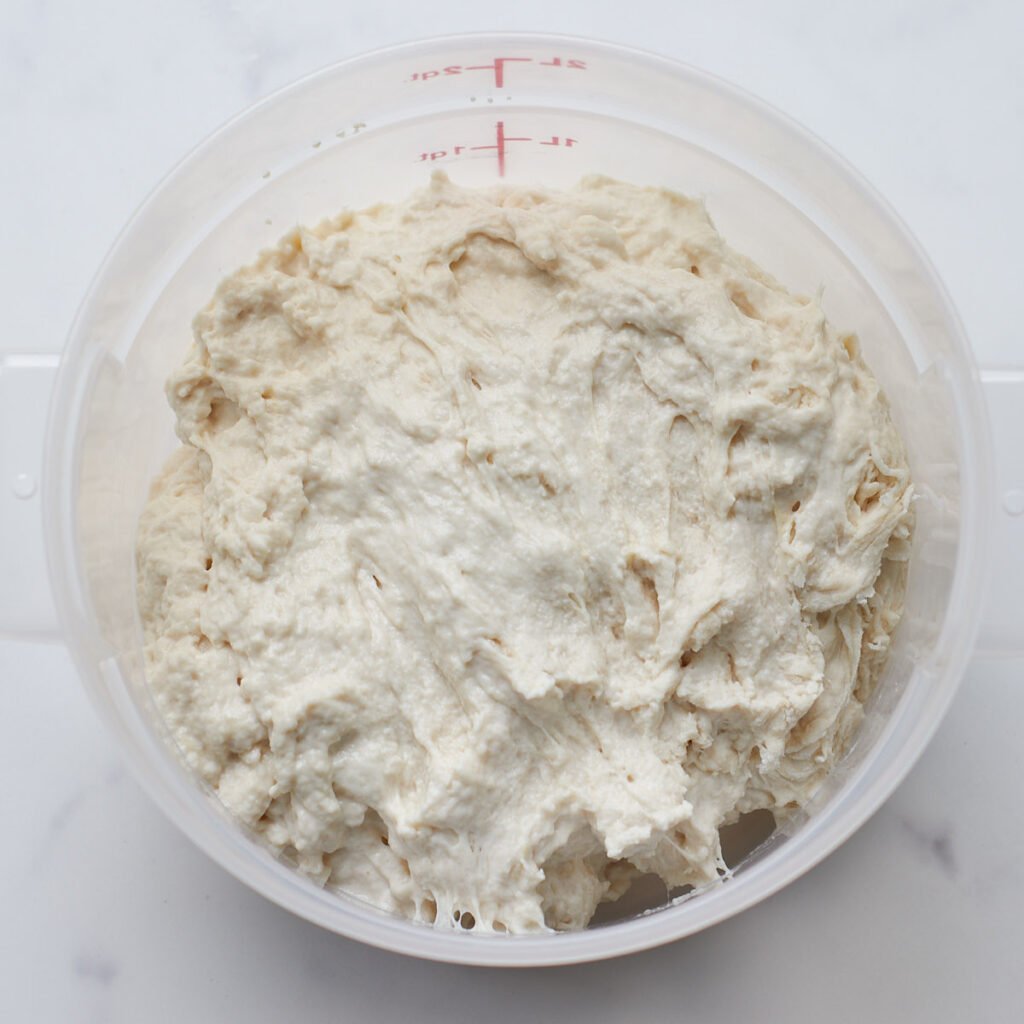
4. First rise
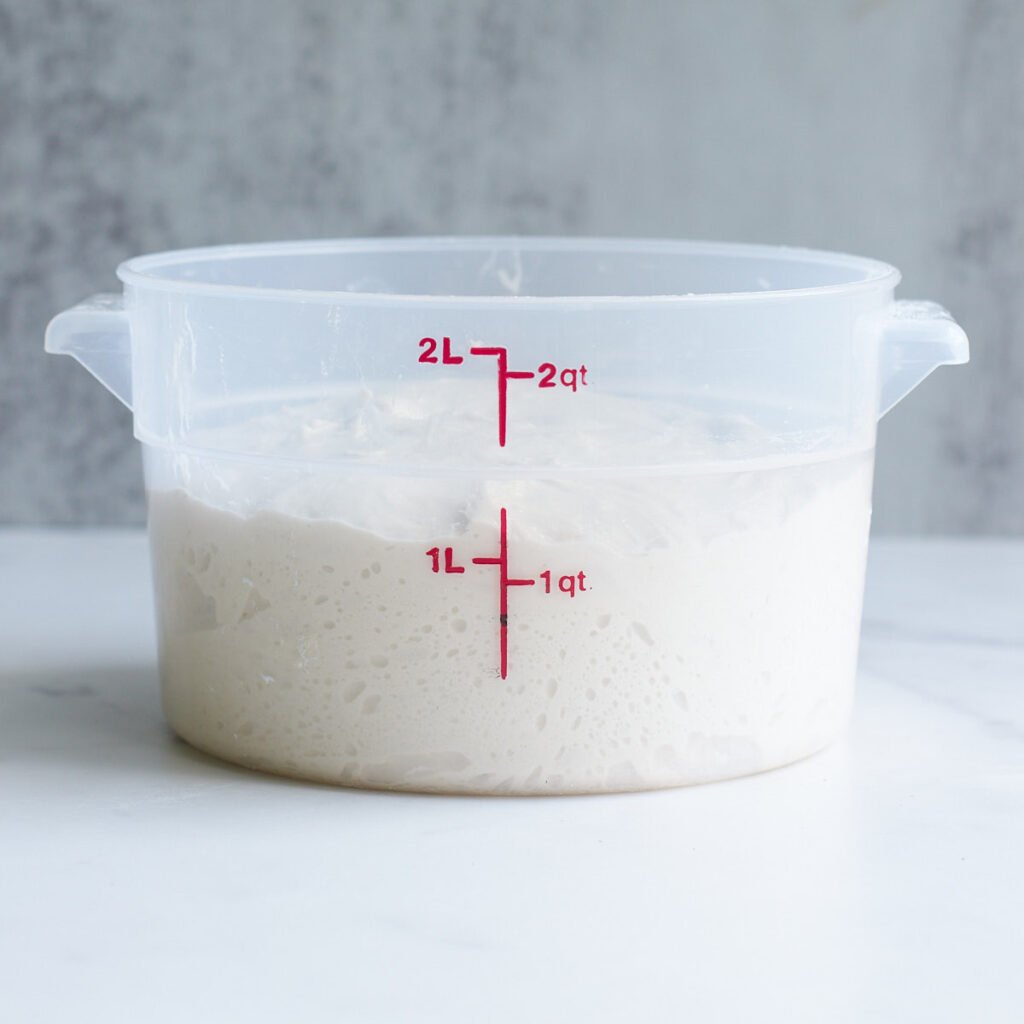
Let the dough rest on the counter in a warm spot to finish bulk fermentation. Bulk fermentation is done when the dough is jiggly, domed on top, bubbly on the sides, and risen 50%. If it does not show these signs, continue to let the dough rise, to finish bulk fermentation. At a dough temperature of 75°F my dough is ready in 4 hours from the time it is mixed.
5. Shape

The goal of shaping is to create a taut, outer skin on the dough. The skin creates surface tension, helping the dough to hold its shape when baked, which translates to a good rise and a crispy crust.
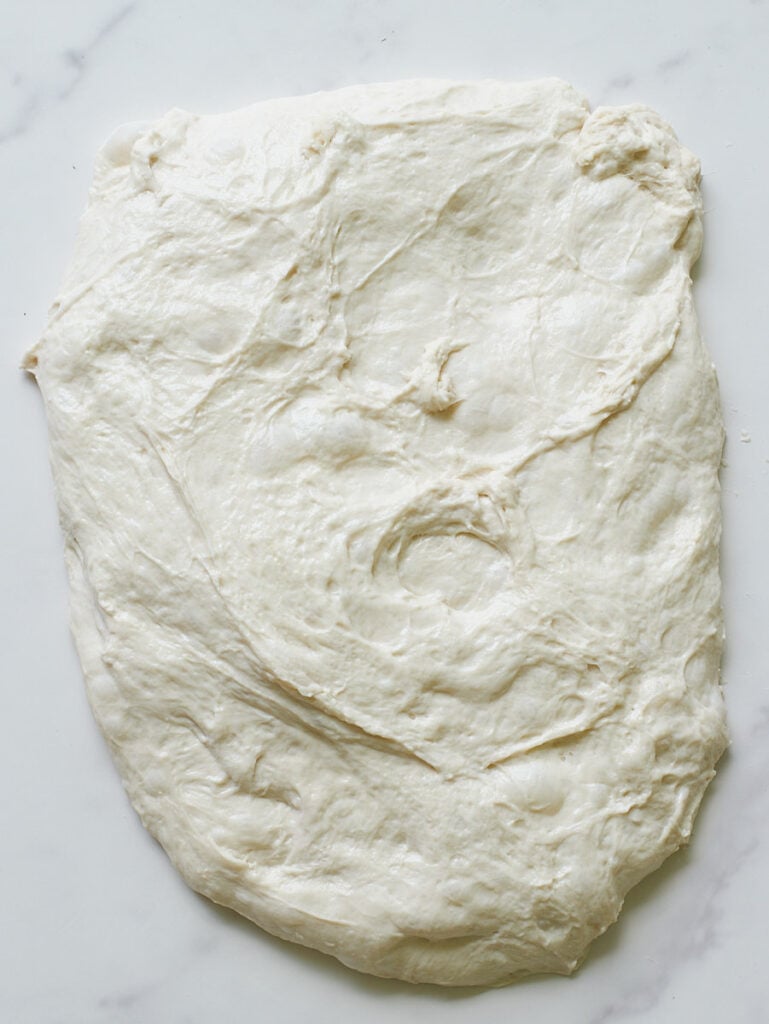
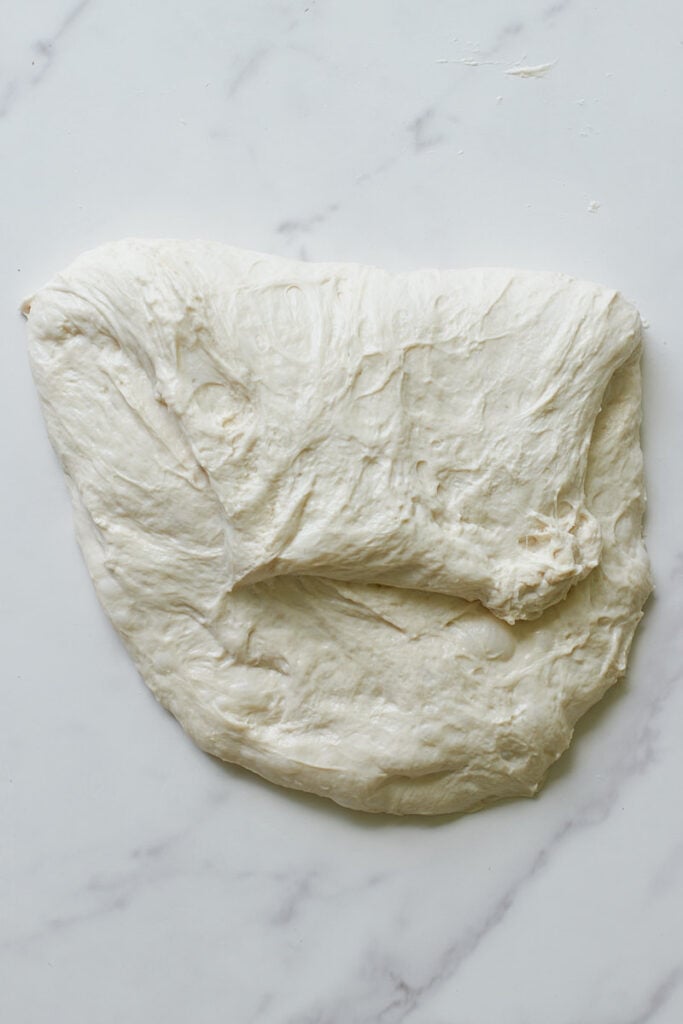
- Turn the dough out onto an unfloured surface and gently stretch it into a thick rectangle.
- Begin shaping by folding the top edge down toward the center of the dough like an envelope, pulling gently to create tension.
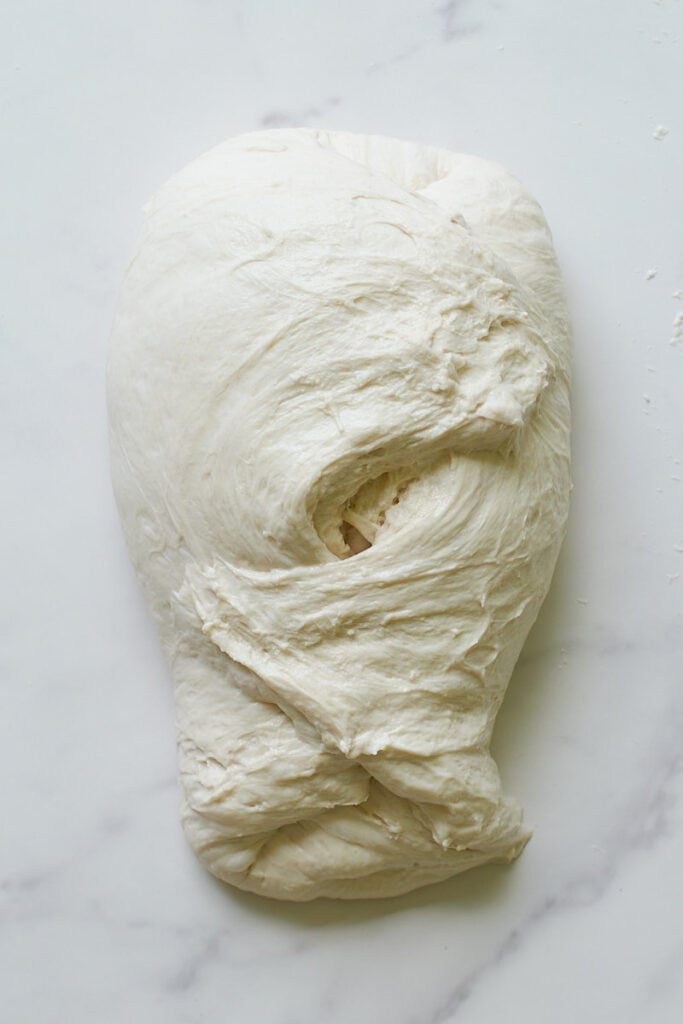
- Then, lift the top two corners and fold them toward the center, slightly overlapping. Repeat with the bottom two corners.
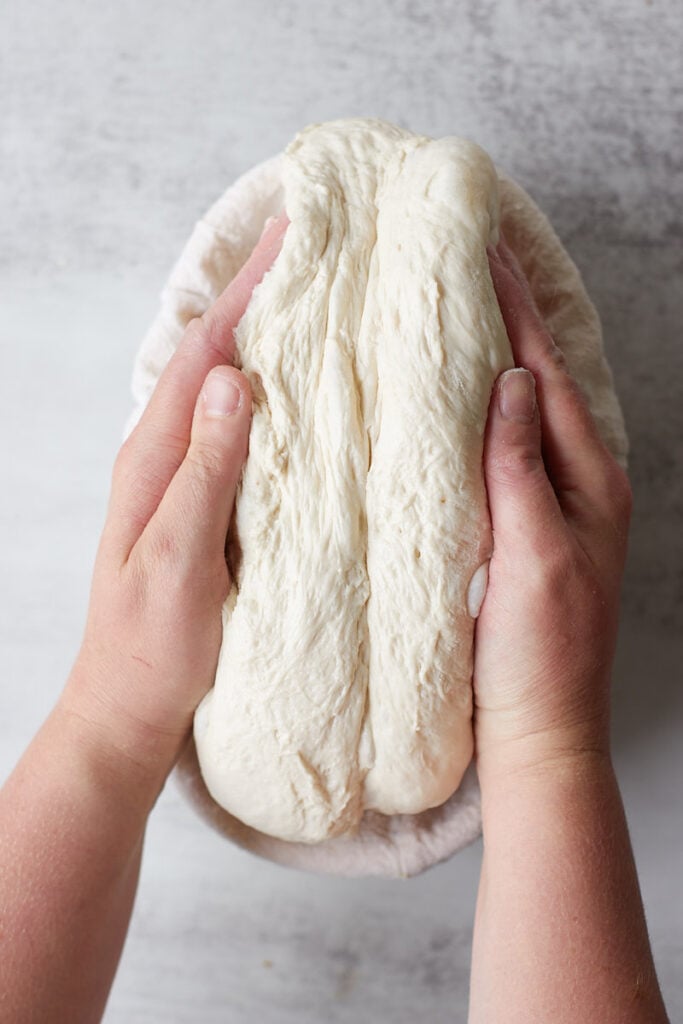
- Roll the dough up like a log. Then place your hands on the far side of the dough and gently pull it toward you along the counter to build surface tension and create a smooth, taut surface. To shape a round loaf instead, skip rolling it into a log. Fold the dough once onto itself so the smooth side is facing up. Then place your hands around the dough in a cupped position and rotate it counterclockwise, gently pulling it toward you as you turn. This motion builds surface tension and forms a smooth ball.
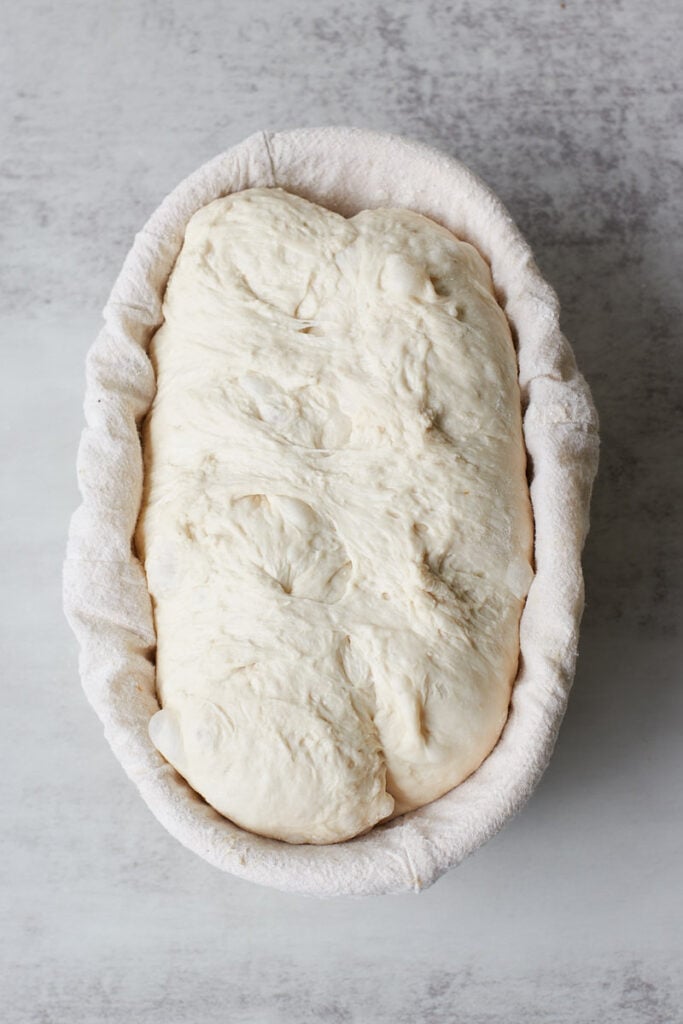
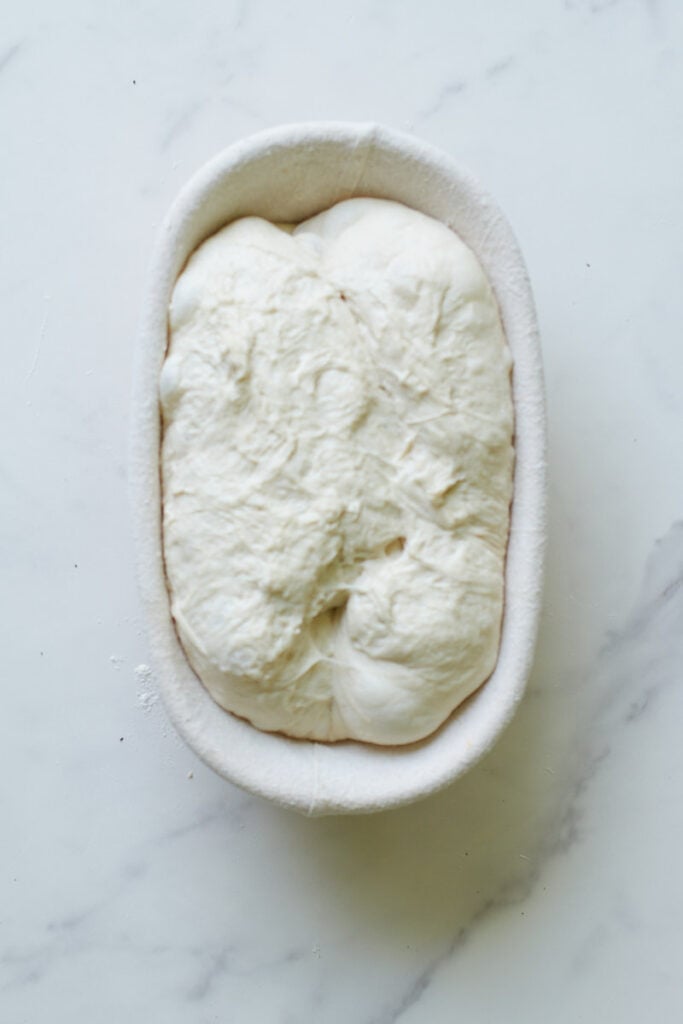
- Prep a proofing basket by lightly flouring with rice flour or well-floured with all-purpose flour. Using a bench scraper or your hands, flip the dough upside down, with the seam side up, into the basket. Note: If you don’t have a proofing basket, line a 9-10″ bowl with a floured tea towel and use that instead.
- Cover the basket with something to keep the moisture in like a dinner plate, foil, or I like basket covers.

6. Second Rise
Same Day Option
Leave the dough on the counter for 1–3 hours. The exact timing will vary depending on the temperature of your kitchen and the strength of your starter.
To check if it’s ready, use the poke test: lightly flour your finger and gently press into the dough. If the indentation slowly fills back in, it’s ready to bake. If it springs back immediately, it needs more time. If the indentation doesn’t fill back in at all, it’s overproofed and should be baked right away.
While your oven preheats, place the dough in the freezer to help it firm up before scoring.
Overnight Option
Place the dough in the fridge overnight for 8-12 hours. Bake directly from the fridge.
7. Score
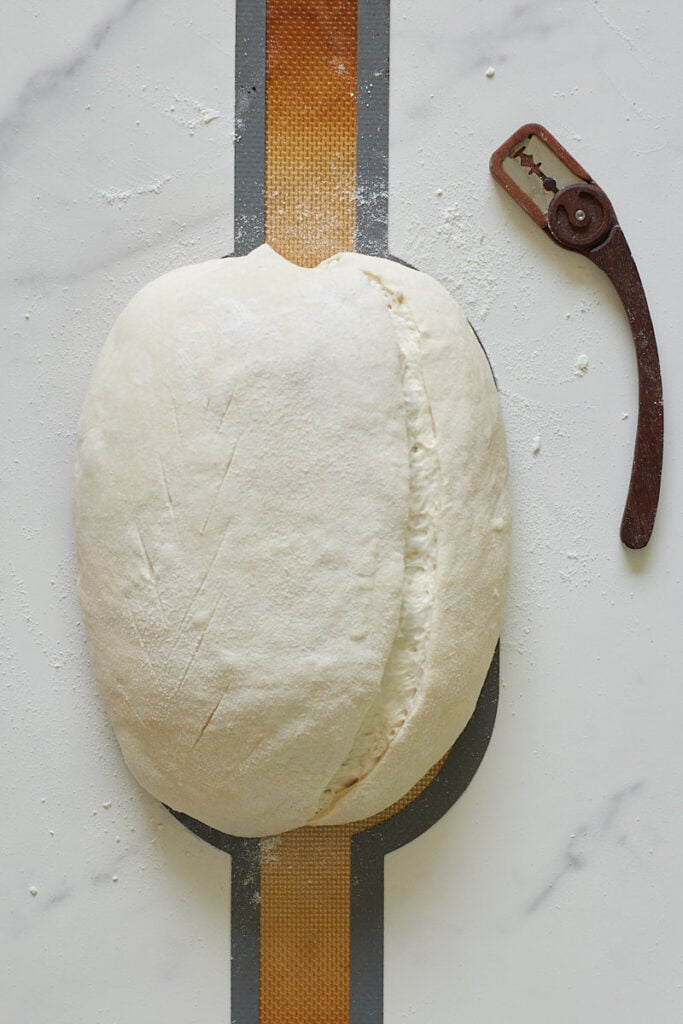
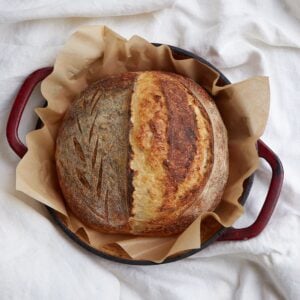
Preheat dutch oven in the oven at 450°F. Flip dough onto a piece of parchment paper and score the bread with a bread lame or sharp knife about a quarter inch deep. This can be one line or multiple depending on your preferences. For more intricate designs hold the blade straight and make shallow cuts.
8. Bake
Bake the bread for 20 minutes with the lid on. Take the lid off and bake for another 20-25 minutes. The bread should sound hollow when you knock on the bottom, this will tell you the bread is cooked through.
Remove the bread from the dutch oven and allow to cool on a cooling rack before slicing.
Recipe Tips
- Use a kitchen scale to measure the ingredients rather than measuring with cups and spoons. This will yield more accurate results. Plus, as a bonus, you will have fewer dishes to clean afterward!
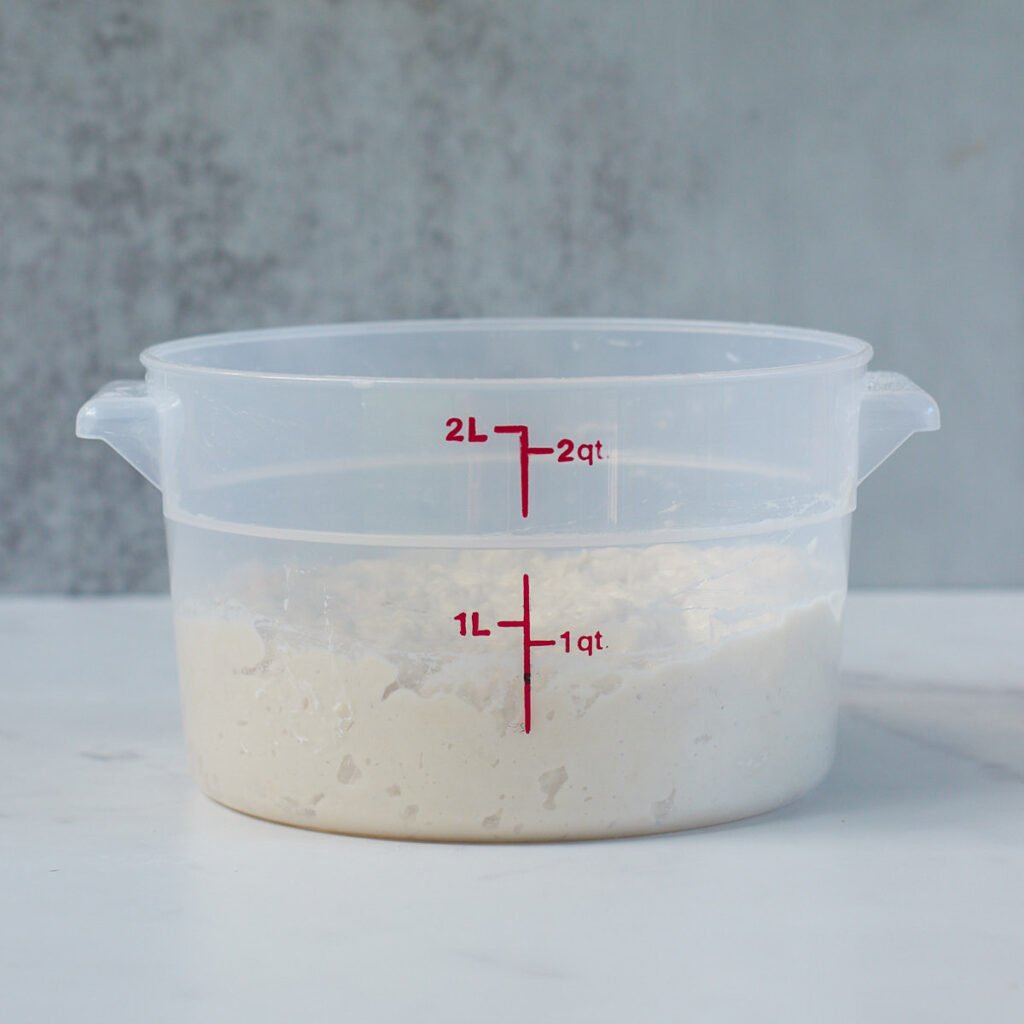
- I recommend using a straight-edge container so you can visually see how much the dough has risen. A 2-quart container is big enough for 1 loaf. If you are doubling the recipe, use a 4-quart container.
- Keep your dough at a temperature around 75°F to match the timeline listed. Use a bread mat (use code country10 for 10%) or proofing box to keep the dough warm, or see more tips on how to keep your dough warm.
- If the dough is very pillowy, sticky, and deflates when working with it, it is overproofed. At this point, you can try to bake it if it will hold some shape. Personally my favorite thing to do with overproofed dough is to make focaccia. Put it in an oiled 9×13 pan with more oil on top and add seasoning and cheese. Dimple the dough and bake at 425°F for 25-30 minutes. Check out my tutorial.
Storing Same Day Sourdough Bread
Store a whole loaf, or a side that can be placed cut side down with only the crust exposed, on the counter up to 2 days with just a tea towel over it. If the inside of the loaf is exposed I store it in a bread box, bread bag or brown paper bag.
Sourdough will not hold its crunch for extended periods of time but can be revived in the oven or toaster. To refresh a loaf preheat the oven to 450°F. Run the loaf quickly under water and then place in the oven for 10-15 minutes until the crust is crispy again.
Sourdough bread also freezes really well. To freeze a loaf, either place the whole or half a loaf into a freezer safe bag. Alternatively, preslice the loaf and place parchment paper in between each slice before placing in a freezer bag.
To thaw, place the loaf on the counter for several hours in the ziplock bag. If you are in a time crunch I’ve used the defrost feature in the microwave to thaw my loaf. Once thawed, use the same refresh instructions as listed above. For individual slices, pulled from the freezer, pop it in the toaster.
Sample baking schedule
Many different factors can affect your sourdough bread, such as the temperature of your dough, kitchen, humidity, and the strength of your starter, so this baking schedule is based on rough estimates. It is more important to look for the visual cues of the bread to know when it is ready.
Same-Day Method
This method is great to use to bake your sourdough bread within one day. Before scoring, add the dough to the freezer while the oven preheats so it is easier to make your cuts in the dough. This schedule is based on a dough temperature of 75°F.
Note: If you want to start the loaf in the morning, you can feed your starter a 1:5:5 ratio (15 grams active sourdough starter, 75 grams flour, 75 grams water) the night before and leave for about 10 hours at 72℉.
| Steps | Time |
| Feed starter a 1:1:1 ratio and leave at 77°F (50 grams sourdough starter: 50 grams flour: 50 grams water) *If you do not have extra starter be sure to feed your starter a little more so you have leftover | 8 am |
| Mix dough | 12 pm |
| Stretch & folds | 12:30 pm – 1:30 pm |
| First Rise | 1:30 pm – 4 pm |
| Shape & second Rise | 4 pm – 5:30 pm |
| Freeze dough while oven preheats | 5:30 pm |
| Bake | 6 pm |
Overnight Method
This is my favorite method! It always turns out, it has more time to develop flavor, and the dough is cold so it is easier to score. This schedule is assuming dough temperature of 75°F.
| Steps | Time |
| Feed starter a 1:1:1 ratio and leave at 77°F (50 grams sourdough starter: 50 grams flour: 50 grams water) *If you do not have extra starter be sure to feed your starter a little more so you have leftover | Day One: 1:00 pm |
| Mix dough | 5:00 pm |
| Stretch & folds | 5:30 pm – 6:30 pm |
| First rise | 6:30 – 9 pm |
| Shape & second rise in fridge | 9:30 pm |
| Bake | Day two: Between 6-10 am |

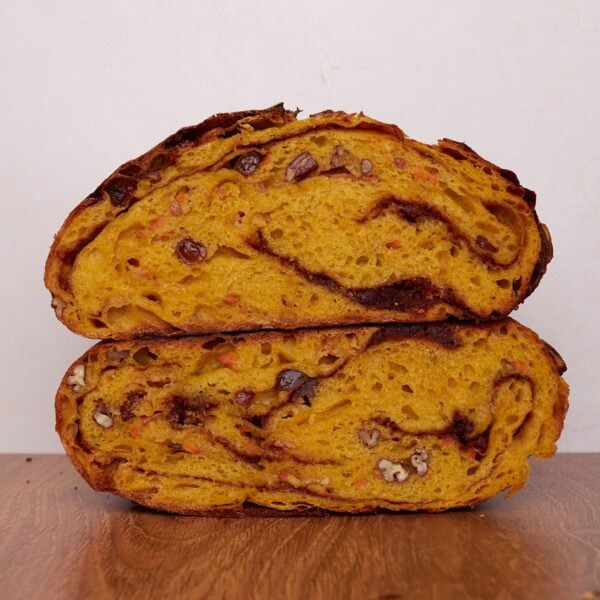
Using sourdough mix-ins
I love incorporating mix-ins with my sourdough bread. From savory, like Jalapeño Cheddar Bacon and Hot Honey Asiago, to sweet like Cinnamon Honey Butter and Chocolate, the possibilities really are endless!
Mix-ins can be added to sourdough bread during stretch and folds, or during lamination. I like to use both methods depending on the type of ingredient being used. For inspiration for your next bake or for more information on how to incorporate them, check out my post 21 Unique Sourdough Add-Ins You Need To Try. Or you can make naturally dyed sourdough bread like this Pink Sourdough Bread recipe!
For sourdough recipes made with whole grains, try this Einkorn Sourdough Bread and Whole Wheat Sourdough Bread.
New to sourdough?
If you’re new to sourdough, I’ve got a few helpful resources to get you started! Learn how to make your own sourdough starter, how to feed and care for your starter, and find my favorite sourdough baking tools. Plus, get familiar with 35+ sourdough terms so you can sound like a pro in no time.
If you’re ready to dive deeper, my Online Sourdough Course walks you through the entire process of making artisan bread at home—with flexible timelines, easy-to-follow recipes, clear explanations, and bonus resources like a private mentoring group, my eBook All Roads Lead to Sourdough, and a packet of my 100+ year old starter (USA only).
Troubleshooting Sourdough Bread
There are 3 common reasons your sourdough bread did not turn out as you hoped.
1. A Weak Starter
If you made a starter from scratch it should be at least 10 days old, bubbly and doubling consistently, before baking with it. No matter the age of your starter if it is not doubling and getting bubbly with each feeding it is best to strengthen it before baking with it. To strengthen it leave it on the counter and feed it daily until it is doubling.
This is when your dough does not have long enough to ferment. This is especially common in the winter months because fermentation is slower in cooler temperatures.
2. Underproofing
Your loaf may be underproofed if the dough does not rise, the crumb is dense and gummy, the crust is pale with a doughy center even with long bake times, or has large holes at the top with dense areas surrounding it.
If your loaf is underproofed extend the time your dough is on the counter for the first proof. Use a bread mat (use code country10 for 10% off) or proofing box to keep the dough warm to ensure it will rise properly. You can also try leaving the dough in the oven with the light on, above the refrigerator, or near a heating vent.
3. Overproofing
This happens when the dough is left for too long to rise. The gluten bonds begin to wear out and the loaf rises too much resulting in the loaf collapsing.
Your loaf may be overproofed if the dough won’t hold shape, puffy and sticky dough, flat loaf with lots of small holes through out. If your loaves are overproofing, shorten the time your dough is on the counter for the first proof or find a cooler temperature.
Recipe FAQ
Yes! With this recipe you can have bread from start to finish within 7 hours. However, you will need to use a sourdough starter that has recently been fed and is at it’s peak. You will need to feed your sourdough starter before starting this recipe. Learn more about feeding your sourdough starter.
I recommend using bread flour because it absorbs more liquid than all-purpose. However, in a pinch you can use all-purpose flour, but I recommend reducing the amount of water added by 25 grams.
This bread has a quicker timeline, and, therefore, a shorter fermentation time. The short fermentation will yield a loaf with a mild flavor. If you would like a stronger sourdough “tang,” try my Overnight Sourdough Bread Recipe, which has a much longer fermentation time.
If your loaves rise quite a bit in the fridge, your fridge may run a little warm—so be careful not to leave them too long or they might overproof. On the other hand, if they don’t rise much, you can extend the chill time. I recommend baking within 24 hours for best results.
At first, the dough will feel sticky and wet—but as you perform stretch and folds and the gluten develops, it should become stronger and easier to handle. Use damp hands when working with the dough to make it easier. If the dough is still sticky and difficult to shape or score, it’s likely overproofed (see section above). This can happen if the dough gets too warm or is left to proof for too long.
If your sourdough bread is dense and gummy after baking, it is likely underproofed. Try increasing your rise times or increasing the temperature of the dough when bulk fermenting. You can leave your dough in a warm place, or see tips on how to keep your dough warm.
More sourdough Bread Recipes
Sourdough Artisan Bread Recipes
Carrot Cake Sourdough Bread
Sourdough Bread Recipes
Cheesy Sourdough Pretzel Bread
Same Day Sourdough Recipes
30+ Same Day Sourdough Recipes (with active starter)
Same Day Sourdough Recipes
Einkorn Sourdough Bread
Tried this Same Day Sourdough Bread or another recipe from the site? I’d love to hear about it! Drop a star rating and share your thoughts in the comments—can’t wait to see what you’re baking!
Same Day Sourdough Bread
Ingredients
Feed sourdough starter
- 50 grams active sourdough starter , ¼ cup
- 50 grams warm water , ¼ cup
- 50 grams all-purpose or bread flour , ⅓ cup
Sourdough Bread
- 150 grams active sourdough starter, ⅔ cup
- 500 grams bread flour, 3 ½ cups
- 350 grams water, 1 ½ cups
- 10 grams salt, ½ Tablespoon
Instructions
- Feed starter: About 4 hours before making the loaf, build a levain or feed your sourdough starter at a 1:1:1 ratio. Cover and let it rest at 77–80°F until bubbly and doubled in size. Skip this step if your starter is already activated and ready to bake with.If you don’t have extra starter, add an extra 5–10 grams to each portion (starter, flour, and water) so you have enough to bake with and still keep your starter going.50 grams active sourdough starter , 50 grams warm water , 50 grams all-purpose or bread flour Note: If you want to start the loaf in the morning, you can feed your starter a 1:5:5 ratio (15 grams active sourdough starter, 75 grams flour, 75 grams water) the night before and leave for about 10 hours at 70-72℉.
- Mix the dough: With a danish dough whisk, hands, or large spoon mix together active starter, water, and salt in a 2 quart container with straight sides or a medium clear bowl. Add the flour and mix until the dough is shaggy and the flour is incorporated. Cover with a lid or dinner plate so the dough doesn't dry out and let sit for 30 minutes in a a warm spot. For a similar timeline as listed below keep the dough temperature at 75℉. 150 grams active sourdough starter, 350 grams water, 10 grams salt, 500 grams bread flour
- Stretch and folds: Perform a set of stretch and folds (pull dough out and then fold over itself, turn bowl and perform on other 3 sides) every 30 minutes. Perform 3 sets. The goal is to get the dough to pass the windowpane test, described in more detail in the post. You can add your mix-ins in the first set of stretch and folds.
- First Rise: Let the dough rest on the counter in a warm spot to finish bulk fermentation. Bulk fermentation is done when the dough is jiggly, domed on top, bubbly on the sides, and risen 50%. If it does not show these signs, continue to let the dough rise. At a dough temperature of 75 degrees Fahrenheit my dough is ready in 4 hours from the time it is mixed.
- Shape: Turn the dough out onto an unfloured surface and gently stretch it into a chubby rectangle. Begin shaping by folding the top edge down toward the center of the dough like an envelope, pulling gently to create tension. Then, lift the top two corners and fold them toward the center, slightly overlapping. Repeat with the bottom two corners. Finally, roll the dough up like a log. Place it seam-side up in a lightly floured (I recommend using rice flour but you can also use all-purpose or bread flour) oval proofing basket and cover. To shape a round loaf instead, skip rolling it into a log. Fold the dough once onto itself so the smooth side is facing up. Then place your hands around the dough in a cupped position and rotate it counterclockwise, gently pulling it toward you as you turn. This motion builds surface tension and forms a smooth ball.
- Final Rise Opt 1 Same Day Method– Leave the dough on the counter for 1-3 hours (this will vary depending on temperature of kitchen and strength of starter). Once it passes the "poke" test, meaning when you poke the dough with a lightly floured finger the dough will slowly fill in. If the dough springs back immediately it needs more time and if it does not fill back in at all it is overproofed and needs baked immediately. Place the dough in the freezer while your oven preheats.
- Final Rise Opt 2 Overnight Method (my preferred method)- Place the dough in the fridge overnight for 8-12 hours. Bake the dough directly from the fridge.
- Preheat Oven: Preheat dutch oven in the oven at 450℉. To prevent the bottom of the loaf from burning, place a heavy-duty baking sheet on the rack below.
- Bake: Flip dough onto parchment paper or silicone bread sling and score the bread with a bread lame or sharp knife about a quarter inch deep at a 45 degree angle on one side of the dough following the curvature of the loaf. Bake the bread for 25 minutes with the lid on. Take the lid off and bake for another 15-20 minutes. To check for doneness, remove the loaf from the pan and tap the bottom of the loaf; it should sound hollow, indicating it’s fully baked. Or check that the internal temperature reaches 205°F.
- Remove the bread from the dutch oven and allow to cool on a cooling rack before slicing. The bread should sound hollow when you knock on the bottom after coming out of the oven, this will tell you the bread is cooked through.
Video

Notes
- For best results I recommend using the gram measurements instead of cups, as it will be much more accurate.
- Timing will depend on the temperature of your dough and the activity level of your starter. Watch your dough versus the clock. Check out my baking sample schedules for this recipe.
- I recommend using a straight-edge container so you can visually see how much the dough has risen. A 2-quart container is big enough for 1 loaf. If you are doubling the recipe, use a 4-quart container.
- Keep your dough at a temperature around 75°F to match the timeline listed. Use a bread mat (use code country10 for 10%) or proofing box to keep the dough warm, or see more tips on how to keep your dough warm.
- If the dough is very pillowy, sticky, and deflates when working with it, it is overproofed. At this point, you can try to bake it if it will hold some shape. Personally my favorite thing to do with overproofed dough is to make focaccia. Put it in an oiled 9×13 pan with more oil on top and add seasoning and cheese. Dimple the dough and bake at 425°F for 25-30 minutes. Check out my tutorial.
Nutrition
Nutrition information is automatically calculated, so should only be used as an approximation.
More Favorites from Country Roads Sourdough
Now available!
Same Day Sourdough Cookbook
Your go-to cookbook for baking sourdough bread, focaccia, rolls, cookies, and more—all in one day.


Thanks for sharing your recipes. I’m a newbie and your advice is very helpful.
Thanks for being here!
Making this recipe for the the 2nd time in a week.
Here’s my query: does the dough go into a proofing basket if I’m using the same-day rise option? Or do I leave the ball on the counter for 1-3 hrs?
Thanks
Hi! Yes it goes into the proofing basket with either option but the basket stays on the counter with the same day option. Thanks!
Hello- if I want to use an instant pot to proof the dough, how would that fit in to this recipe? Would I still do stretch and folds or would I skip that? Thank in advance.
You still need to do stretch and folds, as that is what strengthens the dough and helps it rise tall when baking. I’m not sure what temperature you can set your instant pot to but I imagine it will be warmer than 75 degrees like I use in the recipe so note that your loaf will likely rise quicker.