This post may contain affiliate links . Read my full Disclosure Policy.


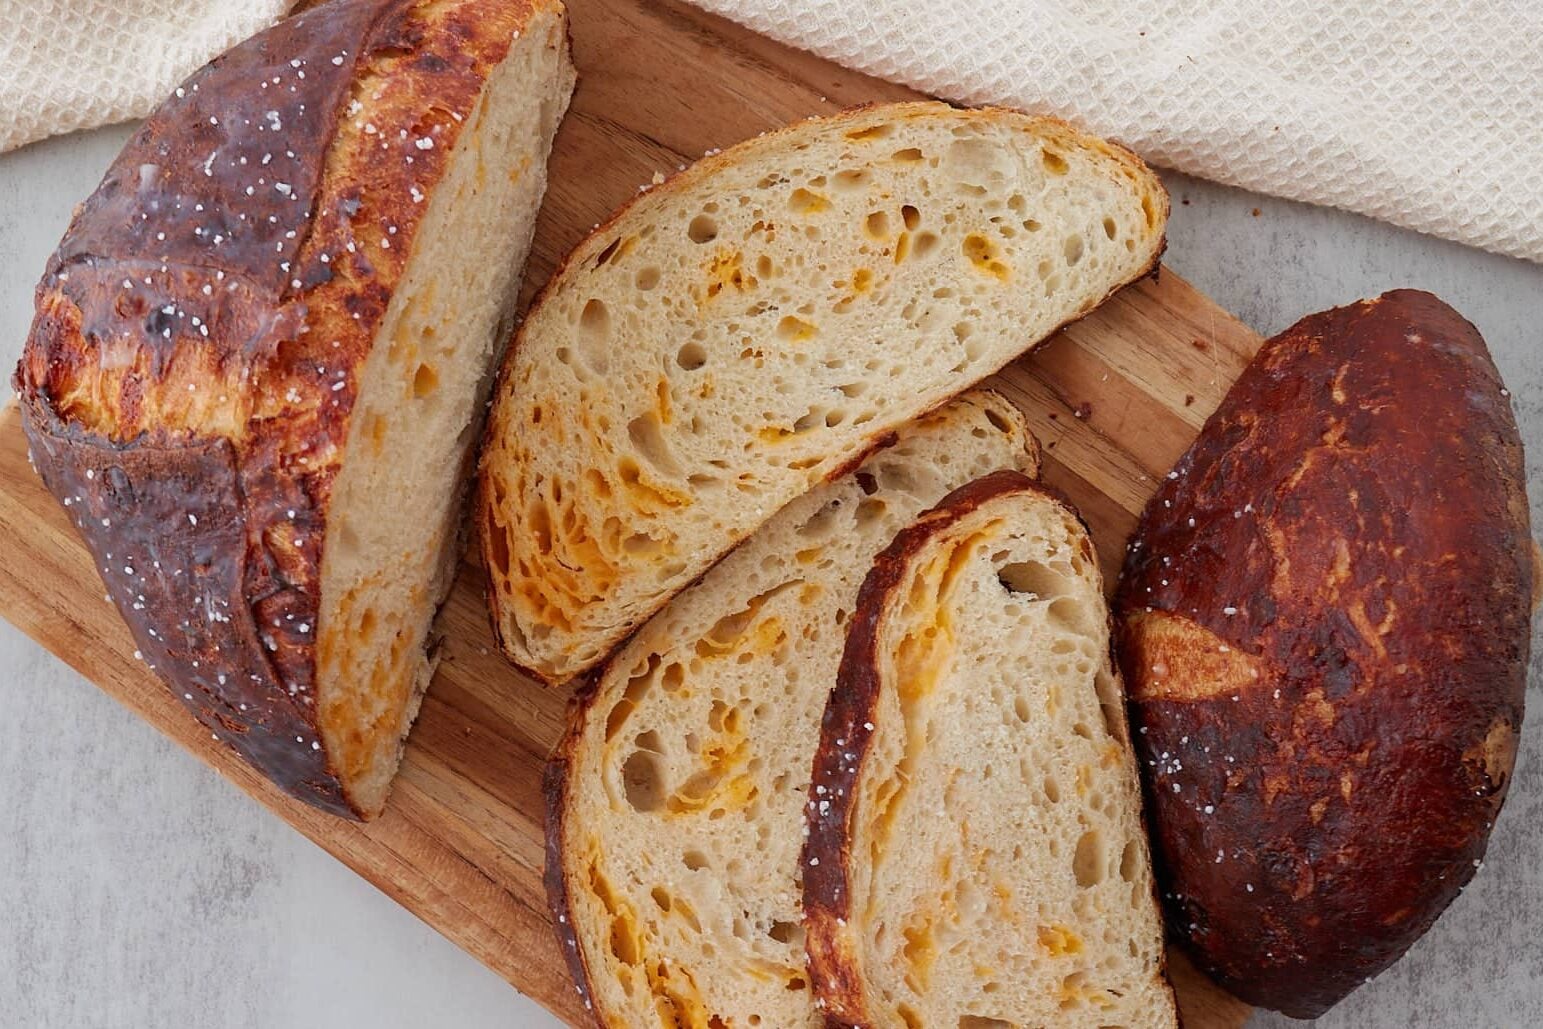
This same-day sourdough pretzel bread tastes just like a pretzel with its deep-golden salty crust and soft, chewy center. Similar to sourdough pretzel bites, this loaf is boiled in a baking soda bath right before baking to get that signature pretzel texture and color.
Save & Summarize
Stuffed with sharp cheddar cheese and shaped as one large pretzel bun, this loaf is delicious for sandwiches, dips, or warm with butter. It’s adapted from my same-day sourdough bread recipe, using the same approachable timeline with a simple baking soda boil to give it that signature crust.
Table of Contents
Why you’ll love this recipe
- Same-Day Recipe. Just like my Jalapeño Cheddar Sourdough Bread, this recipe can be mixed in the morning and ready to bake in time for dinner.
- Pretzel-lover Approved. You get all the textures of a salty, crispy crust and cheesy, chewy center in an artisan sourdough loaf. If you love pretzels, be sure to try my quick and easy sourdough discard pretzel bites.
- No lye required. This recipe calls for a baking soda bath, like my sourdough bagels, to achieve the signature crust, no lye needed.
Important Ingredients and Substitutions
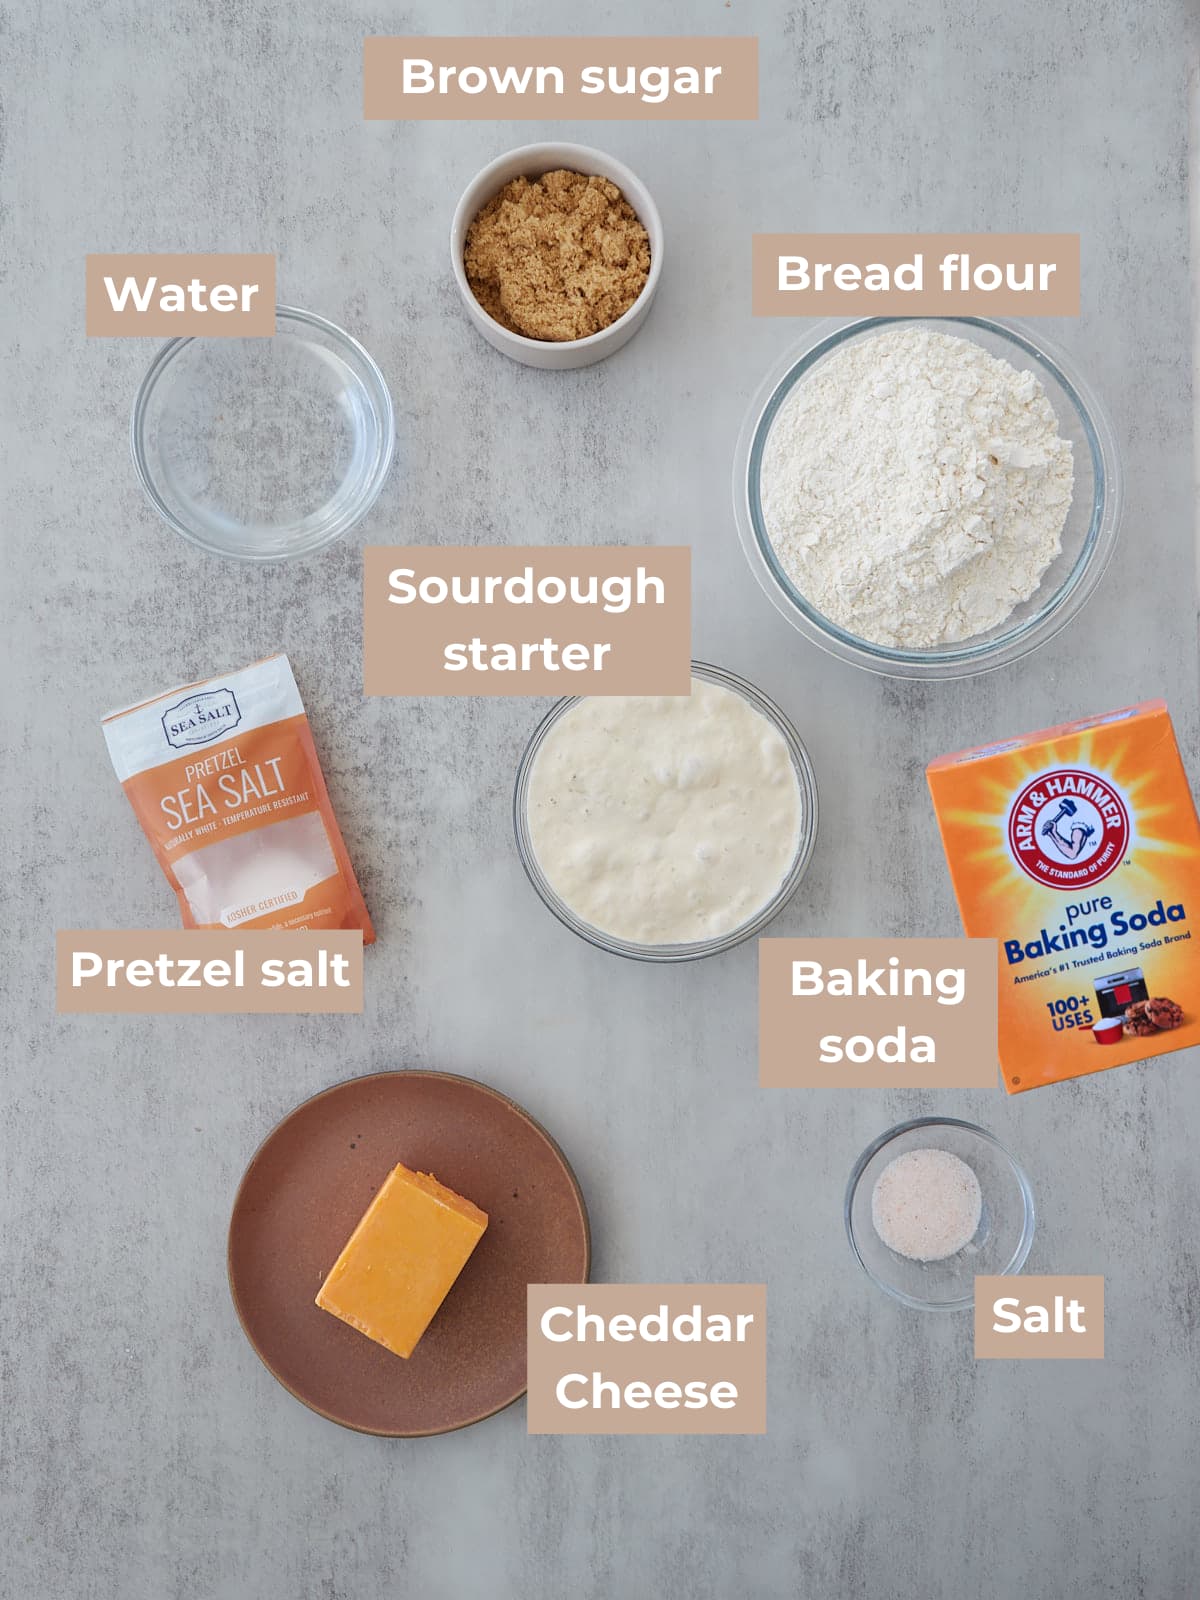
- Active Sourdough Starter – An active sourdough starter is one that has been recently fed, has doubled in size, and is bubbly. To learn more about your sourdough starter or how to make one at home, refer to my Easy Sourdough Starter Recipe.
- Bread Flour – Bread flour is ideal for sourdough because its higher protein content absorbs water better and supports this higher hydration dough. You can use all-purpose flour if needed, but reduce the water by 25 grams since it doesn’t absorb as much.
- Salt – For the top of the dough, I recommend sprinkling it with pretzel salt, but if you don’t have any, you can use a coarse or flaky sea salt.
- Brown Sugar – I use brown sugar in the dough to add a little richness and depth to the dough, similar to pretzels. But you can omit the sugar altogether or swap it out for 15 grams of honey or maple syrup.
- Cheese – You can swap cheddar cheese with another hard cheese or omit it altogether. For more cheddar cheese bread recipes, check out my Jalapeno Cheddar Sourdough Bread.
See the full recipe in the recipe card.
Instructions to make Sourdough Pretzel Bread

Step 1: In a 2-quart straight-sided container or a medium clear bowl, mix water, active starter, brown sugar, and salt using a Danish dough whisk, your hands, or a large spoon. Add the flour and stir until fully incorporated and the dough becomes shaggy. Cover and let rest for 30 minutes in a warm spot.
To follow the suggested timing, keep the dough temperature at 75°F.

Step 2: Perform 3 sets of stretch and folds with a 30-minute rest in between each set. To stretch and fold the dough, grab one side with a damp hand and gently shimmy the dough up, and then fold it on top of itself. Repeat this 3 more times, rotating the bowl 90 degrees each time. Cover and keep the dough warm between each set.
During the second set, incorporate the cheese if adding it.
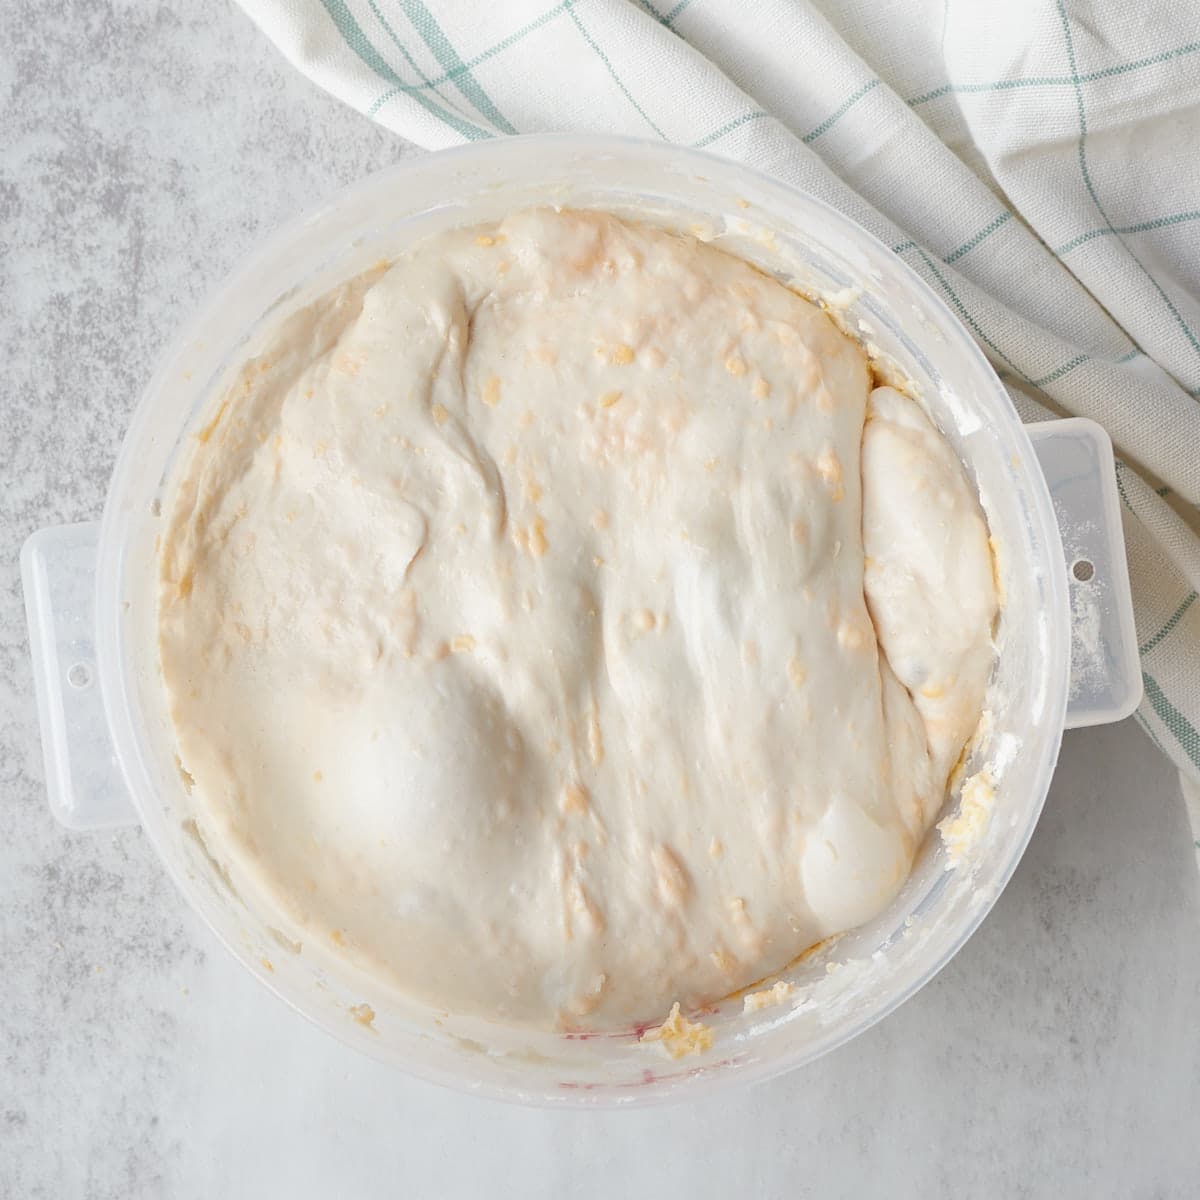
Step 3: After the stretch and folds, let the dough continue to rise until the dough is jiggly, domed on top, bubbly on the sides, and risen 50%. If it does not show these signs, continue to let the dough rise until it does.
At a dough temperature of 75ºF my dough is ready in 4 hours from the time it is mixed.
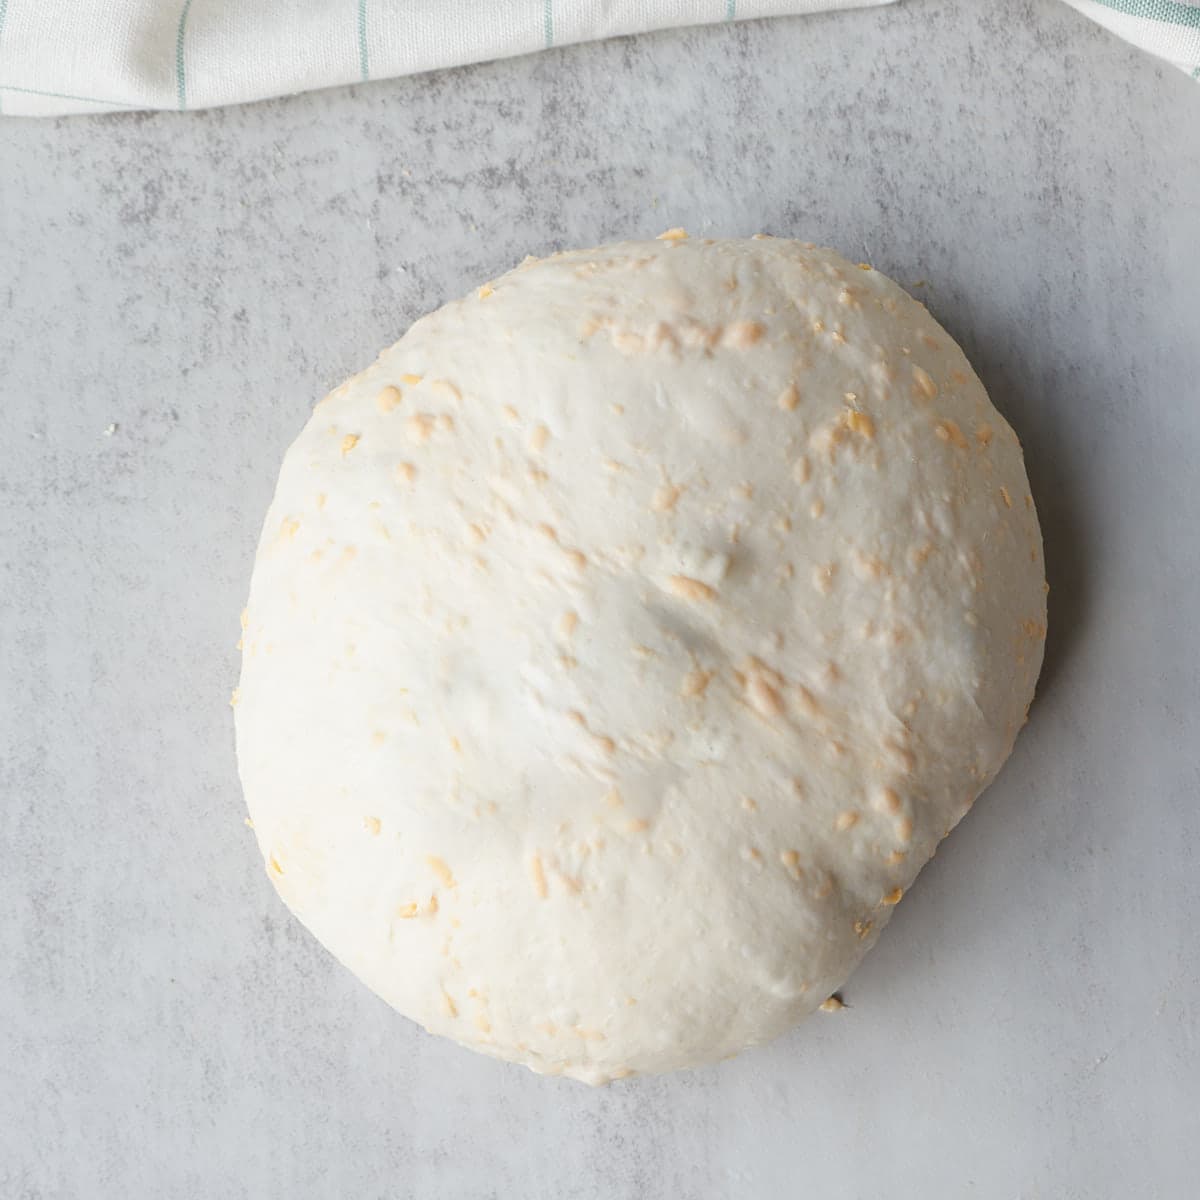
Step 4: Turn the dough out onto an unfloured surface and gently stretch it into a thick rectangle. Begin shaping by folding the top edge down toward the center like an envelope, pulling gently to build tension. Next, lift the top two corners and fold them toward the center, slightly overlapping, then repeat with the bottom two corners. Starting from one side, roll the dough over itself to form a ball, keeping the smooth side on top. Cup your hands around the dough and gently rotate it counter-clockwise toward you to tighten the surface and create a smooth, round shape.
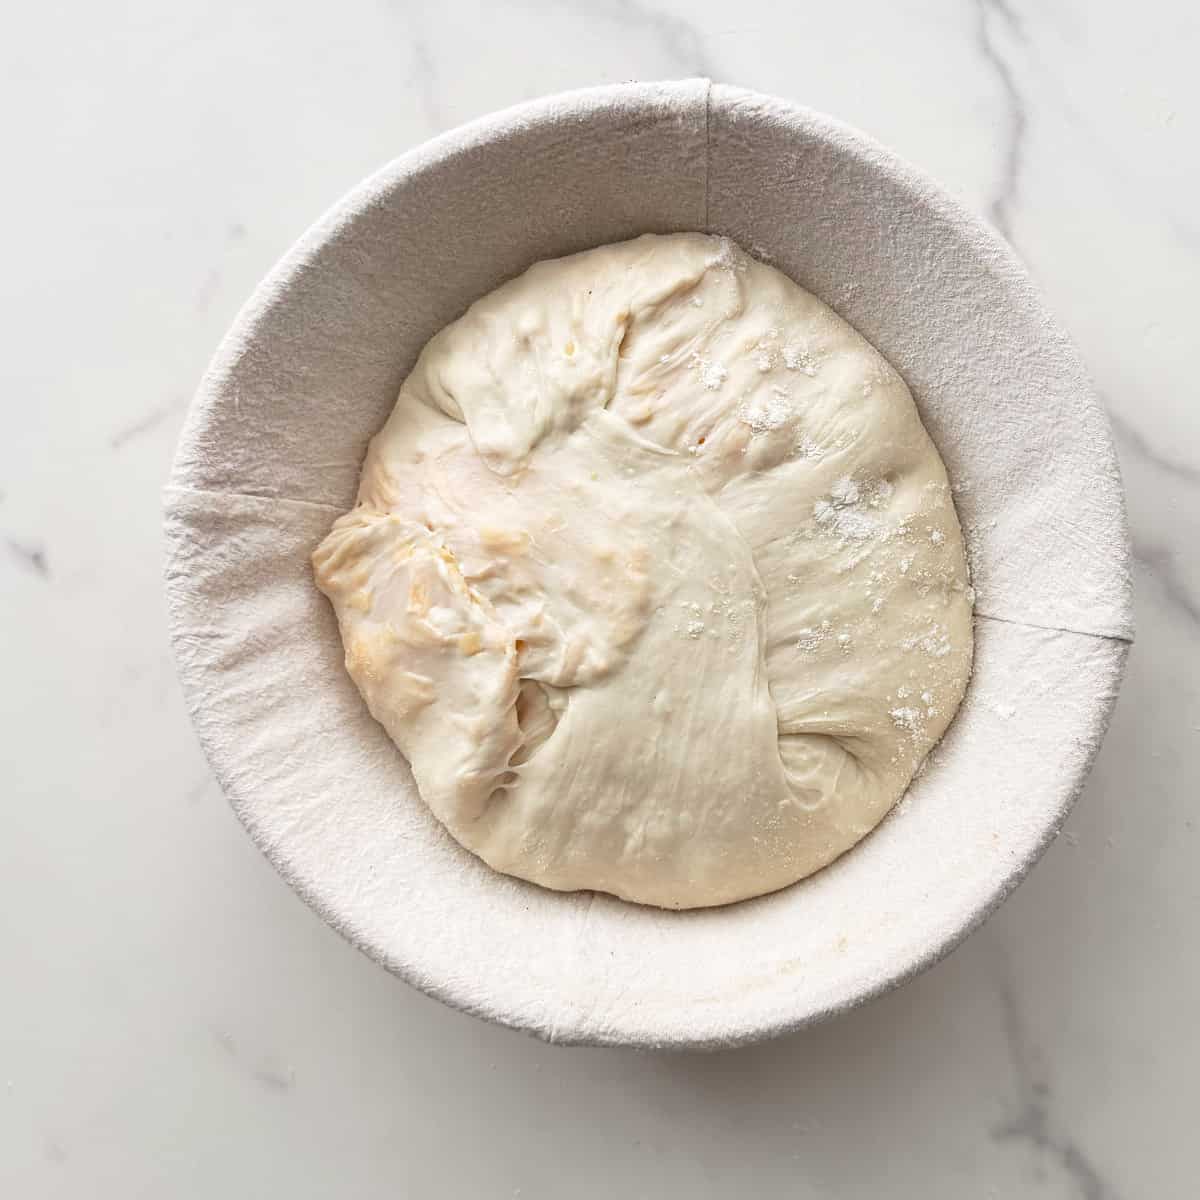
Step 5: Lightly flour an 8–10-inch proofing basket or tea-towel-lined bowl with all-purpose flour or rice flour. Place the dough seam-side up in the floured proofing basket and cover.
Final Rise – Option 1 overnight method: Place the dough in the fridge covered overnight for 8-12 hours. Bake the dough directly from the fridge.
Final Rise – Option 2 counter method: Let the dough rest on the counter for 1–2 hours covered at 75°F.
To check for readiness, perform the poke test: gently press the dough with a lightly floured finger. If the indentation slowly springs back, it’s properly proofed and ready to bake. If it bounces back right away, it needs more time. If the indentation doesn’t spring back at all, the dough is overproofed and should be baked right away.
Once the dough is ready, place it in the freezer for 20-30 minutes before boiling.
Step 6: Preheat the dutch oven in the oven at 450℉. To prevent the bottom of the loaf from burning, place a heavy-duty baking sheet on the rack below.
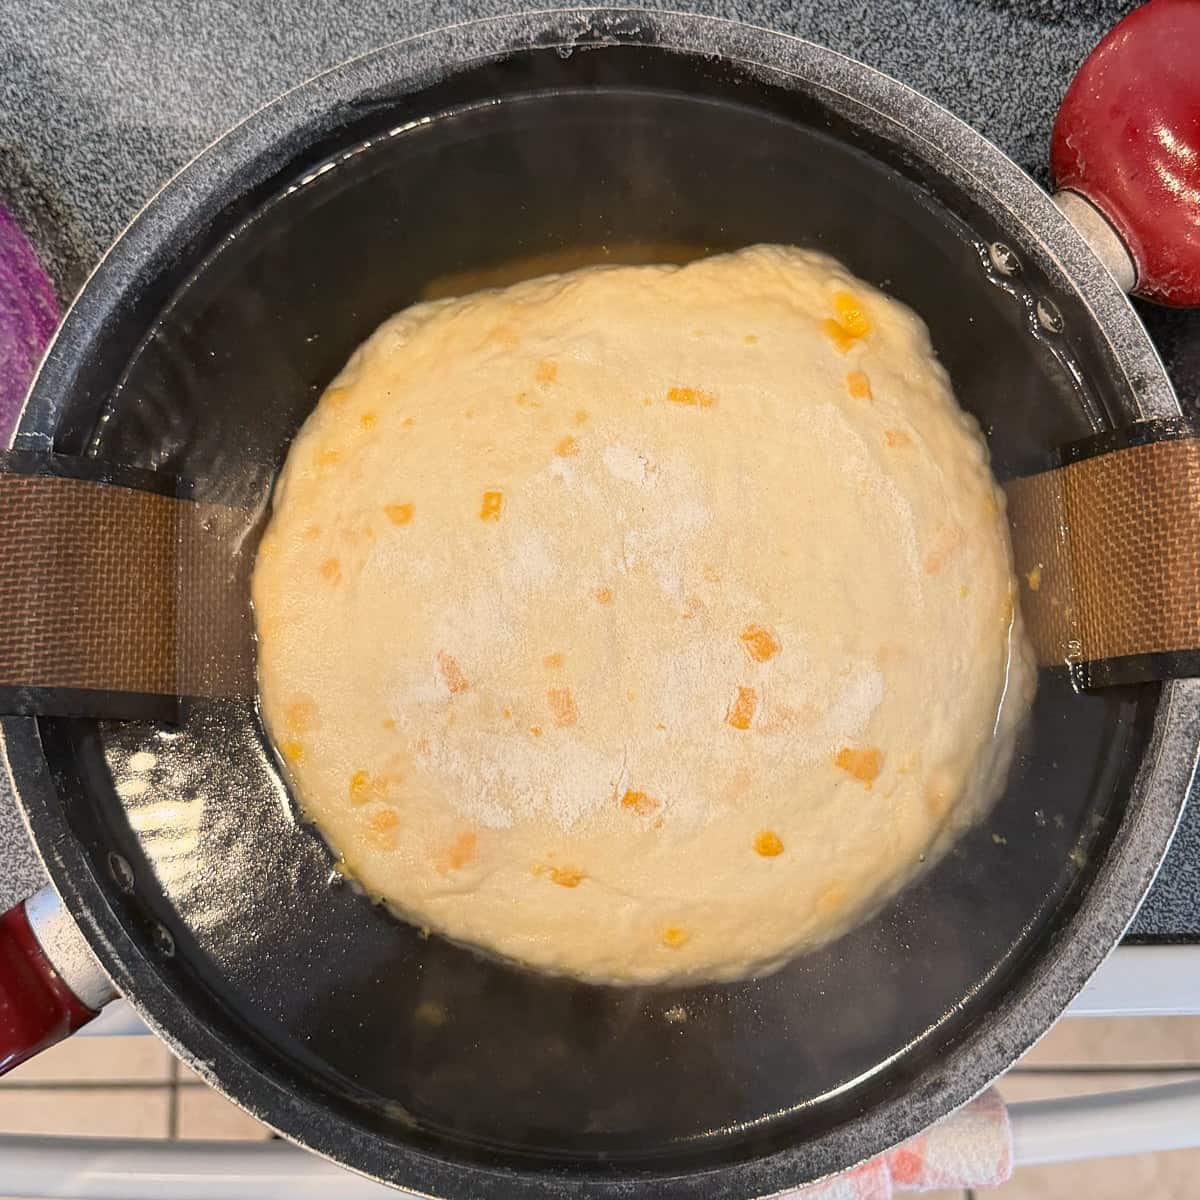
Add 7 cups of water to a 3-4 quart saucier pan with ⅓ cup baking soda. Bring to a boil.
Flip the bread onto a silicone bread sling (or an extra-large piece of parchment paper) and carefully lower the dough into the boiling water. Keep the sling straps or parchment edges out of the water so they’re easy to grab when removing the loaf. Boil for 1-2 minutes, using a ladle to gently scoop and pour the boiling water over the top of the dough.
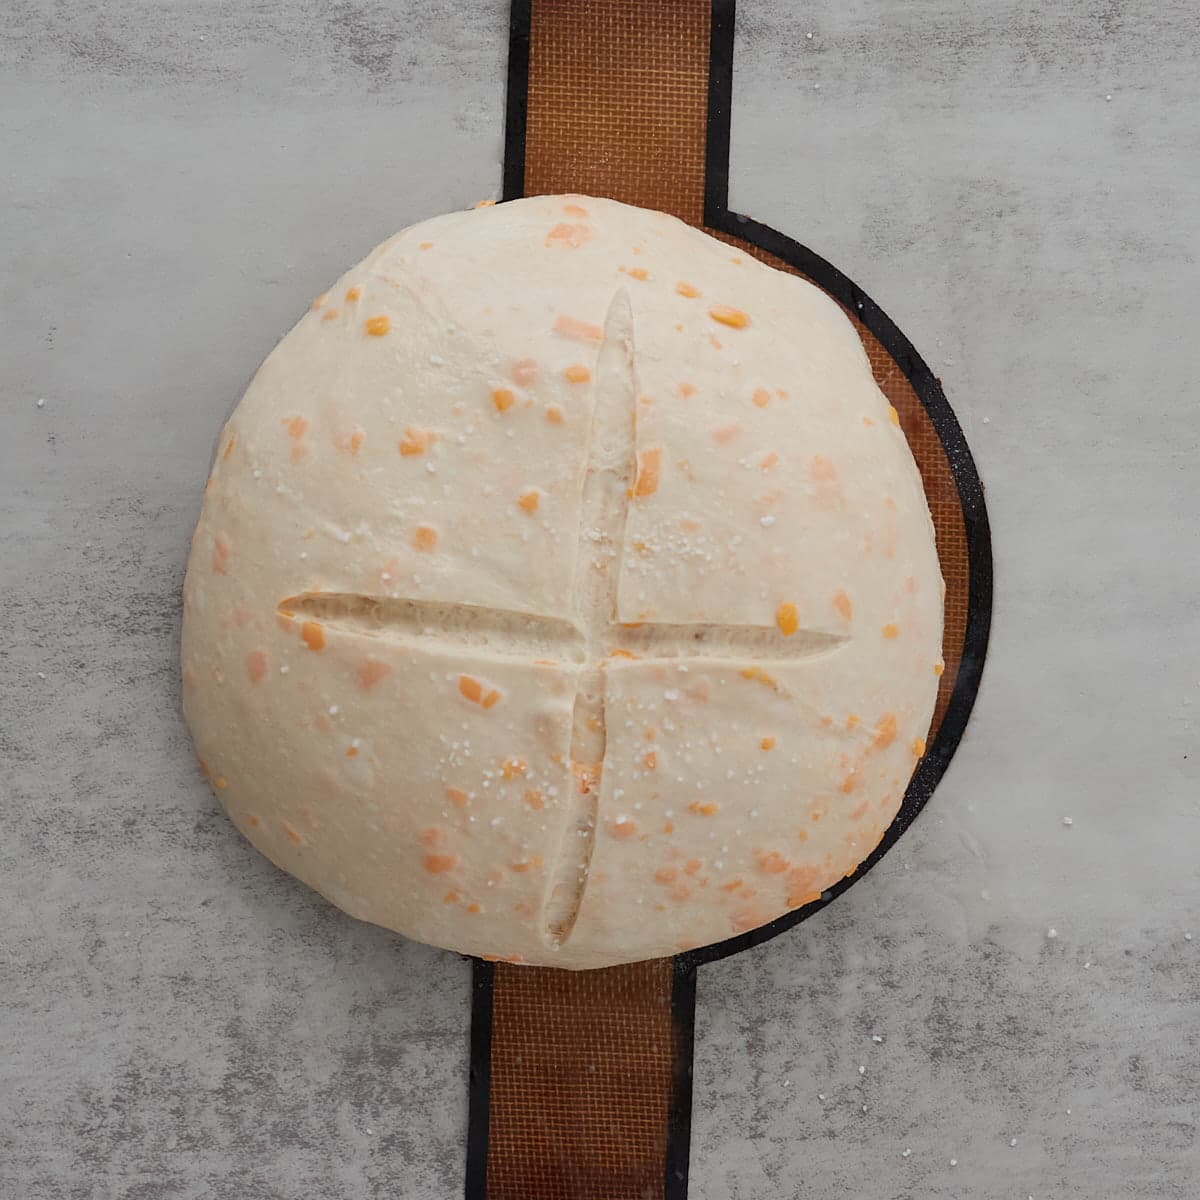
Step 7: Using the straps of the bread sling or the sides of the parchment paper, carefully lift the dough out of the boiling water. If using parchment paper, switch out to a new piece of parchment paper. With a bread lame or sharp knife, score an “X” on the top of the dough about ¼ inch deep.
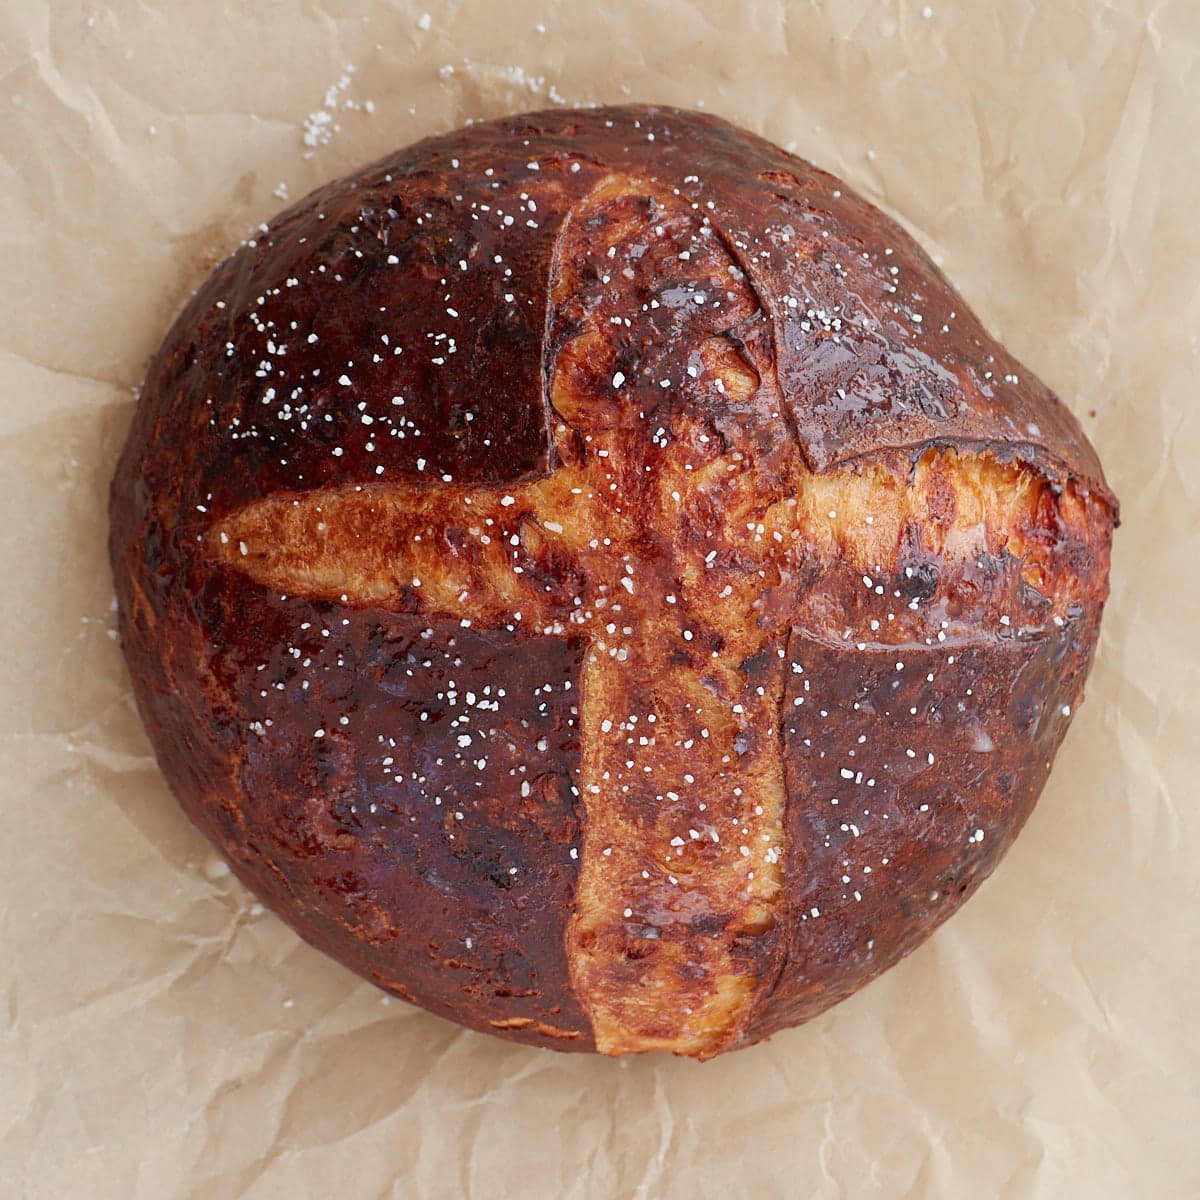
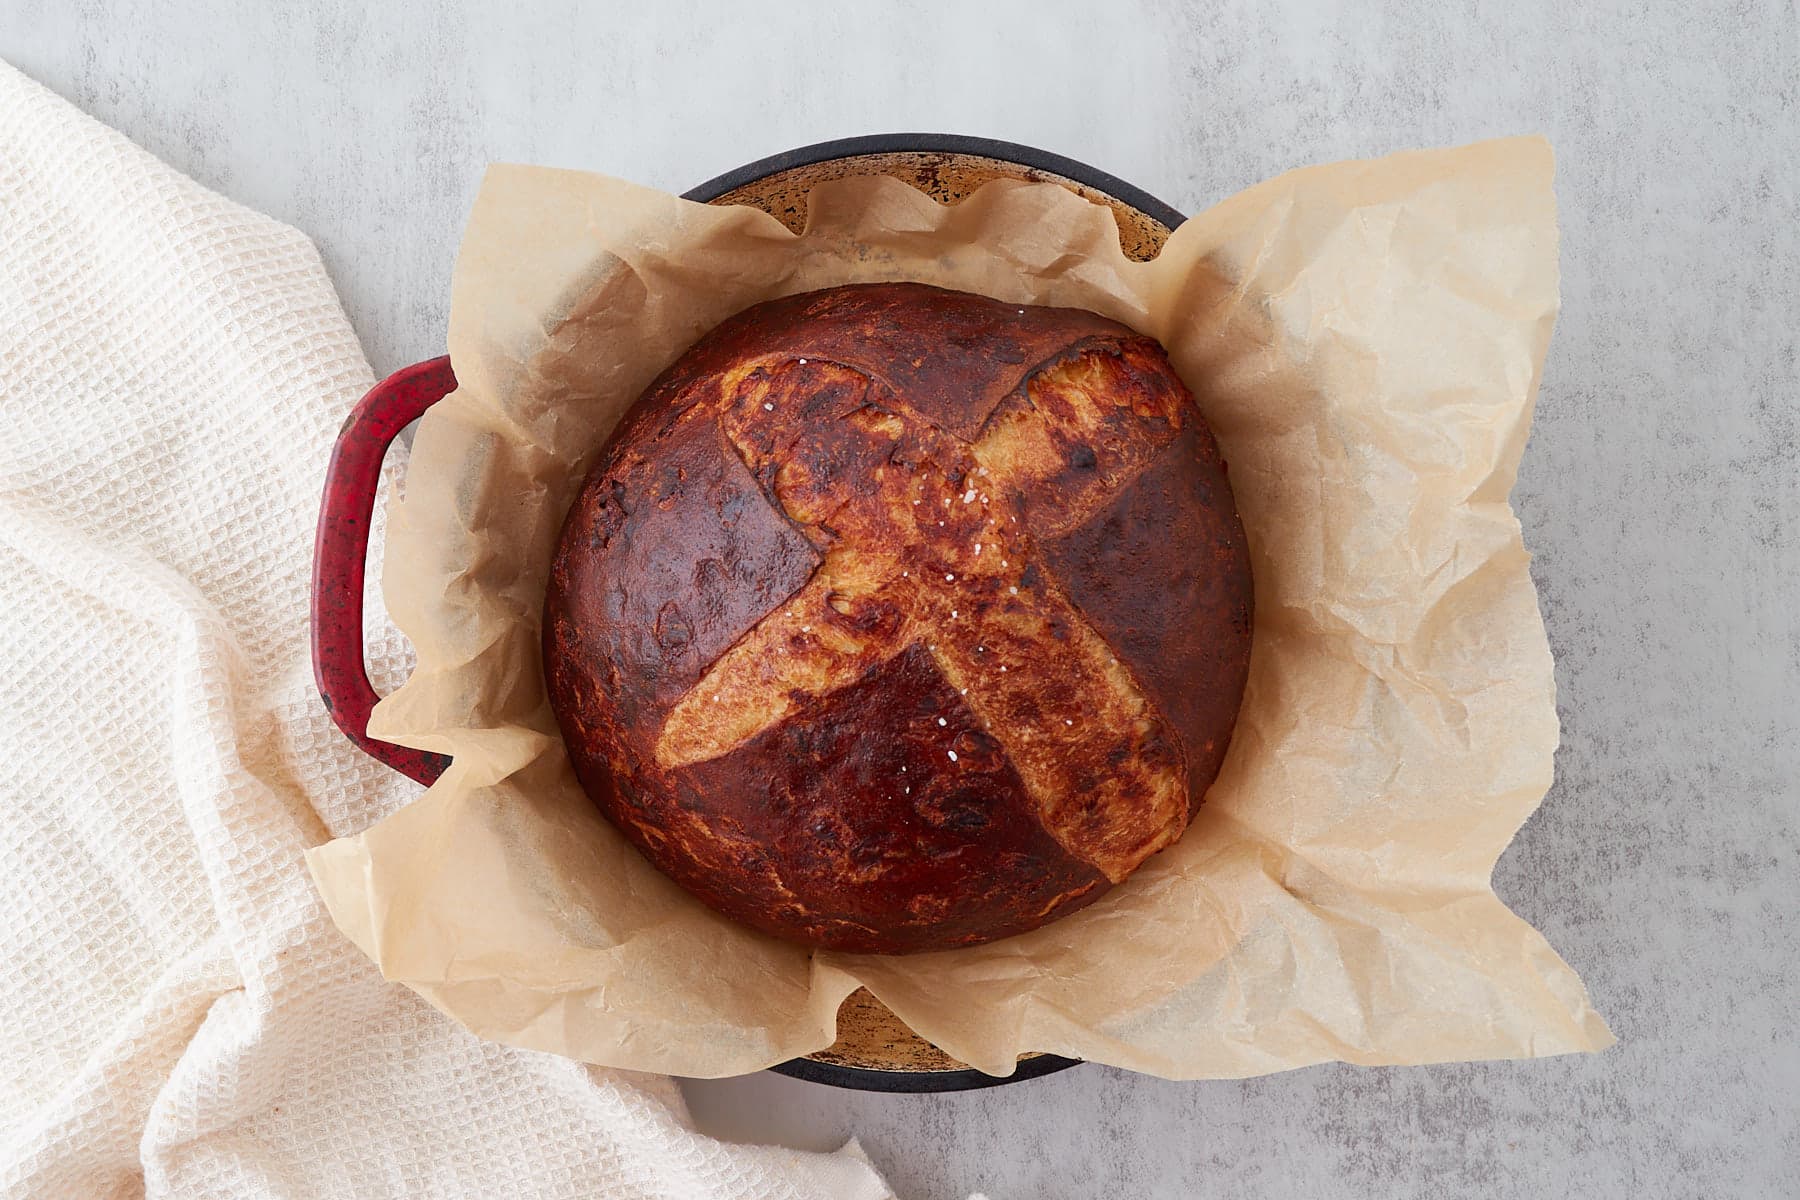
Step 8: Sprinkle the top with pretzel salt, then carefully transfer the dough to the Dutch oven. Bake covered for 25 minutes, then uncover and bake for an additional 12–15 minutes. The bread is done when the internal temperature reaches 205°F.
Right before serving, brush the crust with melted butter and sprinkle with additional pretzel salt, if desired.
If you don’t plan to serve the entire loaf, skip the butter as it won’t store well.
Recipe Tips
- I found it much easier to remove the loaf from the water when using a wide, saucier pan rather than a deep stockpot since the sides aren’t as high. A large pot will still work, but a wider pan makes getting the dough out much simpler.
- Don’t skip the boiling step. I tested brushing hot baking soda water over the loaf, and it just wasn’t the same. Boiling is essential for developing that true pretzel crust.
- If you’re using the counter-rise method, don’t forget to freeze the loaf for 20–30 minutes before boiling. Cold dough is much easier to handle and helps the loaf hold its shape in the water.
Sample baking schedule
This is based on the dough temperature being at 75°F when on the counter, although timing can vary so make sure to watch the dough, not the clock.
Same-day method
| Steps | Time |
| Feed starter a 1:1:1 ratio and leave at 77-80°F (50 grams sourdough starter: 50 grams flour: 50 grams water) *If you do not have extra starter be sure to feed your starter a little more so you have leftover | 8 am |
| Mix dough | 12 pm |
| Stretch & folds | 12:30 – 1:30 pm |
| First rise | 1:30pm – 4 pm |
| Shape & second rise | 4 pm – 5 pm |
| Freeze dough | 5 pm |
| Boil dough & bake | 5:30 pm |
Overnight method
| Steps | Time |
| Feed starter a 1:1:1 ratio and leave at 77°F (50 grams sourdough starter: 50 grams flour: 50 grams water) *If you do not have extra starter be sure to feed your starter a little more so you have leftover | Day One: 1:00 pm |
| Mix dough | 5:00 pm |
| Stretch & folds | 5:30 pm – 6:30 pm |
| First rise | 6:30 – 9 pm |
| Shape and into the fridge | 9 pm |
| Boil and bake | Day two: 8 am |
Storage instructions for Sourdough Pretzel Bread
Store a whole loaf, or one half placed cut-side down with only the crust exposed, on the counter for up to 2 days on the counter. If the inside of the loaf is exposed, I store it in a bread box or bread bag for 3-4 days.
To freeze a loaf, either place it whole in a freezer-safe bag or preslice it and add parchment paper between each slice before sealing in a freezer bag.
To thaw, leave the loaf on the counter for several hours in the sealed bag. If you are short on time, use the defrost setting on the microwave. Once thawed, refresh the loaf in a preheated 450°F oven for 10–15 minutes until the crust is crisp again. For individual slices, pull straight from the freezer and toast.
Recipe FAQ
No, this shortcut does not provide the same outcome. When I tested this, the loaf came out looking and tasting like a normal loaf of sourdough.
Yes! If you’d like, you can divide the dough into 4 or 6 portions to make smaller loaves, similar to my sourdough bread bowls.
When you’re ready to bake, place a baking steel or pizza stone in the oven and preheat to 400°F. Soak three tea towels in water, roll them up, and place them in an 8×8 or 9×9-inch pan. Pour ½ cup of water into the pan. Set aside.
Working 2–3 at a time, carefully lower the dough balls into the boiling water and boil for 30–60 seconds. Remove with a large slotted spoon and place on a large piece of parchment paper. Sprinkle with salt and score an “X” on the top of each dough ball using a sharp knife or bread lame.
Using a flat baking sheet, transfer the parchment with the loaves onto the hot baking steel. Place the pan with the wet towels on the rack underneath. Bake at 400°F for 20 minutes. Remove the pan of water, then increase the oven temperature to 450°F and bake for an additional 15 minutes.
There are a few reasons this can happen:
Improper proofing. Both underproofed and overproofed loaves can struggle to brown properly.
Incorrect baking soda ratio. The water-to-baking-soda ratio must be measured carefully to create the alkaline environment that triggers the Maillard reaction, giving the loaf its deep brown, glossy crust. Too much baking soda can leave a metallic taste, while too little may result in a pale crust.
Boiling time. If the loaf isn’t boiled long enough, it won’t develop proper color. Aim for 1–2 minutes. Boiling too long, however, can make the crust overly firm.
More sourdough Recipes

Sourdough Snack Recipes
Soft Sourdough Pretzel Bites (made with active starter)
Sourdough Artisan Bread Recipes
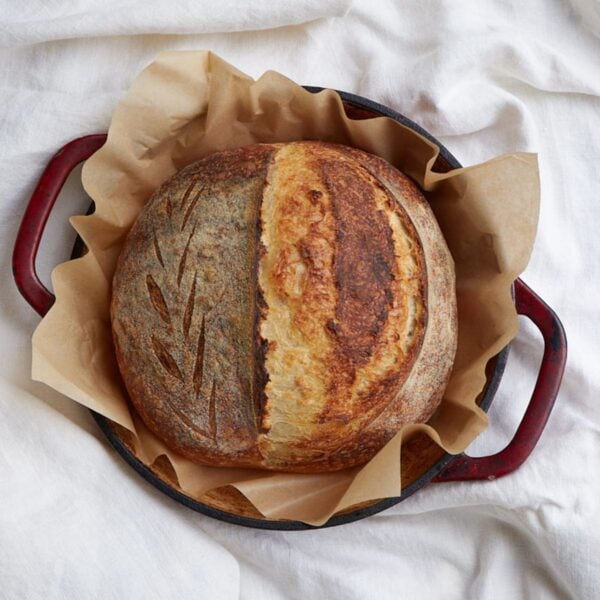
The Best Same Day Sourdough Bread (Great for Beginners)
Sourdough Bread Recipes
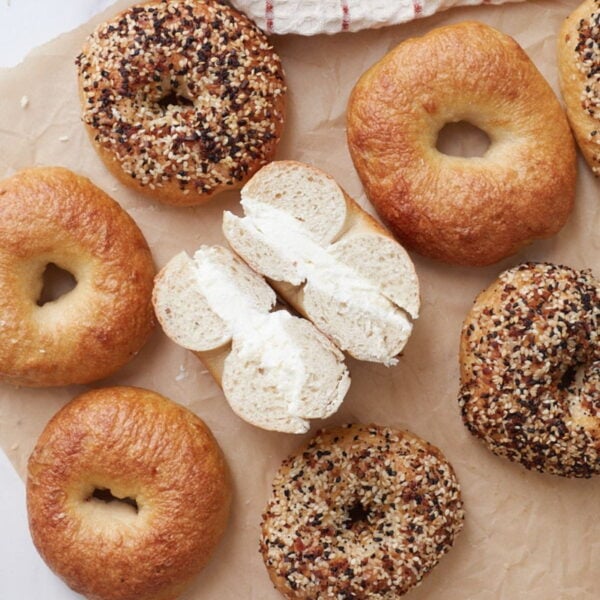
Chewy Sourdough Bagels (so easy!)

Sourdough Bread Recipes
Hot Honey Parmesan & Asiago Sourdough Bread
Tried this Cheesy Sourdough Pretzel Bread or another recipe from the site? I’d love to hear about it! Drop a star rating and share your thoughts in the comments—can’t wait to see what you’re baking!

Cheesy Sourdough Pretzel Bread
Ingredients
Sourdough Starter or Levain
- 50 grams active sourdough starter, ¼ cup
- 50 grams all-purpose or bread flour, ⅓ cup
- 50 grams water , ¼ cup
Pretzel bread
- 330 grams water, 1⅓ cups
- 150 grams active sourdough starter (levain) , ⅔ cup
- 30 grams brown sugar , 2 Tablespoons
- 10 grams salt, ½ Tablespoon
- 500 grams bread flour, 3 ½ cups
- 100 grams cheddar cheese, 1 cup
Pretzel Bath
- 1680 grams water, 7 cups
- 75 grams baking soda, ⅓ cup
Toppings
- pretzel salt
- 14 grams butter, 1 Tablespoon
Instructions
- About 4 hours before making the sourdough pretzel loaf, build a levain or feed your sourdough starter at a 1:1:1 ratio. Cover and let it rest at 77–80°F until bubbly and doubled in size.If you don’t have extra starter, add an extra 5–10 grams to each portion (starter, flour, and water) so you have enough to bake with and still keep your starter going.50 grams active sourdough starter, 50 grams all-purpose or bread flour, 50 grams water Skip this step if your starter is already activated and ready to bake with.Note: If you want to start the loaf in the morning, you can feed your starter a 1:5:5 ratio (15 grams active sourdough starter, 70 grams flour, 70 grams water) the night before and leave for about 10 hours at 72℉.
- Shred cheese: Shred the cheese and set aside to bring to room temperature. This helps prevent the dough from cooling down, which can slow fermentation and extend the rise time.100 grams cheddar cheese
- Mix dough: In a 2-quart straight-sided container or a medium clear bowl, mix water, active starter, brown sugar, and salt using a Danish dough whisk, your hands, or a large spoon. Add the flour and stir until fully incorporated and the dough becomes shaggy. Cover and let rest for 30 minutes in a warm spot. To follow the suggested timing, keep the dough temperature at 75°F. 330 grams water, 150 grams active sourdough starter (levain) , 30 grams brown sugar , 10 grams salt, 500 grams bread flour
- Stretch and folds: Perform 3 sets of stretch and folds with a 30-minute rest in between each set. To stretch and fold the dough, grab one side with a damp hand and gently shimmy the dough up, and then fold it on top of itself. Repeat this 3 more times, rotating the bowl 90 degrees each time. Cover and keep the dough warm between each set. During the second set, incorporate the cheese if adding it.
- First rise: Let the dough rest on the counter in a warm spot to finish bulk fermentation. Bulk fermentation is done when the dough is jiggly, domed on top, bubbly on the sides, and risen 50%. If it does not show these signs, continue to let the dough rise. At a dough temperature of 75ºF, my dough is ready about 4 hours after mixing the dough.
- Prep basket: Lightly flour an 8–10-inch proofing basket with all-purpose flour or rice flour.If you don't have a proofing basket, line an 8-10 inch bowl with a lightly floured tea towel.
- Shape: Turn the dough out onto an unfloured surface and gently stretch it into a thick rectangle. Begin shaping by folding the top edge down toward the center like an envelope, pulling gently to build tension. Next, lift the top two corners and fold them toward the center, slightly overlapping, then repeat with the bottom two corners.Starting from one side, roll the dough over itself to form a ball, keeping the smooth side on top. Cup your hands around the dough and gently rotate it counter-clockwise toward you to tighten the surface and create a smooth, round shape.
- Add to basket: Place it seam-side up in the floured proofing basket and cover.
- Final rise same-day (option 1): Let the dough rest on the counter for 1–2 hours at 75°F. To check for readiness, perform the poke test: gently press the dough with a lightly floured finger. If the indentation slowly springs back, it’s properly proofed and ready to bake. If it bounces back right away, it needs more time. If the indentation doesn’t spring back at all, the dough is overproofed and should be baked right away. Once the dough is ready, place it in the freezer for 20-30 minutes before boiling.
- Final rise overnight option (option 2): Place the dough in the fridge overnight for 8-12 hours until ready to bake. No need to test if the dough is ready, just bake it straight from the fridge.
- Preheat oven: Place a dutch oven in the oven and preheat it to 450℉. I also like to place a heavy-duty pizza stone on the rack underneath to prevent the bottom of my loaf from burning.
- Boil water: Add 7 cups of water to a 3-4 quart saucier pan with ⅓ cup baking soda. Bring to a boil. 1680 grams water, 75 grams baking soda
- Boil bread: Flip the bread onto a silicone bread sling (or an extra-large piece of parchment paper) and carefully lower the dough into the boiling water. Keep the sling straps or parchment edges out of the water so they’re easy to grab when removing the loaf. Boil for 1-2 minutes, using a ladle to gently scoop and pour the boiling water over the top of the dough.
- Score: Using the straps of the bread sling or the sides of the parchment paper, carefully lift the dough out of the boiling water. If you are using parchment paper, put the bread on a fresh piece of parchment. With a bread lame or sharp knife, score an “X” on the top of the dough about ¼ inch deep.
- Bake: Sprinkle the top with pretzel salt, then carefully transfer the dough to the Dutch oven. Bake covered for 25 minutes, then uncover and bake for an additional 12–15 minutes. The bread is done when the internal temperature reaches 205°F.
- Remove the bread from the dutch oven and allow to cool on a cooling rack before slicing. If you are serving right away, brush the crust with melted butter and sprinkle with more pretzel salt if needed. If you don’t plan to serve the entire loaf, skip the butter and salt at the end as it won’t store well.14 grams butter, pretzel salt
Notes
- Saucier pan for boiling. I found that it was much easier to boil the loaf in a saucier pan rather than a large pot.
- Boil after 2nd rise. Be sure to boil the bread after the second rise. This boil is what gives the dough that classic pretzel crust. If you skip the boil, you’ll end up with a regular loaf of sourdough bread.
- Freeze before boil. If you are using the counter-rise method, be sure to freeze the bread for 30 minutes before boiling. This will allow the dough to hold its shape. If you are using the refrigerator method for the second rise, you do not need to freeze the dough.
- Substitutions. I use brown sugar in the dough to add a little richness and depth to the dough, similar to pretzels. But you can omit the sugar altogether or swap it out for 15 grams of honey or maple syrup. If you don’t have pretzel salt you can use a coarse sea salt.
- See sample schedules in the blog post.
Nutrition
Nutrition information is automatically calculated, so should only be used as an approximation.


Looks amazing! Haven’t cut it open though. Only boiled one minute. Had to spoon water onto the top because it didn’t submerge as much as I anticipated. The dough almost fell off the mat as it was so soft and gooey. Luckily I got it onto the counter before it fell apart. Got it safely into the Dutch oven. Cooked up beautifully with lid on for 25min and off for 15. Thanks
Awesome hope you enjoy!
I tried to use an extra large piece of parchment paper because I don’t have a silicone mat and it did not work. The loaf wouldn’t sink into the pot of water with the surrounding paper and then once I could get it almost submerged, the parchment started slipping out from under it. I then had to try to dump the water out of the pot while keeping the loaf in it and ended up pouring the loaf all in the sink- major fail! Any tips on using parchment with it ?
I had the same issue – any tips?
My initial test, I used parchment paper so I have tried it I just made sure to use a really big piece so I had plenty of room to grab the sides of it when it’s in the pan. Using a shallower pan like a saucier pan instead of a pot is a lot easier because the loaf doesn’t go as deep into the pot making it easier to pull out. It won’t submerge all the way so you can just ladle water on top instead of trying to force it down further. If the parchment paper does fall of you could use a big straining spoon to try and get it out or use two large serving spoons on each side to lift it.
Sooo good. I was doubtful about boiling a loaf of bread, but it turned out really good. Sliced it up and made very delicious sandwiches. The crust and crumb are both a great texture. I didn’t have pretzel salt so I just sprinkled everything but the bagel seasoning on top. I see others commenting on here about adding jalapenos, so I’m definitely gonna try that.
So glad you liked it! I agree I’ll be trying with jalapenos as well.
This bread was amazing! I’d like to split into minis, but would have to open bake then. I have a gas oven. Any suggestions on how to open bake this dough as mini loaves?
So glad you liked it!
I’ve never has a gas oven so I don’t have a good answer. I have heard open baking can be a little trickier with gas but I looked at a Facebook group I’m a part of, and people were talking about baking with gas and it seems many people have success.
Here is what one person said: I open bake in my gas oven all the time. Just put a baking pan one rack down before you pre-heat. Then pre-heat as usual. When you’re ready to bake, arrange your loaves how you want them in the oven. Right at the end, pour a cup of water into the baking pan and shut the door quickly. It generates plenty of steam and hasn’t caused me any issues.