This post may contain affiliate links . Read my full Disclosure Policy.


Sourdough Mini Loaves are a fun twist on my Overnight Sourdough Bread recipe using mini loaf pans! With this method, you can try out multiple add-in flavor combinations, or bake mini loaves to give as gifts.

Save & Summarize
Why make mini loaves
Not only are mini loafs cute and fun to make, but they also are a great way to get creative! Mini sourdough loaves allow you to try different flavors and add-ins without having to make multiple loaves. Want to share your sourdough love with your friends and family? Make mini loaves to share or to give as gifts! They are also the perfect solution for someone who lives alone or who doesn’t eat as much bread to eat a loaf now and freeze the rest for later.
Do you make mini loaves the same way as regular sourdough?
To make the mini loaves you will use the same base recipe as regular sourdough bread, we will be using my Overnight Sourdough Bread recipe but if you want 4 minis instead of 3 I recommend using my Same Day Sourdough Bread recipe. It only changes when we go to shape the dough and bake it!
Sourdough add-ins to try
For sourdough add-ins, you can go savory or sweet, and there are so many different possibilities to try! My favorite combinations are jalapeno and cheddar, and everything but the bagel seasoning and cheese, but feel free to get creative! Making mini loaves is a great opportunity to do some sweet and some savory. Or, try a flavor combination that you want to experiment with on just one mini loaf.
Here are 21 Unique Sourdough Add-ins for you to try in your mini loaves!
Why do you need to use ice?
To make the mini sourdough loaves, you will place a sheet pan with ice on the rack underneath the bread in the oven for the first part of the baking. This is done because the ice adds steam, which helps the crust stay soft at the high heat and allows the loaf to fully rise. So be sure to not skip this step!
If you have a gas stove you will have to experiment a little as gas stoves vent the steam quicker than electric ovens. If you have a gas stove and it doesn’t work baking these, you can place 1 or 2 mini loaf pans at a time, depending on the size, in your Dutch oven instead.
Ingredients
Sourdough Starter – You’ll need an active starter that has doubled in size and is bubbly.
Bread Flour- Bread flour has a higher protein content and is preferred for sourdough bread.
Water- You can use filtered or tap water, either works fine for me!
Salt- Any type of salt you prefer.
Your choice of add-ins – Get creative! Or see this list of 21 Unique Sourdough Add-ins.

How to make Mini Sourdough Loaves
The first steps to making the mini loaves are exactly the same as making a regular loaf, you’ll notice the differences when it comes to shaping and baking the dough.
Step 1: Feed your sourdough starter
There are a few factors that can affect how your sourdough starter will rise, including the temperature of your house, how much you feed it, and how active it already is. Here are a few different feeding options you can do based on the timing in which you’d like to make your mini loaves.
1:1:1 ratio (1 part starter, 1 part flour, 1 part water): This ratio will rise in about 4-6 hours
1:5:5 ratio (1 part starter, 5 parts flour, 5 parts water): This ratio will rise in about 12 hours
The starter is ready to use when it doubles or exceeds its size and becomes bubbly. If you can’t use the starter right away, you can store it in the fridge until you are ready.
Step 2: Mix ingredients
Add the flour, water, salt, and active starter into your large bowl and mix with a Danish dough whisk, spoon, or your hand until it is incorporated and shaggy. Cover the bowl with a dinner plate (not a tea towel!) and let it sit for 30 minutes.
Step 3: Stretch and fold
This step helps aerate and build strength in the dough. Ideally, you’ll do two or more sets of stretch and folds.
How to stretch and fold:
- After you let the dough rest for the initial 30 minutes, grab one side of the dough with a damp hand and shimmy the dough up, and then fold it on itself. Rotate the bowl 90 degrees and then repeat 3 more times
- Re-cover and let sit for 20-30 minutes to let the dough relax
- Repeat the stretch and fold one more time (a total of two times)
- If you have additional time, you can do 3-4 sets of stretch and folds (but no worries if you are in a time crunch!)
Step 4: First rise
Let the dough sit covered on the counter overnight at 68-72 degrees Fahrenheit for about 8-14 hours (depending on temperature) or until the dough is about 75% risen but not completely doubled. You’ll know it is ready when the dough is aerated with bubbles showing on the sides and the bottom of the dough, and it jiggles when you shake the bowl. If the dough isn’t ready, let it sit in a warm spot and wait until you see these signs before moving on to the next step.
Step 5: Shape the dough
This is the step where you will divide the dough into mini loaves, and incorporate your add-ins. Shaping the dough is important to create a taut outer skin to create tension and help the dough hold its shape while baking.

How to shape the mini loaves:
- Dump the dough onto an unfloured surface and cut it into three equal parts.
- Take one-third of the dough and gently spread it into a chubby rectangle. If you are adding mix-ins you can add them at this point to the dough.
- Gently pull the bottom of the dough up on top of itself, about ⅓ of the way, and then pull the other side of the dough up on top of both layers (folding it like a letter for an envelope).
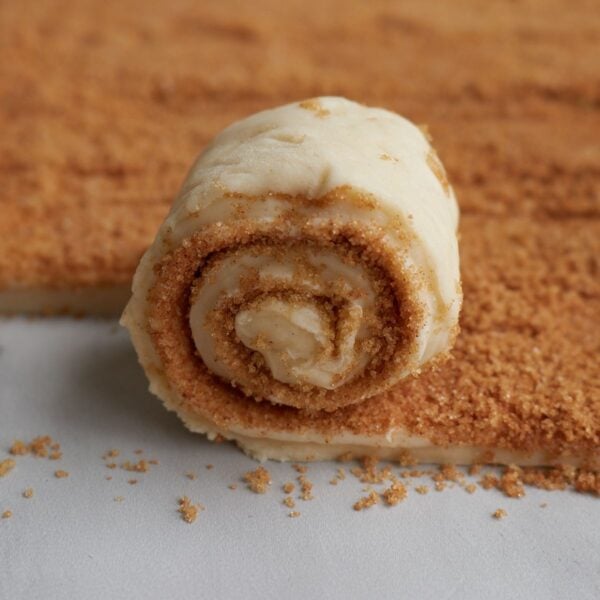
- Add an additional layer of your add-ins on top of the folded dough. Then starting from one side roll the dough on top of itself into an oblong shape.
- With your hands cupped pull the rolled up dough towards your body to smooth out the surface.
- Using a bench scraper or your hands, gently lift the dough and add to the lightly greased mini loaf pan.
- Repeat steps 2-6 for all three parts of the dough to create three mini loaves.

Step 6: Second proof
Cover the mini loaf pans and add to the fridge for the final proof. Let the dough sit ideally for at least 8 hours up to 48 hours. The fridge slows down fermentation which allows the dough to sit for a longer time. The longer the dough sits, the more sour it will taste.
Step 7: Baking
When you are ready to bake, preheat the oven to 450°F. Remove the pans from the fridge and score the top of the dough with your bread lame or sharp knife.
When the oven is preheated, add the pans to the oven and on the rack below, add a sheet pan with about 10-12 ice cubes on it and bake for 15 minutes. After 15 minutes, remove the baking sheet, decrease the temperature to 425°F, and then bake for an additional 15 minutes. Once baked, remove the bread from the pan immediately and let cool on a cooling rack. I like to use my lanon heat protective gloves (use code countryroads15 for 15% off) to get the bread out of the pans easily.
When cooled, cut with a bread knife and enjoy!

Sample Baking Schedule
This schedule is based on rough estimates but can help you get an idea of what your sourdough schedule will look like. The temperature of your dough, kitchen, humidity, and strength of the starter will all impact the times so while this will give you an estimate it is best to look at the signs the dough is ready to move on. There is flexibility with the schedule, so do what works best for you!
| Steps | Time |
| Feed sourdough starter 1:4:4 ratio (i.e. 10 g starter: 40 g flour: 40 g water) | 8 am |
| Mix dough | 7:00 pm |
| Stretch & folds | 7:30 pm-8 pm |
| Shape | ~7 am |
| Final proofing in fridge | 8 am-4 pm |
| Bake | 4 pm |
How to store and freeze sourdough mini loaves
You can store a whole mini loaf on the counter with a tea towel over it for up to 2 days. If the inside of the loaf is exposed, you can store it cut side down and cover with a tea towel, or store it in a bread box or ziplock bag.
The great thing about Mini Sourdough Loaves is that you can freeze them to save for later! Add a whole, or half loaf to a freezer-safe bag and store for later.
To thaw, remove the bag from the freezer and let defrost on the counter for several hours, or if you are in a pinch you can use the defrost setting on your microwave. Once thawed, you can revive the sourdough by popping it in the oven to get the signature sourdough crispy crust again. Run the loaf quickly under running water and then place it in a 450-degree oven until the crust is crispy, about 8-10 minutes.

Mini Sourdough Bread Loaves
Equipment
Ingredients
- 50 grams sourdough starter, doubled in size and bubbly, ¼ cup
- 500 grams bread flour, 3 ¾ cups
- 350 grams water, 1 ½ cups
- 10 grams salt, ½ Tablespoon
- Optional: mix-in ingredients
Instructions
- Mix together active starter, water, flour, and salt until a shaggy dough is formed.50 grams sourdough starter, doubled in size and bubbly, 500 grams bread flour, 350 grams water, 10 grams salt
- After 30 minutes get your hand damp and then perform a set of stretch and folds. Cover and let rest. You now have 2 options: if you will be home and have time, add in 1 or 2 more sets of stretch & folds every 30 minutes or leave the dough to sit on the counter for the remainder of the time. Adding additional stretch & folds does help the loaf to rise more in the oven but both options make delicious bread.
- Let the dough sit covered on the counter overnight between 68-72℉ for about 10-14 hours or until the dough is about 75% risen but not completely doubled. You’ll know it is ready when the dough is aerated with bubbles showing on the sides and the bottom of the dough, and it jiggles when you shake the bowl. If the dough isn’t ready, let it sit in a warm spot and wait until you see these signs before moving on to the next step.
- Grease 3 mini loaf pans (about 5.5 x 3 in) and then dump the dough onto an unfloured surface and cut it into three equal parts.
- Take one-third of the dough and gently spread it into a chubby rectangle. If you are adding mix-ins you can add them at this point to the dough. Gently pull the bottom of the dough up on top of itself, about ⅓ of the way, and then pull the other side of the dough up on top of both layers (folding it like a letter for an envelope). Add an additional layer of your add-ins on top of the folded dough. Then starting from one side roll the dough on top of itself into an oblong shape. With your hands cupped pull the rolled up dough towards your body to smooth out the surface. Using a bench scraper or your hands, gently lift the dough and add to the lightly greased mini loaf pan.
- Repeat step 5 for all three parts of the dough to create three mini loaves.
- Cover the mini loaf pans and add to the fridge for the final proof. Let the dough sit ideally for at least 8 hours up to 48 hours. The fridge slows down fermentation which allows the dough to sit for a longer time. The longer the dough sits, the more sour it will taste.
- When you are ready to bake, preheat the oven to 450°F. Remove the pans from the fridge and score the top of the dough with your bread lame or sharp knife. When the oven is preheated, add the pans to the oven and on the rack below, add a small pan with about 10-12 ice cubes on it and a cup of water. Bake for 15 minutes. Remove the pan with water and decrease the temperature to 425°F. Bake for an additional 15 minutes.
- Once baked, remove the bread from the pan immediately and let cool on a cooling rack.
Notes
Nutrition
Nutrition information is automatically calculated, so should only be used as an approximation.


I love my mini’s. They are are at baked temp of 210’-213’
Why won’t they brown on top !!!! HELP !!
That is likely a proofing issue. Under or overproofed dough will bake up pale.
What size pans do you use for the minis?
5.75 x 3 inches
Might want to make changes for those who follow precisely recipes.
Section 1:
1:1:1 ratio (1 part starter, 1 part flour, 1 part flour): This ratio will rise in about 4-6 hours
I believe water should be placed
Thanks for catching that I’ve updated it!
Soooooo I decided to triple your recipe and left it sitting in my stove overnight and when I woke up this morning, it looked like sourdough Zilla threw up in my oven 😂😂😂 so I cleaned up the mess and still had a huge bowl left of dough but it’s really sticky so I’m trying my best to shape it into mini loaves and I’m adding add ins to a few!!! Praying they turn out ok 👌
Oh no!! The good news is when they bake in the loaf pan it forces them to rise up. When you double or triple the recipe the rise times go quicker and with the warmer temps outside it probably just got warm and went quicker than anticipated.
If you are giving these as a gift what is the best wrap and store them? Can you make a few days in advance? Thank you!
They will get stale if they sit out for a few days so if you want to gift them later, I would freeze them and then you can defrost them overnight the day before you gift them. When you freeze them, you could wrap in heavy-duty foil or Saran Wrap and then put them in a freezer-safe bag. Then, to get them to crisp up again, I would just tell them to preheat the oven to 400°F and then quickly run the loaf under water and bake for 5-10 minutes until the loaf crisps up. It will taste good as new.
Made three mini loaves adding jalapeño & cheddar to one, and black olives & fresh parmesan (not your favorite!) to another. First time baking with steam. They all turned out amazing and delicious!
So happy to hear that! Glad you liked them!
Hi Emily,
Will you please advise me suggestions for add-ins and the total amount that I can add to the mini loaves?
I love your same day sourdough bread and have successfully made until yesterday!
I totally skipped the step about the step of proofing the dough in the proofing basket!!
The loaf still looks turned out okay, but it’s texture changed and it was much more “hollier” than usual!
Thank you for all of your fabulous recipes!!
I bought another of your stellar books, Same Day Sourdough, and had it shipped to my life long friends who’s also a Sourdough baker and she adores it as much as I do!!!
Thank you again Emily! I truly appreciate you and all of your recipes ❤️ ♥️
Thanks so much, Lori! For mix-ins, I typically don’t measure on my mini loaves I just add what seems about right for each loaf. But as a general rule of thumb you want to keep mix-ins at about 20% or less of your overall dough weight.