This post may contain affiliate links . Read my full Disclosure Policy.


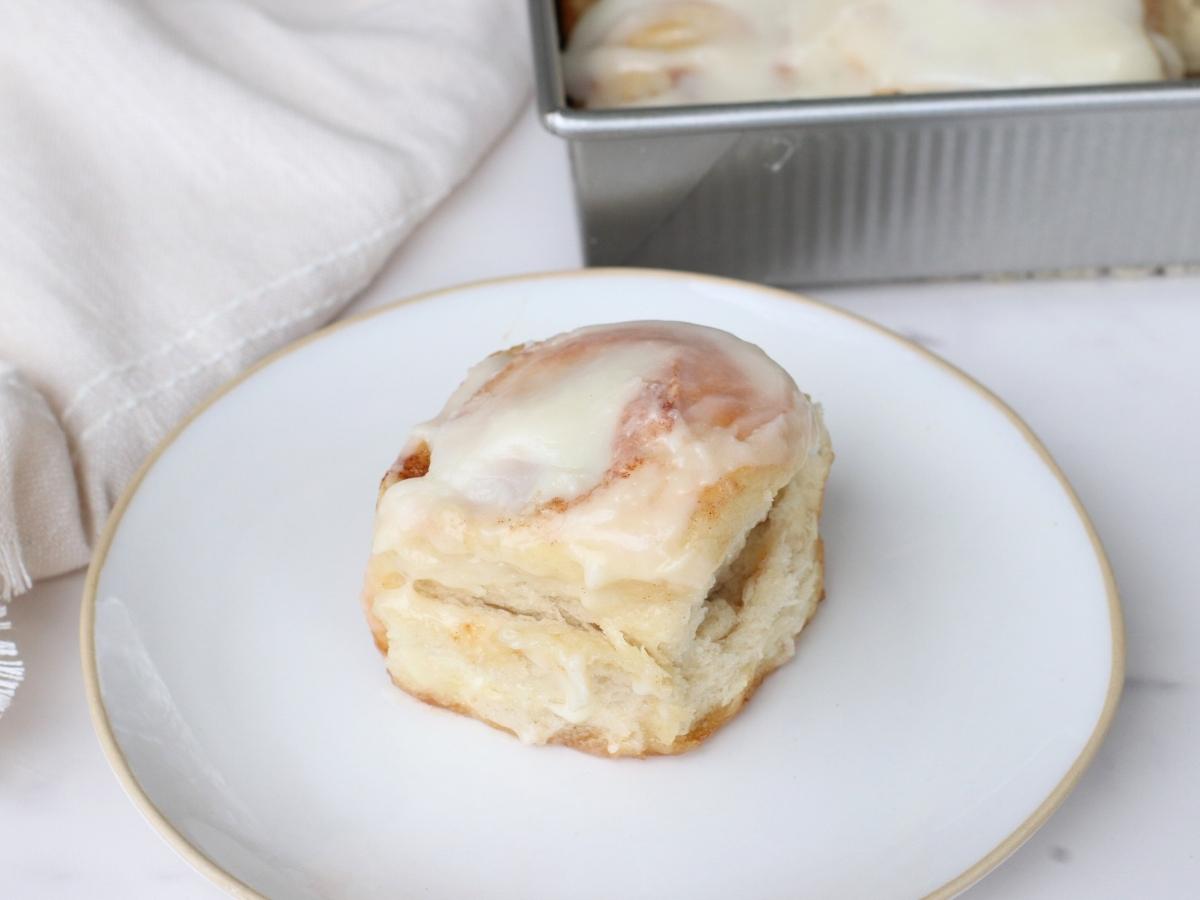
Soft and fluffy Sourdough Cinnamon Rolls made with a gooey cinnamon filling and topped with a cream cheese frosting. This recipe is the classic cinnamon roll you know and love, naturally leavened with active sourdough starter.

Save & Summarize
Cinnamon Rolls are a favorite for a reason! They are so delicious with their gooey filling and soft texture. These easy sourdough cinnamon rolls rise overnight and then bake the next morning. This will be a staple recipe for your family, whether it is Christmas morning, Easter, or just as a special treat! And if you love cinnamon rolls as much as I do, you’ll want to try my Sourdough Cinnamon Roll Cookies, Cinnamon Roll Sourdough Focaccia and Sourdough Monkey Bread.

Table of Contents
- Why you’ll love this Sourdough Cinnamon Roll recipe
- Sourdough Cinnamon Rolls Recipe Ingredients
- Overnight Cinnamon Rolls Recipe Variations
- How to make Sourdough Cinnamon Rolls
- Sourdough Cinnamon Roll Recipe Tips
- Sample baking schedule
- How to Store Overnight Sourdough Cinnamon Rolls
- Frequently Asked Questions
- More sourdough Breakfast Recipes
- Sourdough Starter Cinnamon Rolls Recipe
- More Favorites From Country Roads Sourdough
Why you’ll love this Sourdough Cinnamon Roll recipe
- This easy cinnamon roll recipe rises while you sleep so you can have these ready in the morning. If you want a quick rise option, try my Sourdough Discard Cinnamon Rolls.
- The cream cheese frosting is rich and tangy and pairs so well with the sweetness of the rolls.
- Made with active sourdough starter, in place of yeast, this long-fermented dough can be easier to digest.
- Super soft and fluffy rolls filled with cinnamon sugar. If you love cinnamon, don’t miss my Sourdough Cinnamon Raisin Bread.
“My first attempt at making cinnamon rolls ever. This recipe is fantastic. Mine came out just perfect. Better than any bakery bought ones. Highly recommend this recipe.” -Tracy
Sourdough Cinnamon Rolls Recipe Ingredients

- Bubbly sourdough starter – You’ll want to use a sourdough starter that is bubbly and at its peak to help the cinnamon rolls rise.
- Butter – I recommend using unsalted butter to control the amount of salt but you can use salted as well. Butter is used in the dough, filling and frosting. Be sure to melt the butter before adding it to the dough. Butter
- Milk – Any type of milk works but I prefer whole milk to get the softest roll. You could also use a dairy-free alternative, I would recommend full-fat coconut milk.
- Flour- Unbleached all-purpose or bread flour is what I recommend.
- Cream cheese – Use room temperature cream cheese so the frosting blends together more easily.
- Sugars – You’ll need white granulated sugar for the dough, brown sugar for the filling, and powdered sugar for the frosting.
See all the ingredients and amounts in the recipe card below.
Overnight Cinnamon Rolls Recipe Variations
While you can’t go wrong with a classic sourdough cinnamon roll, if you want to switch things up, try my Cookies and Cream Chocolate Sourdough Rolls for a rich, chocolatey twist, my Sourdough Maple Cinnamon Rolls for a cozy bacon and maple-infused version, or my Sourdough Cinnamon Star for a festive treat. For a savory version, try my Sourdough Ham and Cheese Rolls.
Or if you love fruit flavors, try my Lemon Blueberry Sourdough Rolls, Sourdough Strawberry Rolls, Apple Crisp Sourdough Cinnamon Rolls, and Peach Cobbler Sourdough Cinnamon Rolls. And my Carrot Cake Sourdough Cinnamon Rolls and Sourdough Pumpkin Cinnamon Rolls are another spin on the classic flavors.
Browse more irresistible sourdough cinnamon roll variations you need to try!
How to make Sourdough Cinnamon Rolls
The Night before:
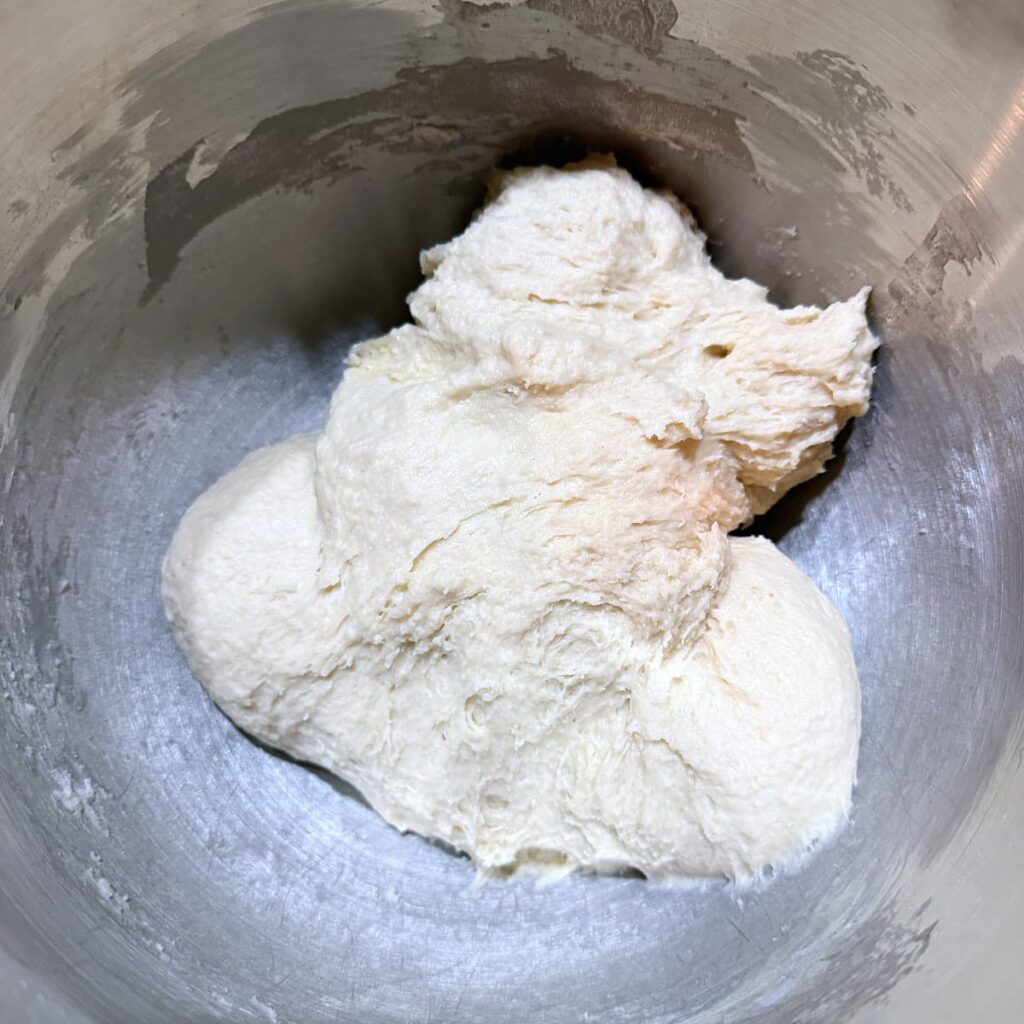
Step 1: In the bowl of a Stand Mixer or large mixing bowl add the milk, melted butter, egg, sugar, salt, active and bubbly sourdough starter, and all-purpose flour.
Option 1- Mix in a stand mixer: Mix the dough with a dough hook attachment on 1-2 speed in a stand mixer for 3-5 minutes until the dough pulls away from the bowl and forms a smooth, soft ball.
Option 2- Mix in a bowl: Mix the dough with a danish dough whisk or your hands until the dough begins to come together. Once you can no longer mix it in the bowl, place the dough on a lightly floured work surface and knead for about 5 minutes or until the dough forms a soft, smooth ball.
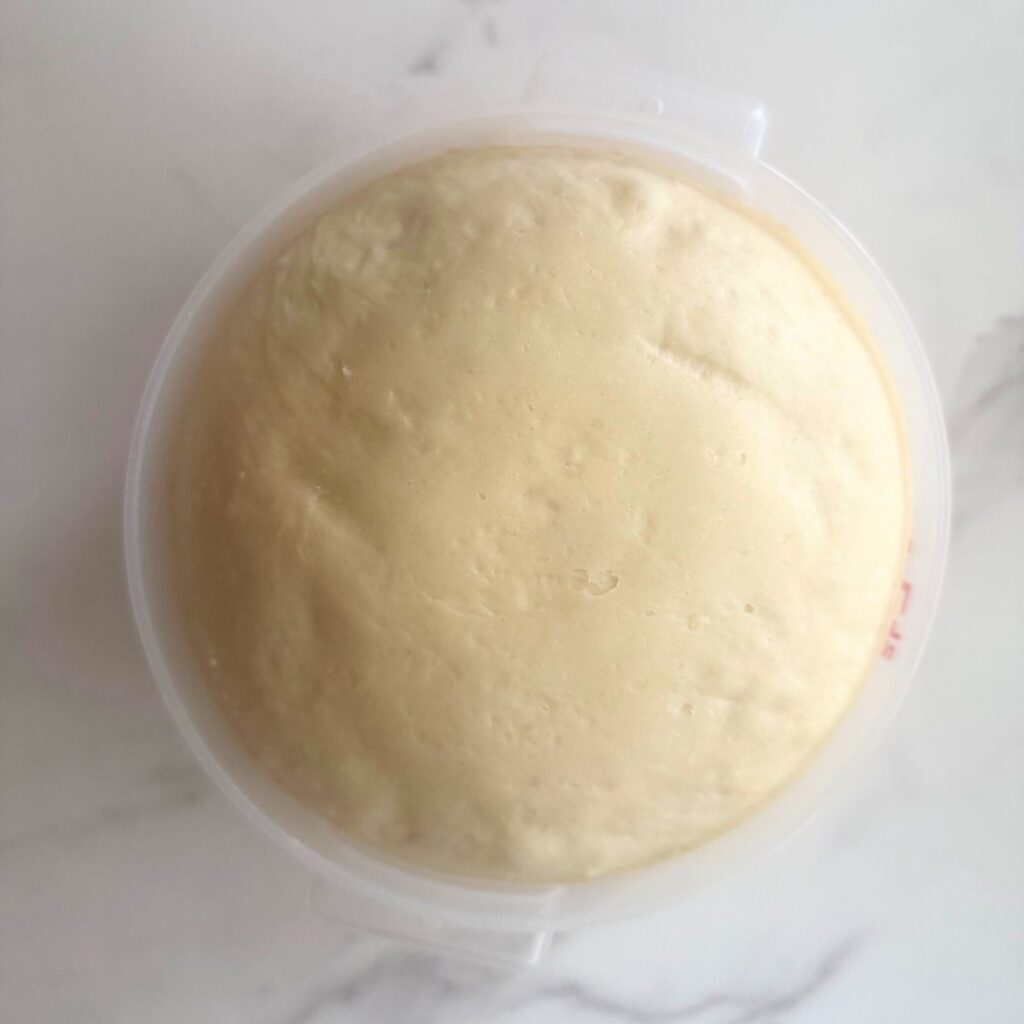
Step 2: Place the dough in a medium-sized bowl or 2-quart straight edge container. Let the dough rise covered overnight in a warm spot (ideally 70℉-75℉) for 8-12 hours until doubled in size.
The next morning:
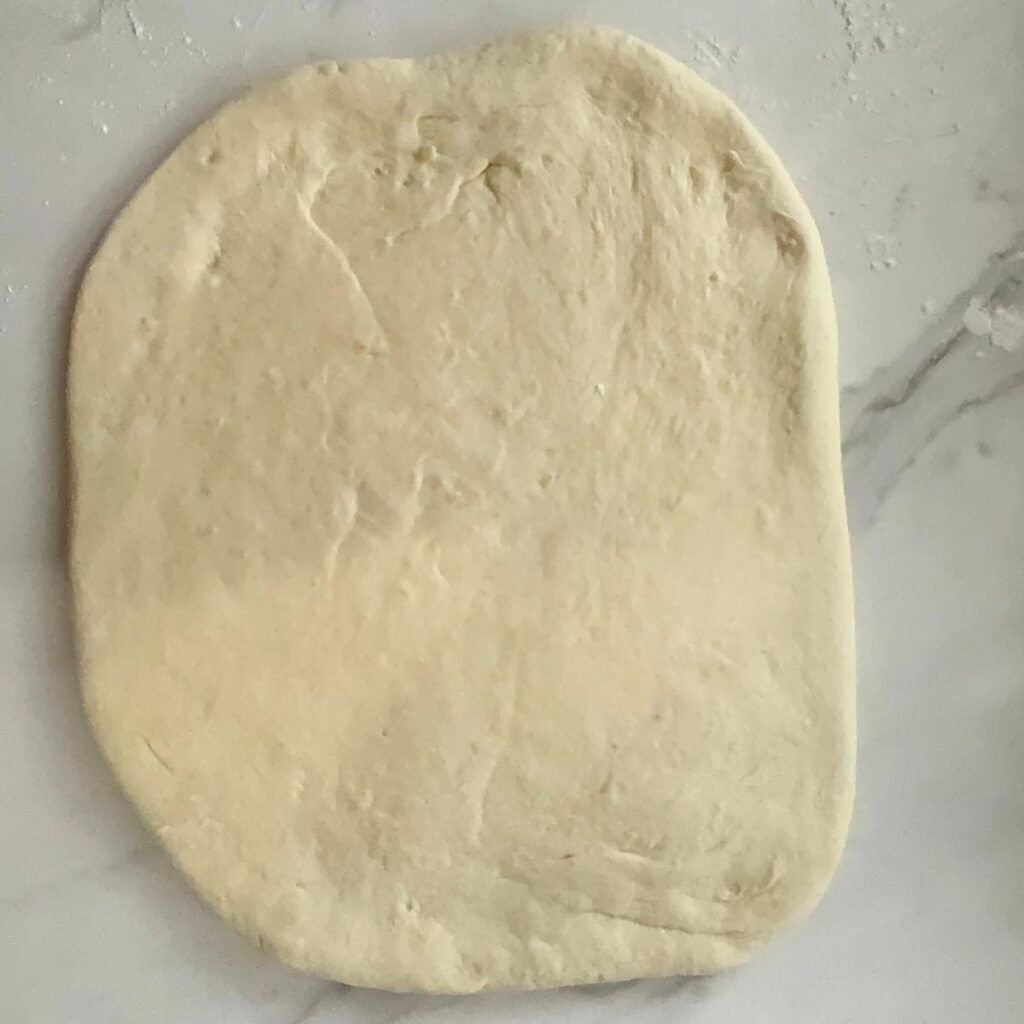
Step 3: Once the dough is doubled, punch down the dough and roll it out into a large rectangle (about 12″ x 18″) on a lightly floured surface with a rolling pin.
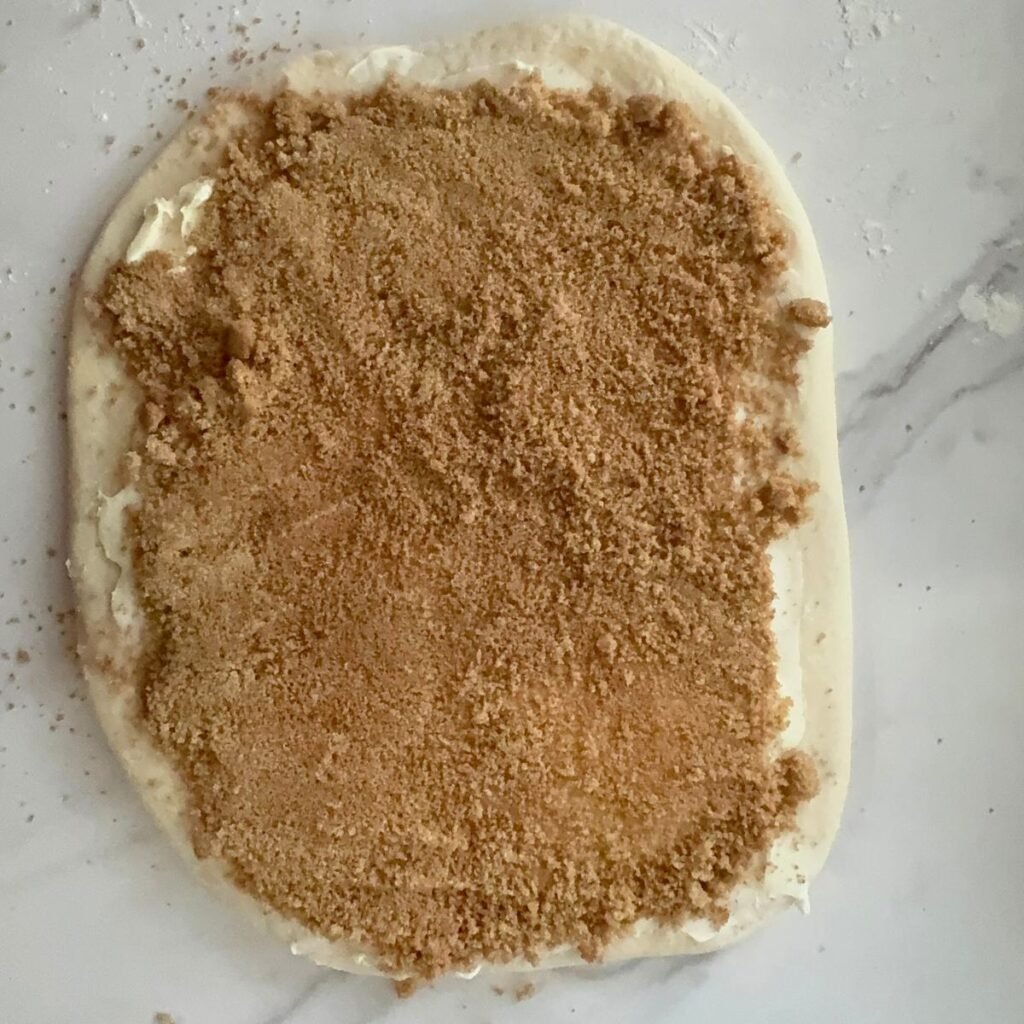
Step 4: Spread the softened butter all over the dough. Mix together the cinnamon and brown sugar together in a small bowl. Sprinkle overtop the butter.
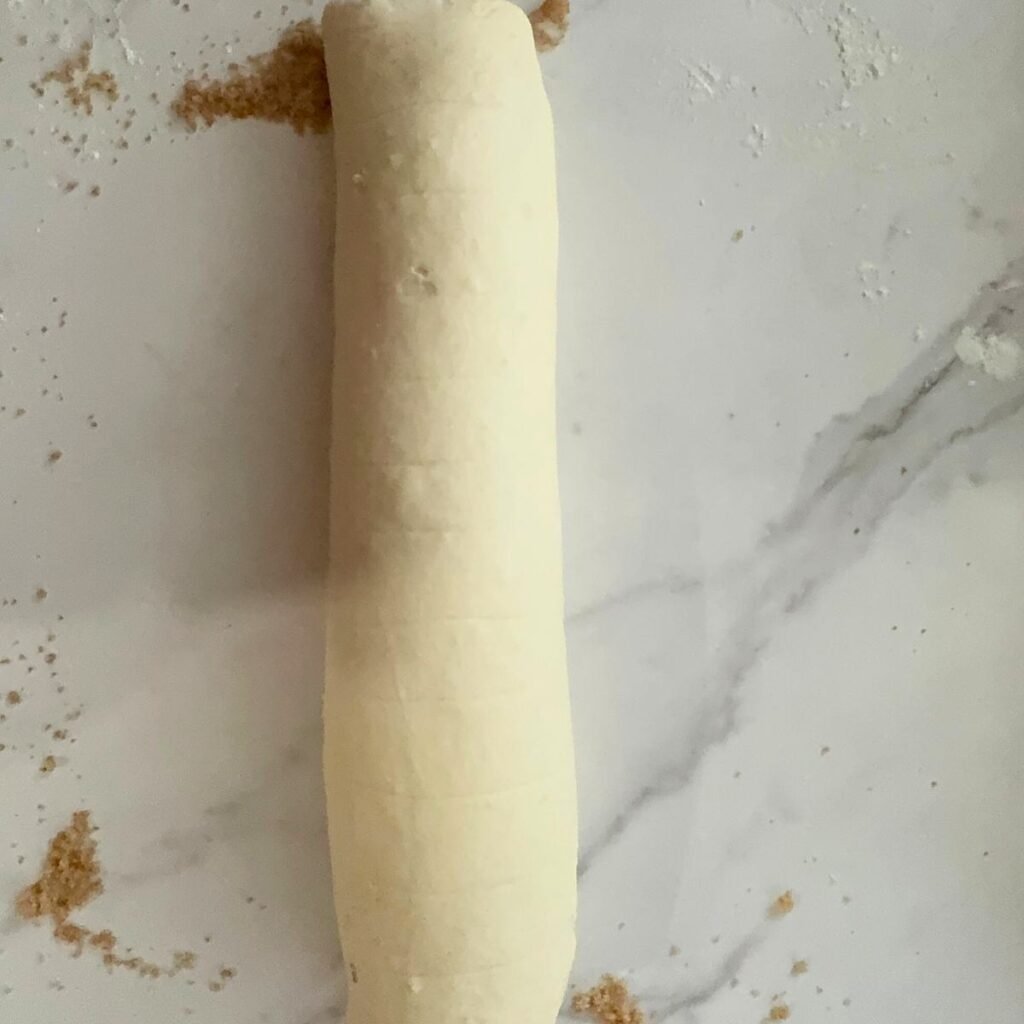
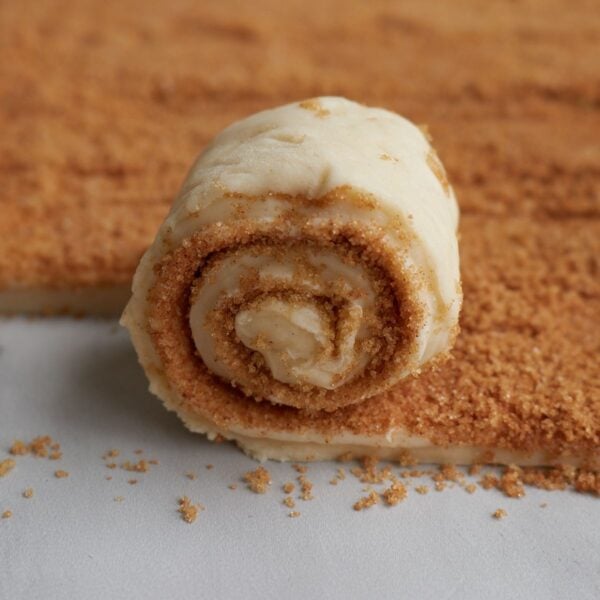
Step 5: Roll up the dough tightly and using a large piece of dental floss or a bench scraper, cut the roll into 12 even slices.
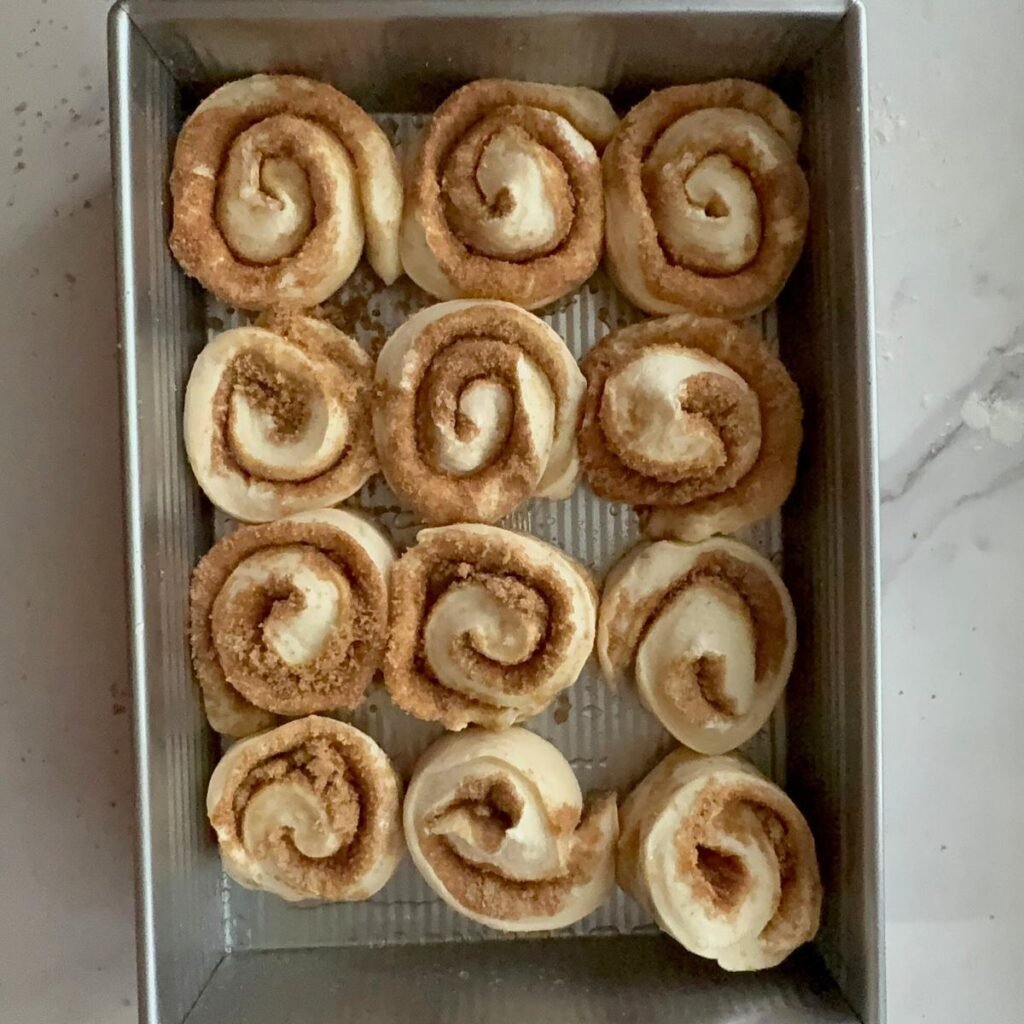
Step 6: Place the rolls in a greased 9×13 pan.
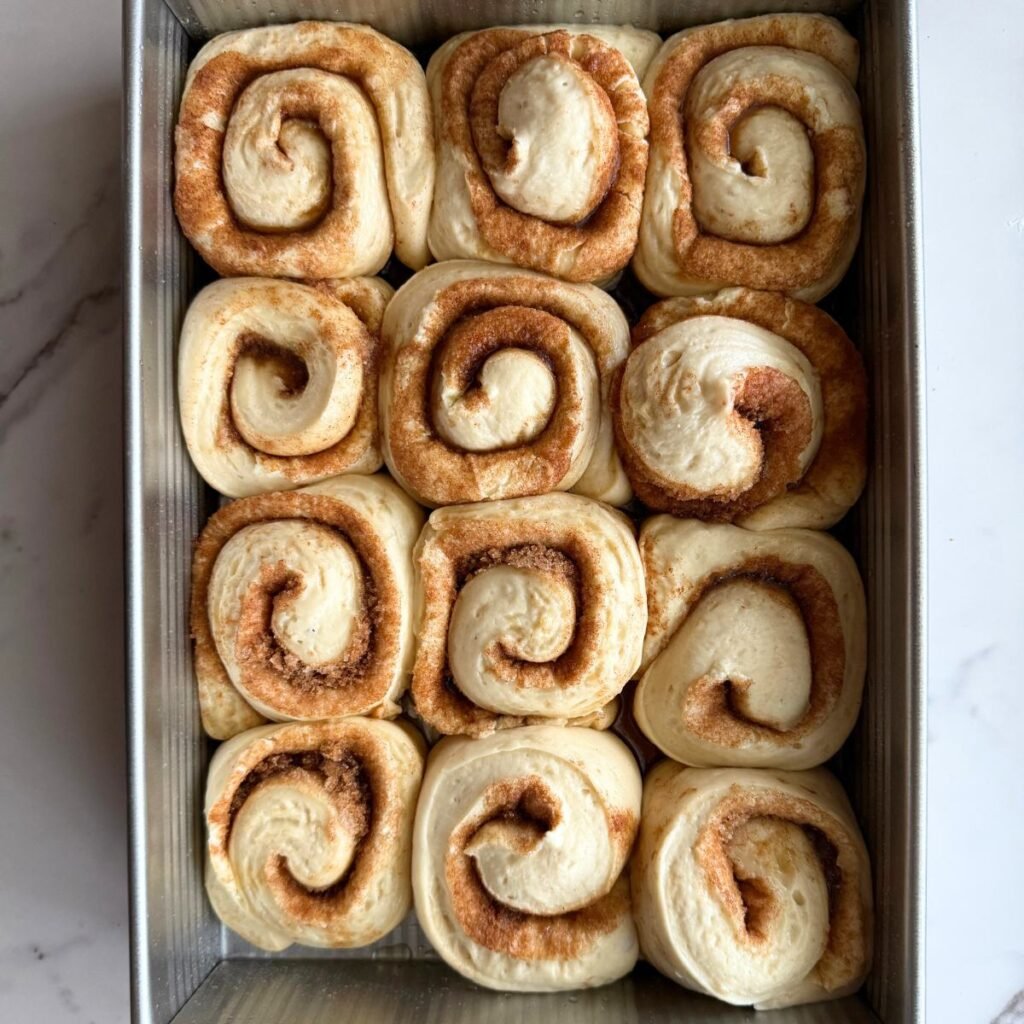
Step 7: Cover and let the rolls rise in a warm spot for an additional 1-2 hours until puffy.
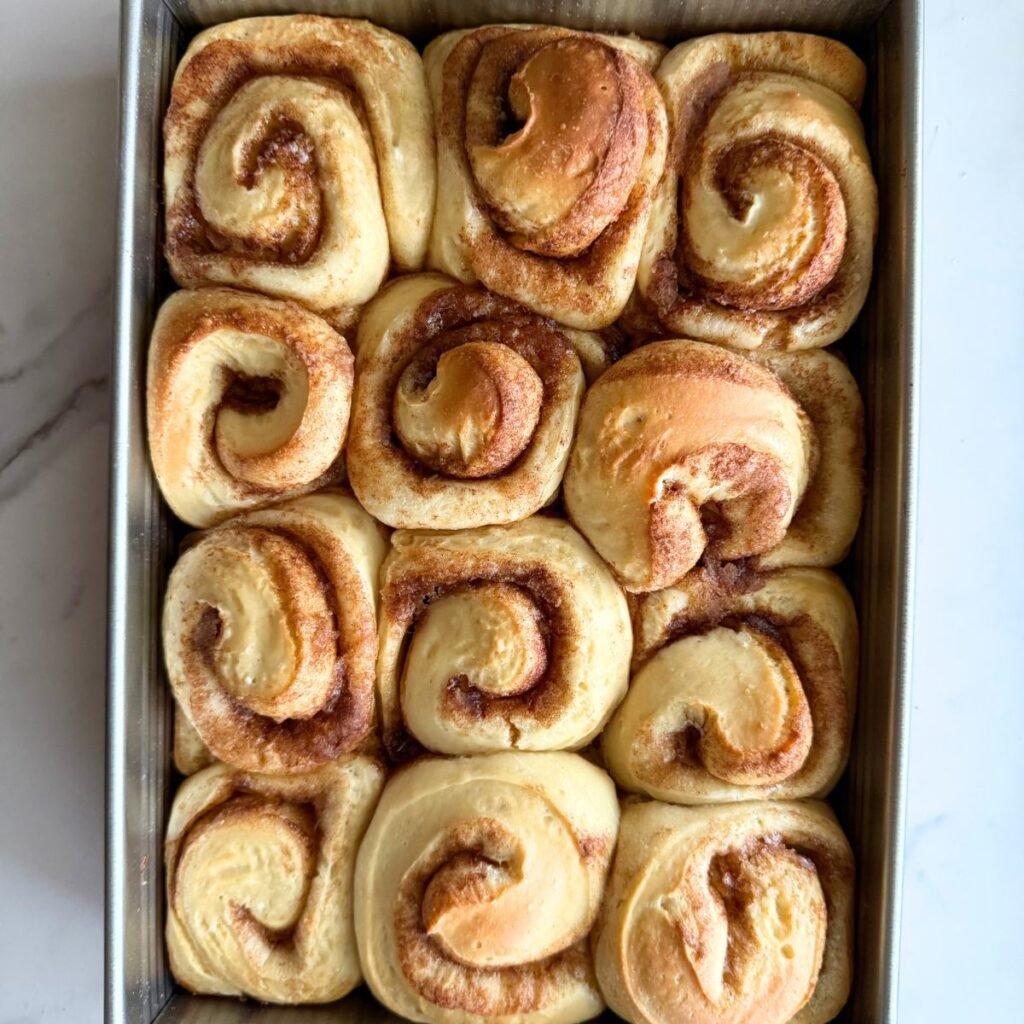
Step 8: Preheat the oven to 350℉ and bake for 25-30 minutes until lightly browned.
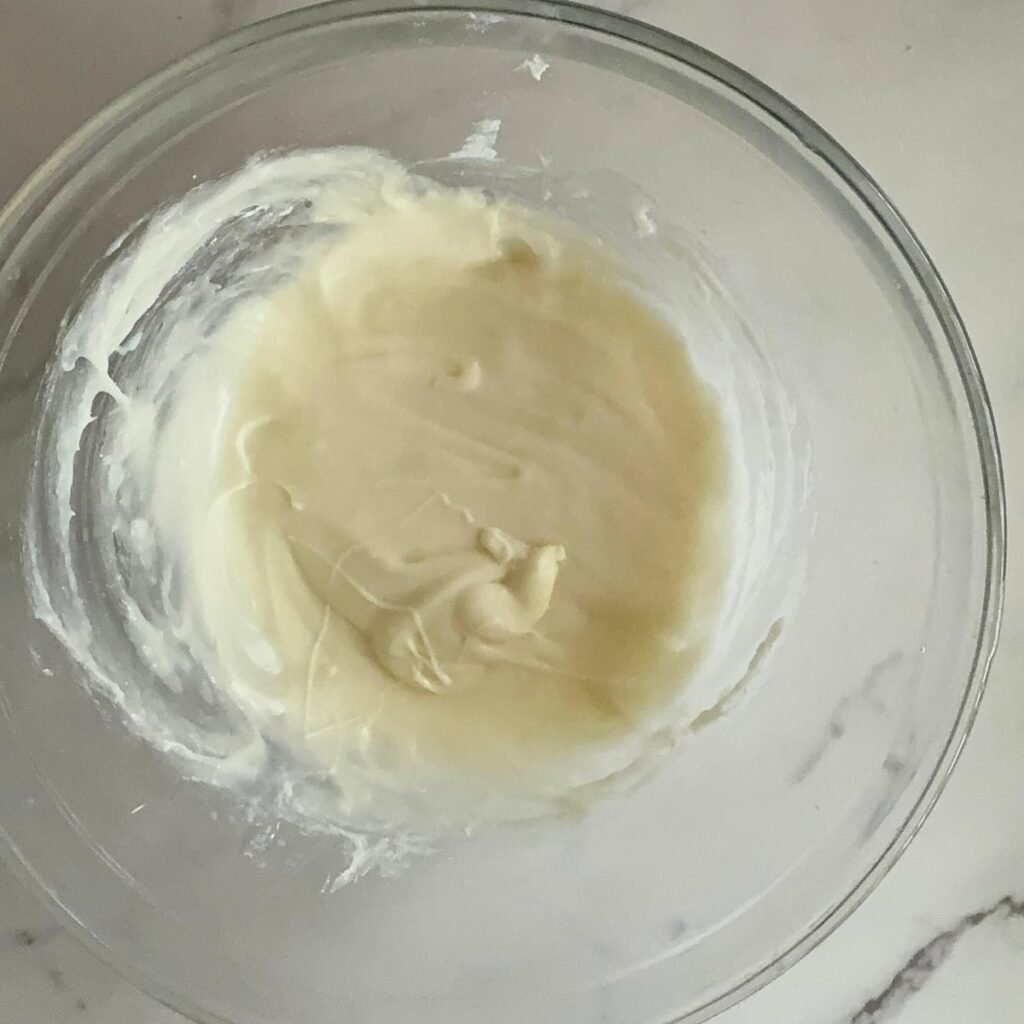
Step 9: Make the cream cheese icing by beating together the softened butter and softened cream cheese until smooth. Add the salt, powdered sugar, and vanilla until combined. Slowly add 1 tablespoon at a time of the milk until your desired consistency is reached.
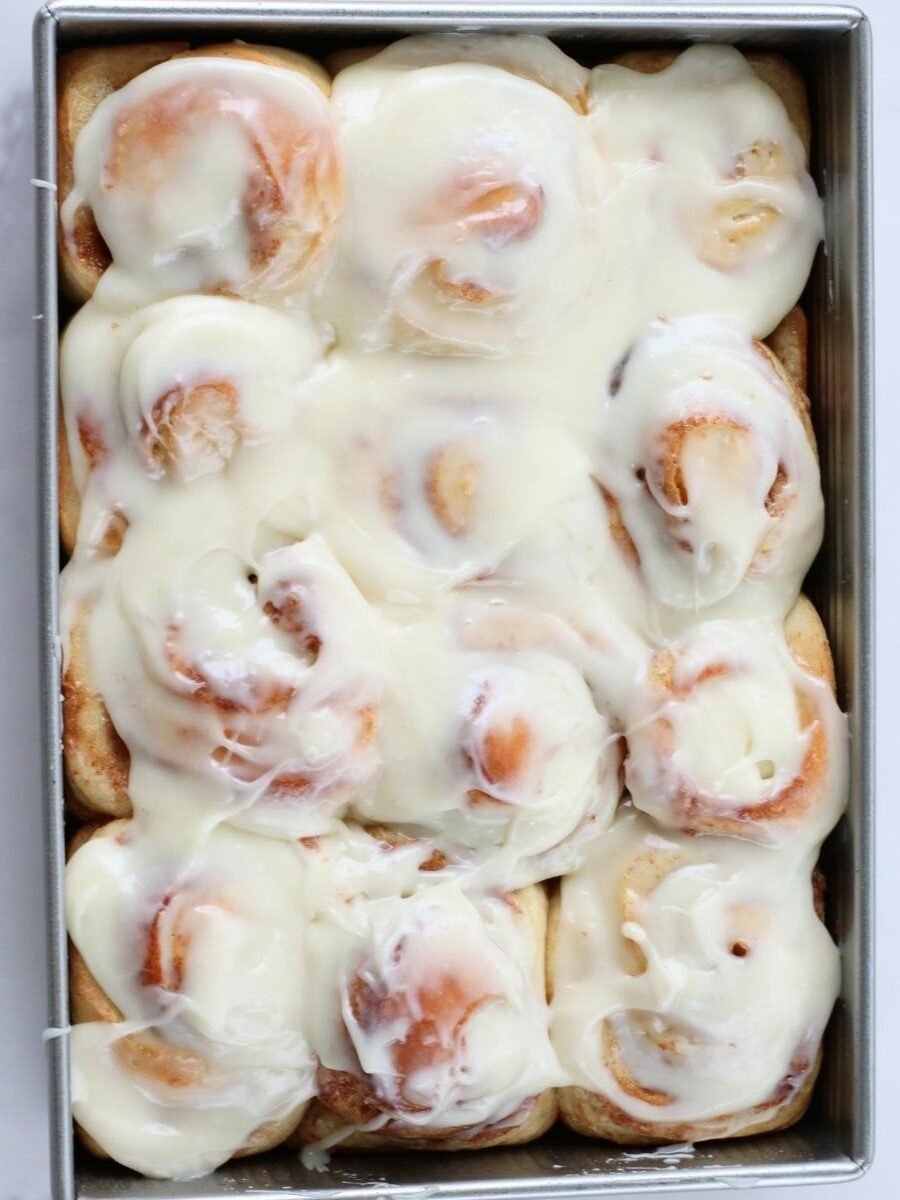
Step 10: Let the rolls cool for 5-10 minutes after baking and then cover with the icing. Serve warm and enjoy!
Can Cinnamon Rolls be made ahead of time?
Cinnamon rolls can definitely be made ahead of time which can be especially helpful for a busy holiday morning. Here are a few options but note that if you leave the dough in the fridge overnight the rolls will have more tang as they are fermenting for a longer period of time.
- Bake directly from fridge- This option can work but if your rolls overproof they may not be as light and fluffy when baking. Don’t leave the rolls longer than 12 hours in the fridge. For this method, feed your starter in the evening two nights prior to when you want to eat them. Then make the dough the morning prior. Follow all the instructions for the first and second rise. Once the rolls have almost doubled in size in the pan, place in the fridge overnight. Then, the next morning, remove the rolls from the fridge and let them sit at room temperature while the oven preheats before baking.
- Bake & Reheat– This is a great option because you don’t have to worry about the rolls over proofing in the fridge or even worry about baking the next day. For this method, feed your starter in the evening 2 nights prior and make the dough the morning before you want the rolls. I recommend starting as soon as you get up. Go through the entire process and finish the night by baking the rolls. Cover with foil and leave on the counter. In the morning, preheat the oven to 350F and brush the tops with just a little bit of water to rehydrate them. Cover and bake for 8-10 minutes or until warm and then add your icing.
- Final Rise & Bake- If you prefer to have the rolls freshly baked the morning of I find this is a good option. For this method, feed your starter in the evening 2 nights prior and make the dough in the late morning/early afternoon the day before you want the rolls. Once the dough has doubled, shape the rolls as normal and place into the fridge. Or if you prefer to assemble in the morning, refrigerate the dough after it doubles. Then in the morning, shape the rolls. I don’t recommend leaving the rolls longer than 12 hours as you don’t want them to overproof. In the morning place the rolls in a warm spot to rise and get puffy before baking. Note the rolls may take a little longer to rise since the dough will need to come to room temperature.
Sourdough Cinnamon Roll Recipe Tips
- Leave the dough to rise in a warm spot between 70-75 degrees Fahrenheit. See the frequently asked questions above on ways to warm up your dough if your house is cooler.
- If your kitchen is warmer than 75 degrees Fahrenheit you can either leave the dough for less time or reduce the amount of starter to 150 grams.
- Ensure your starter is strong and doubled in size when making this dough. Using a weak starter will result in a dough that won’t rise.
- Use unflavored dental floss to slice the dough into 12 clean pieces without squishing it or losing any filling. Simply slide the floss underneath the dough, cross the ends over the top, and pull in opposite directions to make a clean, even cut.
Sample baking schedule
For this recipe, you need to use a sourdough starter that is active and bubbly. For that reason, you will need to give your sourdough starter time to double before making your cinnamon roll dough.
Here is an example schedule for your timeline for baking your cinnamon rolls. The timeline can depend on the temperature and the activity of your starter, so your time may vary. This schedule assumes the dough temperature is in the low to mid 70’s.
| Step | Time |
| Feed sourdough starter a 1:5:5 ratio (20 grams starter: 90 grams flour: 90 grams water) | Day one: 9 am |
| Mix dough together First rise | Day one: 9 pm |
| Roll out dough and add filling Second rise | Day two: 7 am |
| Bake the cinnamon rolls and make the icing | Day two: 8 am |
How to Store Overnight Sourdough Cinnamon Rolls
If you are storing the rolls without the icing, they can be stored on the counter for 1-2 days in an airtight container. To make them last longer, you’ll want to store them in the fridge. If the cinnamon rolls have icing then they should be stored in the fridge and can last up to 5-7 days. To reheat the cinnamon rolls place them in the microwave for 30 seconds or until warm and gooey.
Can I freeze cinnamon rolls?
I recommend freezing the cinnamon rolls without the icing. Place them in a freezer-safe container or bag and store for up to 3 months. If don’t want to pull them out all at once put parchment paper in between the rolls.
When you are ready to eat them, thaw them the night before and reheat in the oven at 350°F or microwave until warmed.
Frequently Asked Questions
Enriched doughs, meaning doughs with fats added, typically have a harder time rising, which is why rise times are usually much slower. If after your dough sits all night it has not risen at all it is most likely one of two things.
Your kitchen was cold so the dough just will take longer to rise. Especially in colder months, I recommend placing the dough in a draft-free warm spot like the oven with the light on or microwave or near a vent. You can also use a temperature-regulated dough mat (use code country10 for 10% off) or proofing box to keep it warm.
Two, your sourdough starter was not strong enough. You want to make sure your starter is healthy and active and consistently doubling in size with each feeding before using it in a recipe.
Yes it will be fine left overnight! The good bacteria in your sourdough starter will fight off any unwanted bacteria.
Yes! If you prefer to add heavy cream to your rolls before baking to add extra goodness simply pour 2/3 cup on top right before baking.
If you would like a quicker rise time, you can use yeast to speed up the process. Use sourdough discard instead of active starter and add in 2¼ teaspoons (7 grams) of instant yeast. The first rise will take 1-2 hours, and then the second rise will take about 1-2 hours as well.
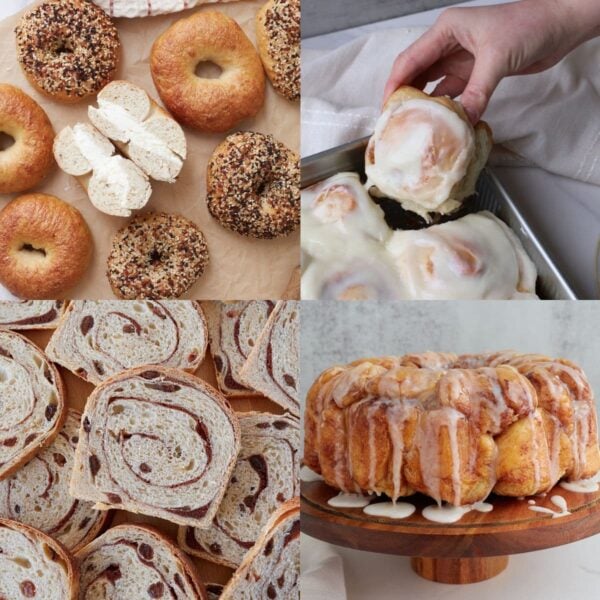
More sourdough Breakfast Recipes
Sourdough Breakfast Recipes
18 Must-Try Overnight Sourdough Breakfast Recipes
Sourdough Discard Recipes
Sourdough Discard Bagels (ready in under 2 hours)

Sourdough Breakfast Recipes
Homemade Sourdough Pop Tarts

Sourdough Breakfast Recipes
30 Must-Try Sourdough Discard Breakfast Recipes
Tried this Sourdough Cinnamon Rolls or another recipe from the site? I’d love to hear about it! Drop a star rating and share your thoughts in the comments—can’t wait to see what you’re baking!

Sourdough Starter Cinnamon Rolls
Ingredients
Cinnamon Roll Dough
- 310 grams milk, warm, 1 ¼ cup
- 57 grams butter, unsalted and melted, ¼ cup
- 1 large egg, 50 grams
- 100 grams sugar, ½ cup
- 5 grams salt, 1 teaspoon
- 200 grams active sourdough starter, scant 1 cup
- 650 grams all-purpose flour, 4 ⅔ cup
Cinnamon-Sugar Filling
- 220 grams brown sugar, 1 cup
- 113 grams butter, unsalted and softened, ½ cup
- 12 grams cinnamon, 1 ½ Tablespoons
Cream Cheese Frosting
- 56 grams butter, unsalted and softened, ¼ cup
- 112 grams cream cheese, softened, ½ cup
- 240 grams powdered sugar, 2 cups
- ¼ teaspoon salt,
- 2 grams vanilla extract , ½ teaspoon
- 20-30 grams milk, 2-3 Tablespoons
Instructions
The Night Before
- In the bowl of a stand mixer or large mixing bowl add the milk, melted butter, egg, sugar, salt, active and bubbly sourdough starter, and all-purpose flour. 310 grams milk, 57 grams butter, 1 large egg, 100 grams sugar, 5 grams salt, 200 grams active sourdough starter, 650 grams all-purpose flour
- Option 1- Mix in a stand mixer: Mix the dough with a dough hook attachment on 1-2 speed in a stand mixer for 3-5 minutes until the dough pulls away from the bowl and forms a smooth, soft ball.
- Option 2- Mix in a bowl: Mix the dough with a danish dough whisk or your hands until the dough begins to come together. Once you can no longer mix it in the bowl, place the dough on a lightly floured work surface and knead for about 5 minutes or until the dough forms a soft, smooth ball.
- Place the dough in a medium-sized bowl or 2-quart straight edge container. Let the dough rise covered overnight in a warm spot (ideally 70℉-75℉) for 8-12 hours until doubled in size.
The Next Morning
- Once the dough is doubled, punch down the dough and roll it out into a large rectangle (about 11" x 17") on a lightly floured surface.
- Spread the softened butter all over the dough. Mix together the cinnamon and brown sugar together in a small bowl. Sprinkle overtop the butter. 113 grams butter, 12 grams cinnamon, 220 grams brown sugar
- Roll up the dough tightly and using a large piece of dental floss or a bench scraper, cut the roll into 12 even slices.
- Place the rolls in a greased 9×13 inch pan. Cover and let the rolls rise in a warm spot for an additional 1-2 hours until puffy.
- Preheat the oven to 350℉ and bake for 25-30 minutes until lightly browned.
- Make the cream cheese icing by beating together the softened butter and softened cream cheese until smooth. Add the salt, powdered sugar, and vanilla until combined. Slowly add 1 tablespoon at a time of the milk until your desired consistency is reached.56 grams butter, 112 grams cream cheese, 240 grams powdered sugar, ¼ teaspoon salt, 2 grams vanilla extract , 20-30 grams milk
- Let the rolls cool for 5-10 minutes and then cover with the icing.
Video
Notes
Pro tips:
- Leave the dough to rise in a warm spot between 70-75 degrees Fahrenheit. See the frequently asked questions above on ways to warm up your dough if your house is cooler.
- If your kitchen is warmer than 75 degrees Fahrenheit you can either leave the dough for less time or reduce the amount of starter to 150 grams.
- Ensure your starter is strong and doubled in size when making this dough. Using a weak starter will result in a dough that won’t rise.
How to make cinnamon rolls ahead of time:
- Bake & Reheat– This is a great option because you don’t have to worry about the rolls over proofing in the fridge or even worry about baking the next day. For this method, feed your starter in the evening 2 nights prior and make the dough the morning before you want the rolls. I recommend starting as soon as you get up. Go through the entire process and finish the night by baking the rolls. Cover with foil and leave on the counter. In the morning, preheat the oven to 350F and brush the tops with just a little bit of water to rehydrate them. Cover and bake for 8-10 minutes or until warm and then add your icing.
- Final Rise & Bake- If you prefer to have the rolls freshly baked the morning of I find this is a good option. For this method, feed your starter in the evening 2 nights prior and make the dough in the late morning/early afternoon the day before you want the rolls. Once the dough has doubled, shape the rolls as normal and place into the fridge. Or if you prefer to assemble in the morning, refrigerate the dough after it doubles and then shape in the morning. I don’t recommend leaving the rolls longer than 12 hours as you don’t want them to overproof. In the morning place the rolls in a warm spot to rise and get puffy before baking. Note the rolls may take a little longer to rise since the dough will need to come to room temperature.
- Bake directly from fridge- This option can work but if your rolls overproof they may not be as light and fluffy when baking. Don’t leave the rolls longer than 12 hours in the fridge. For this method, feed your starter in the evening two nights prior to when you want to eat them and make the dough the morning prior. Follow all the instructions for the first and second rise and then once the rolls have almost doubled in size in the pan, place in the fridge overnight. Then, the next morning, remove the rolls from the fridge and let them sit at room temperature while the oven preheats before baking.
Nutrition
Nutrition information is automatically calculated, so should only be used as an approximation.


Can you use bread flour instead of all purpose flour?
Yeah that’s fine!
I made these and they turned out really sour tasting. It was quite warm in my house so do you think that could have caused this? They rose beautifully and turned out amazing but way too sour!
If your house is pretty warm the dough could have started overproofing, leading to a more sour roll as these typically are not that sour. If your house is really warm at night, you can cut down the amount of starter to closer to 100 or 150 grams to slow the rise, or you can make these the same day by keeping the dough at about 80 degrees and letting the dough rise for about 4 hours.
Thanks! I’ll try again!
What if it doubles in size before the 8-12 hour mark and can you add heavy cream on top before baking ?
That can happen in summer when it’s warmer out. If you want to make them earlier you can or if you want to keep that timeline, I find using cool milk can help slow things down, you could also reduce the amount of starter to 175 grams to slow it down. And yes if you want to add heavy cream before baking you can!