This post may contain affiliate links . Read my full Disclosure Policy.


This quick Sourdough Discard Pie Crust is flaky, buttery, and bakes up a beautiful golden brown. I started with a family pie crust recipe and tested it over and over, making small tweaks and adding sourdough discard until it was full of buttery layers, held its shape and baked into the most delicious crust for all of your favorite fillings.
Save & Summarize
Pie crust used to intimidate me, and it took me way too long to finally try making it from scratch. But once I did, I realized it was so much easier than I expected, especially with a food processor, and it tastes so much better than store-bought crust.
To be honest, I’ve never been a big pie person, and since I never share a recipe unless I truly love it, I was a tough critic with this sourdough pie dough. I first tested it back in the fall and wasn’t happy with it, so I kept working at it until it was perfect. I even shared it with my pie-obsessed friends, and they loved how the crust was flaky, tender, and full of rich buttery flavor.
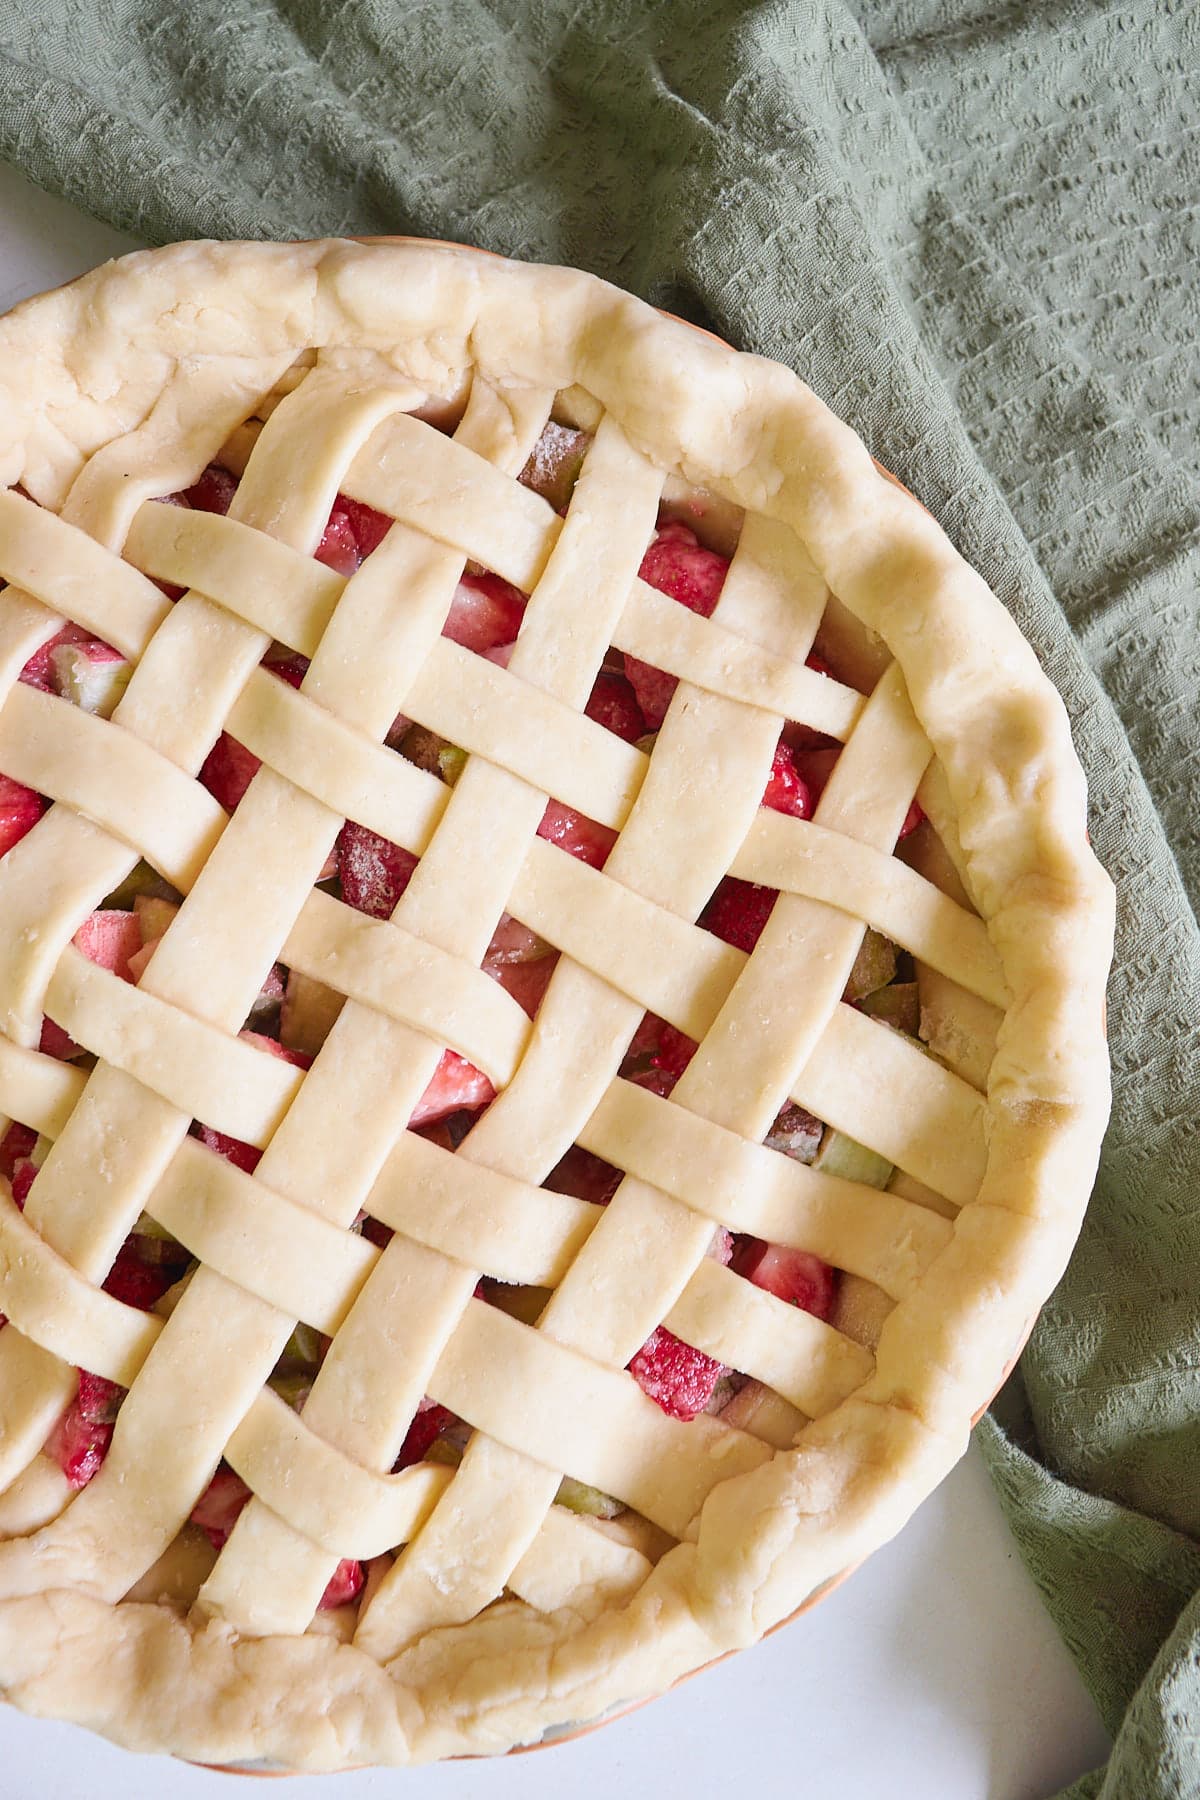
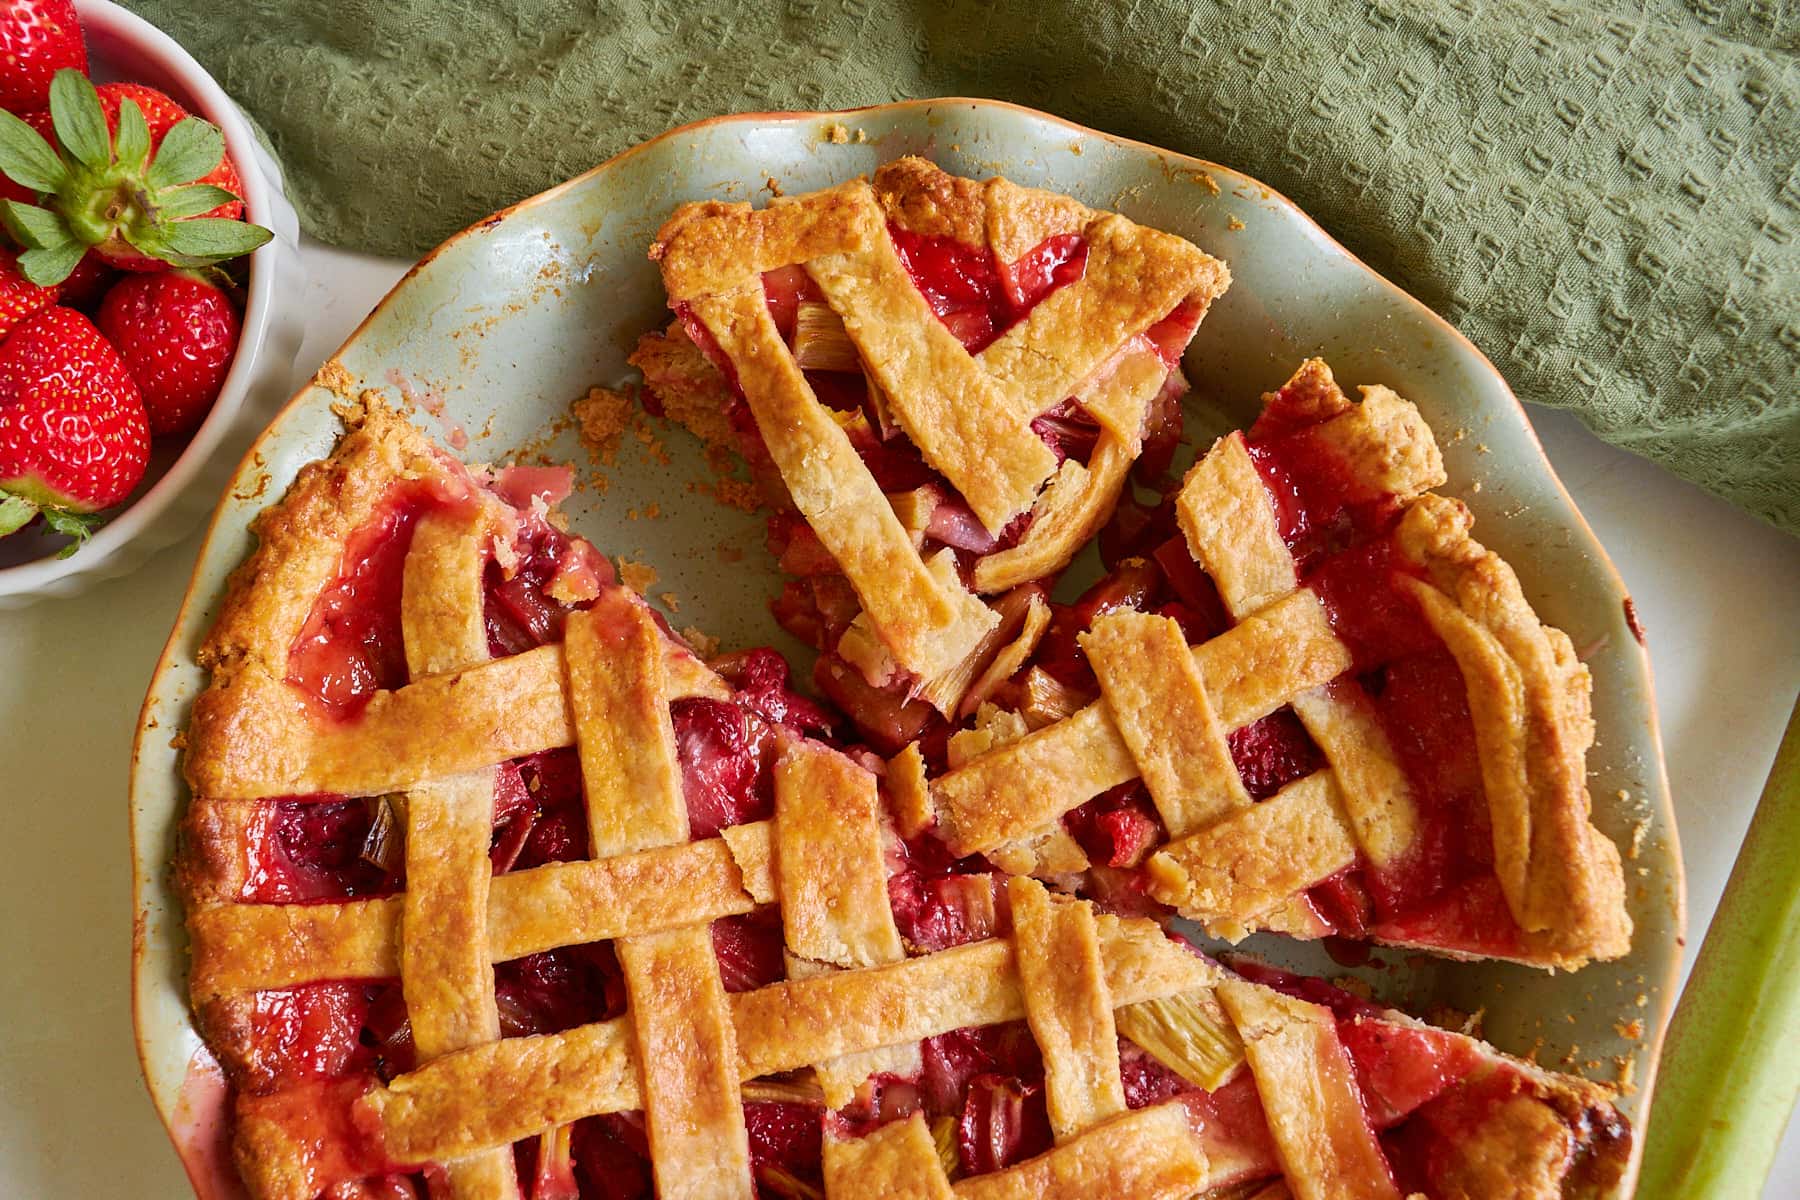
The filling that truly sealed the deal for me was this Sourdough Strawberry Rhubarb Pie. It was the pie that finally made me understand why people love pie so much.
Table of Contents
- Why You’ll Love This Sourdough Pie Crust Recipe
- Important ingredients and substitutions
- How to make Sourdough Pie Crust
- How to make a lattice top pie crust
- Sourdough Discard Pie Tips
- Troubleshooting Sourdough Pie Crust
- When & How to Blind Bake Sourdough Pie Crust
- Storage & Freezing Instructions
- Frequently Asked Questions
- More sourdough desserts
- Sourdough Discard Pie Crust Recipe
Why You’ll Love This Sourdough Pie Crust Recipe
- Made with butter – This recipe uses only butter, which gives the crust a rich, buttery flavor without needing any shortening, lard, or other specialty fats.
- Uses sourdough discard – Instead of water like traditional pie recipes, this one uses only discard. I love using discard instead because it is already cold in the fridge (a plus for my strawberry lemon sourdough scones too), so you don’t need to worry about using ice water.
- Quick and easy- This recipe uses a food processor to mix up this pie dough in minutes! I’ve also included instructions to make it by hand.
- Versatile – This Sourdough Pie Crust can be used for any pie recipe you’d like, such as fruit pie, cream pies, or even savory pies. It’s used in my Sourdough Pop Tart recipe, and you could even use this crust in my Sourdough Chicken Pot Pie recipe.
- Freezer and make-ahead friendly – This pie crust freezes really well. It can also be refrigerated for a couple days before baking, which is so helpful for busy times like Thanksgiving and Christmas.
Important ingredients and substitutions
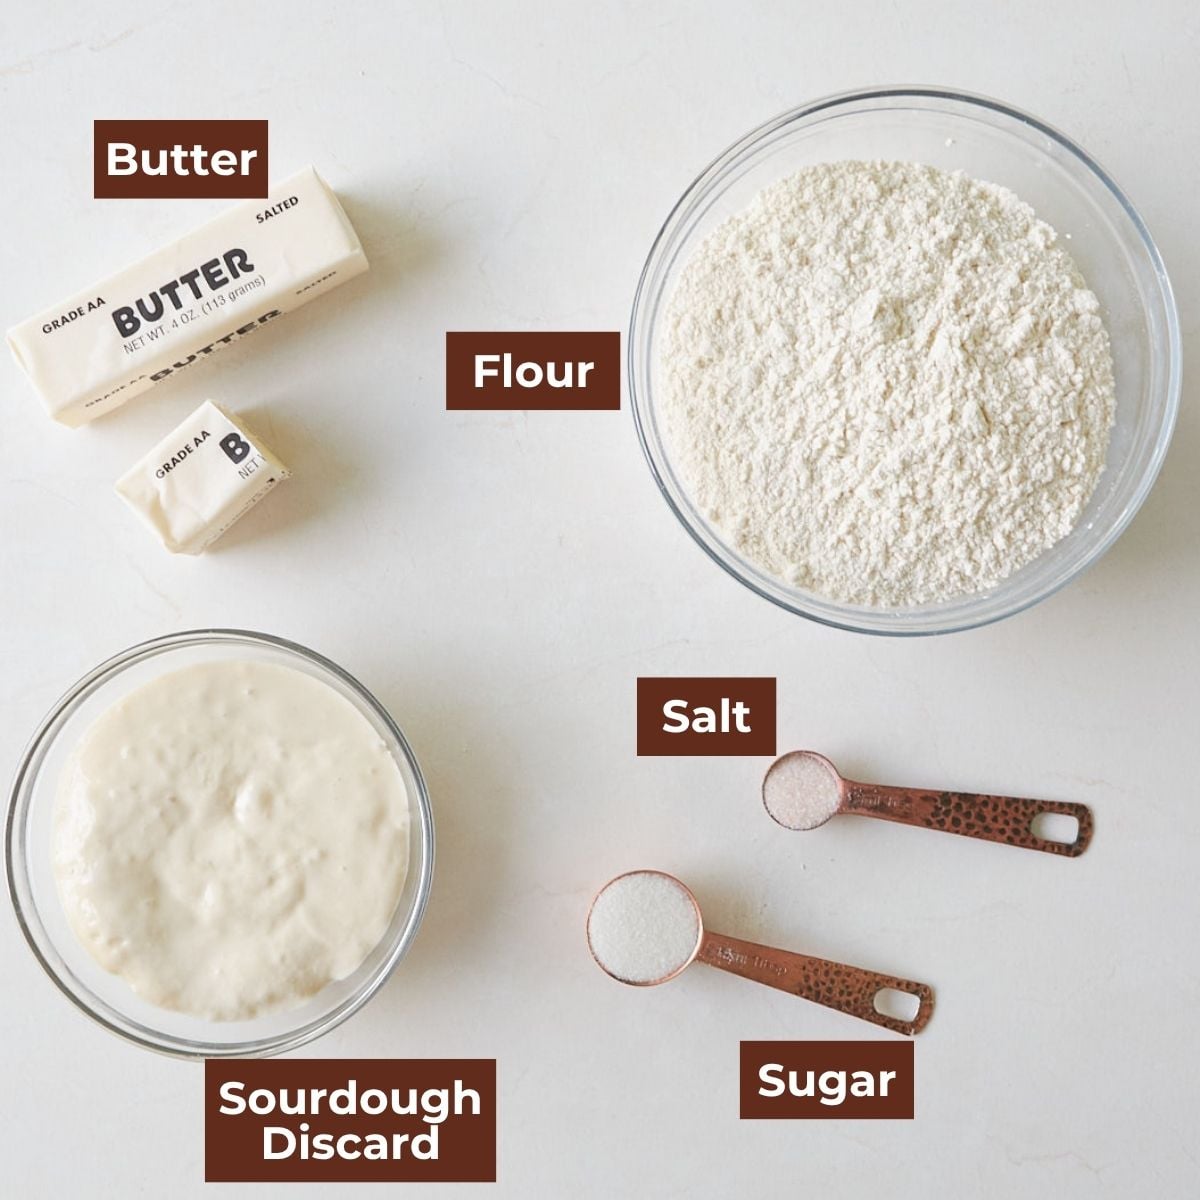
- Sourdough discard – Use very cold sourdough discard straight from the fridge to help keep the butter cold. The discard replaces the water used in traditional pie crust recipes and adds a subtle sourdough flavor. I recommend using 100% hydration discard, meaning it was fed with equal parts flour and water.
- Butter – Using very cold butter straight from the fridge is what creates flaky layers, just like it does in sourdough blueberry scones and sourdough biscuits. Either salted or unsalted will work for this recipe.
- Flour – I recommend using unbleached all-purpose flour.
See all the ingredients and amounts in the recipe card below.
How to make Sourdough Pie Crust
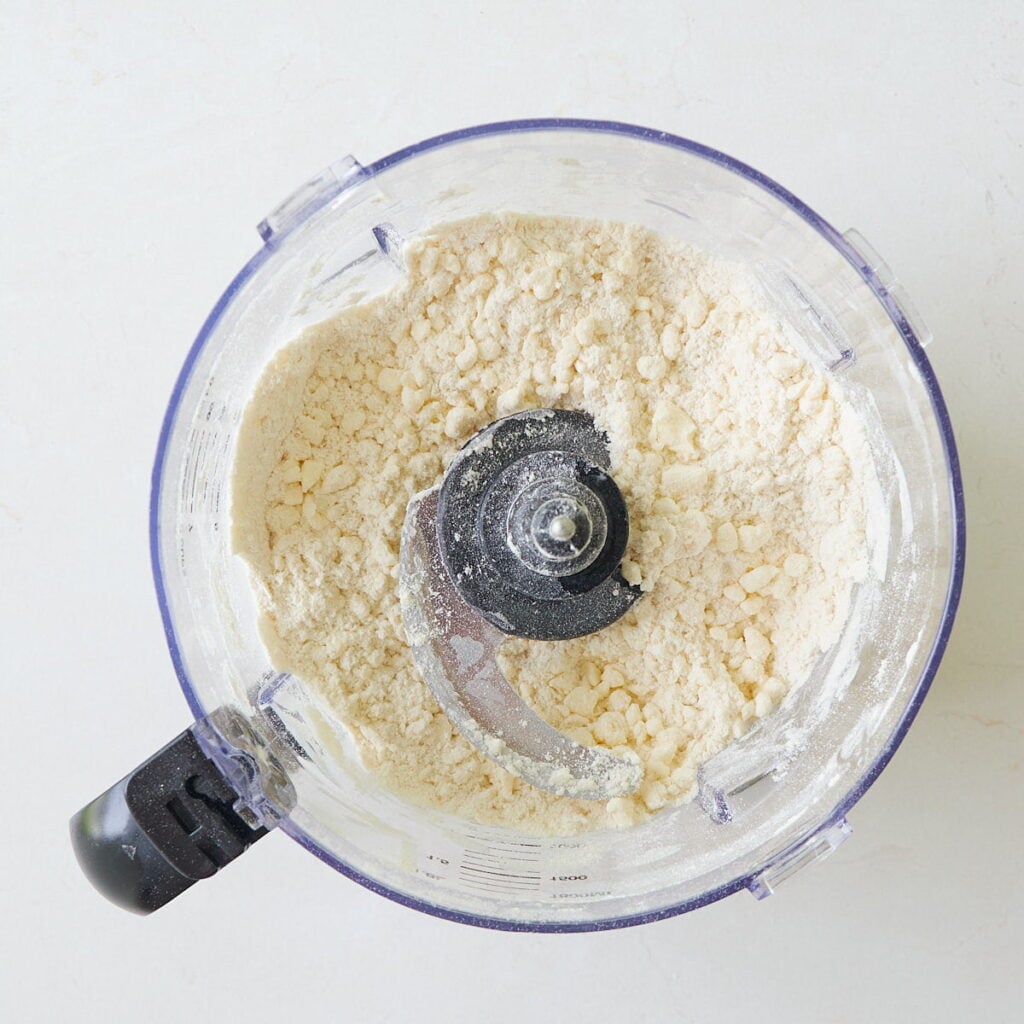
Step 2 – Add butter
Dice up the cold butter and scatter it on top. Pulse for about 10-15 seconds or until the butter is in pea-size pieces.
If you are mixing the dough by hand, you can either use a cheese grater to grate frozen butter into the dry mixture or you can dice the cold butter into the mix and use a pastry cutter to incorporate the butter.
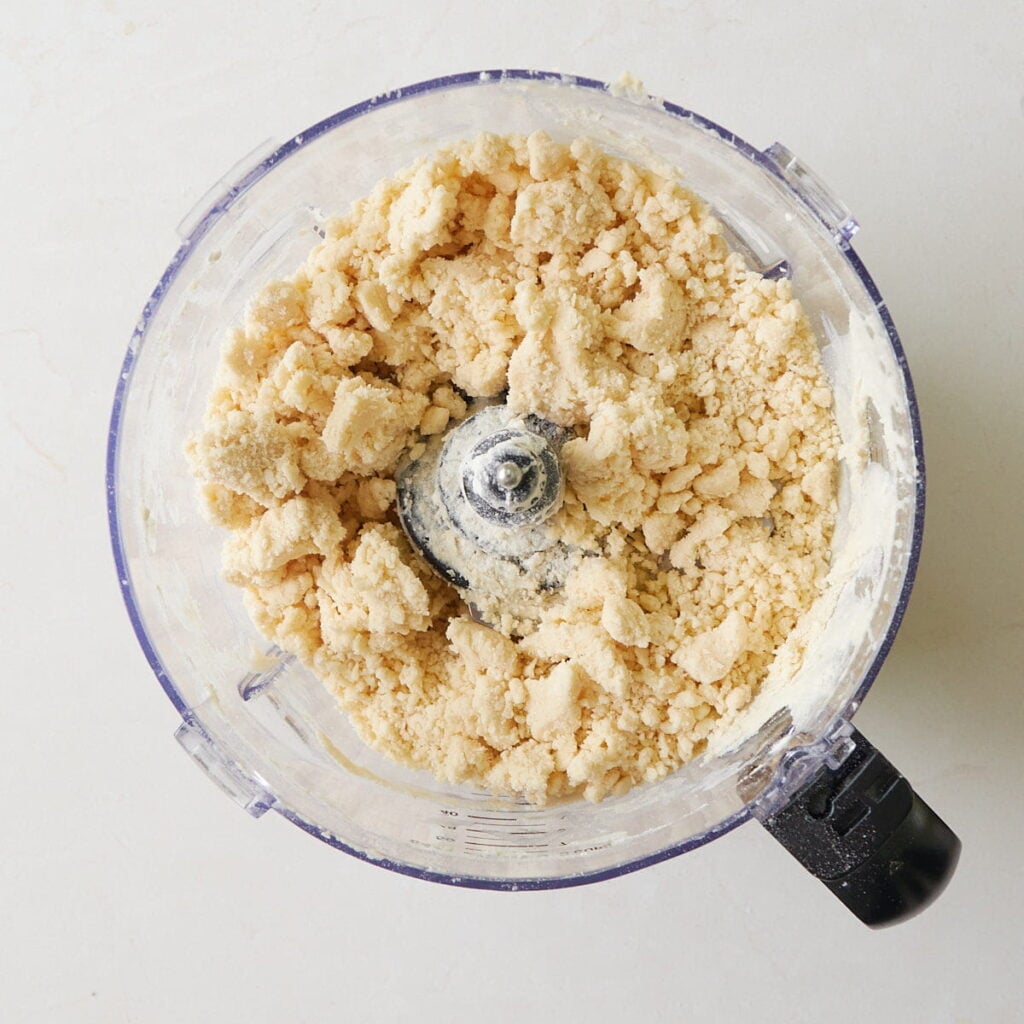
Step 3 – Add discard
Add the sourdough discard and cold water and pulse until it begins to cling to itself, about 20 seconds. It will still be a little dry, but if you press it together, it should hold together. If not, add one Tablespoon of ice-cold water at a time until it does.
If you are mixing by hand, add the discard and cold water and mix with a fork or Danish dough whisk until the dough begins to come together. It should hold together when pressed between your hands.
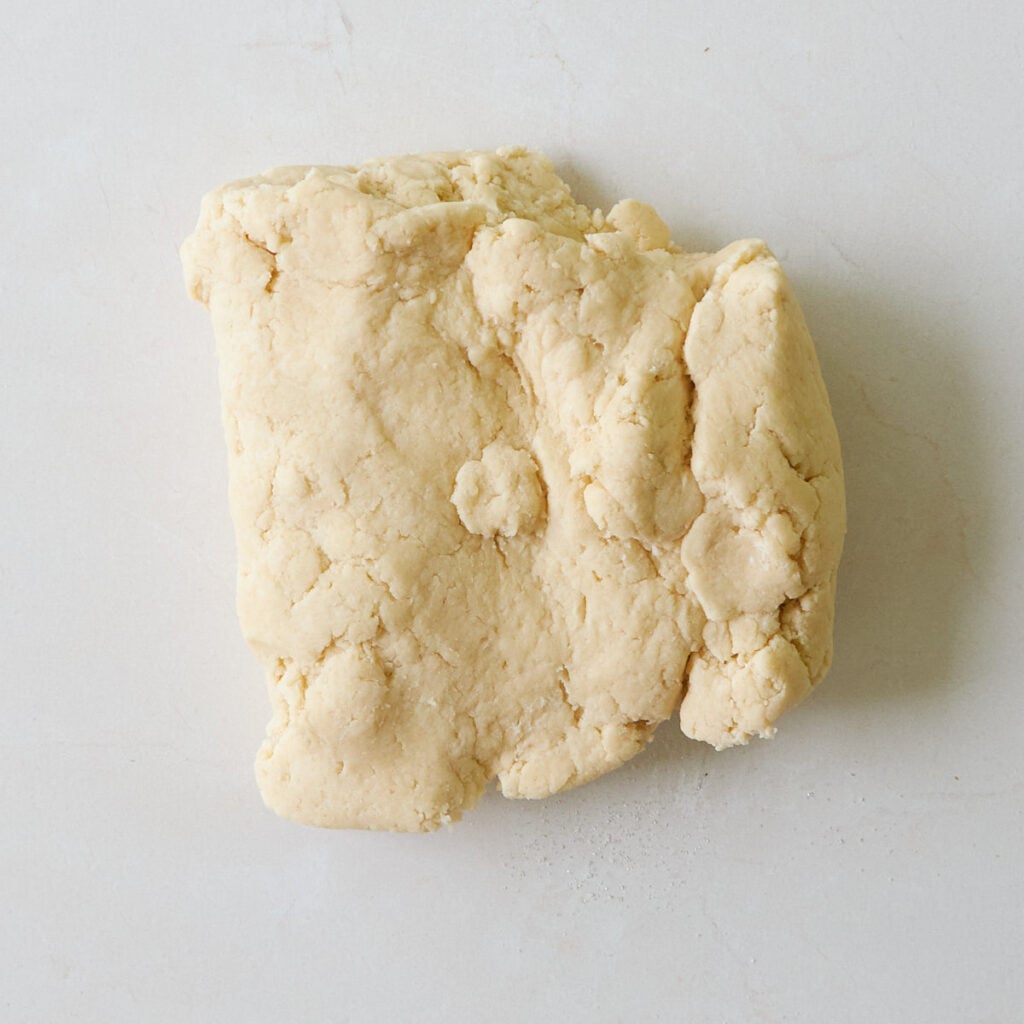
Step 4 – Turn out the dough
Turn the dough out onto a lightly floured surface and form it into a cohesive ball.
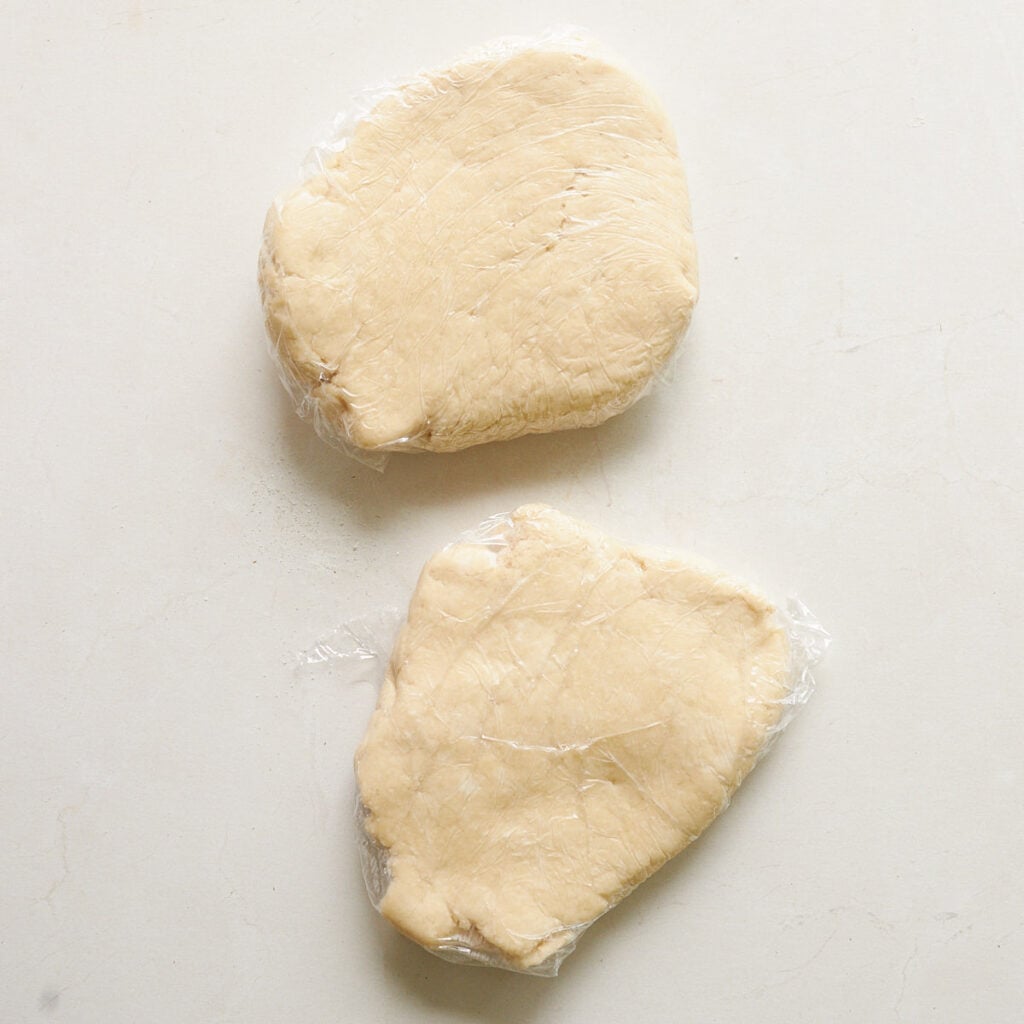
Step 5 – Chill
Divide the dough in half and press into 2 discs about ½ inch thick. Wrap the dough in plastic wrap and put it in the fridge for at least 30 minutes, or up to 4 days.
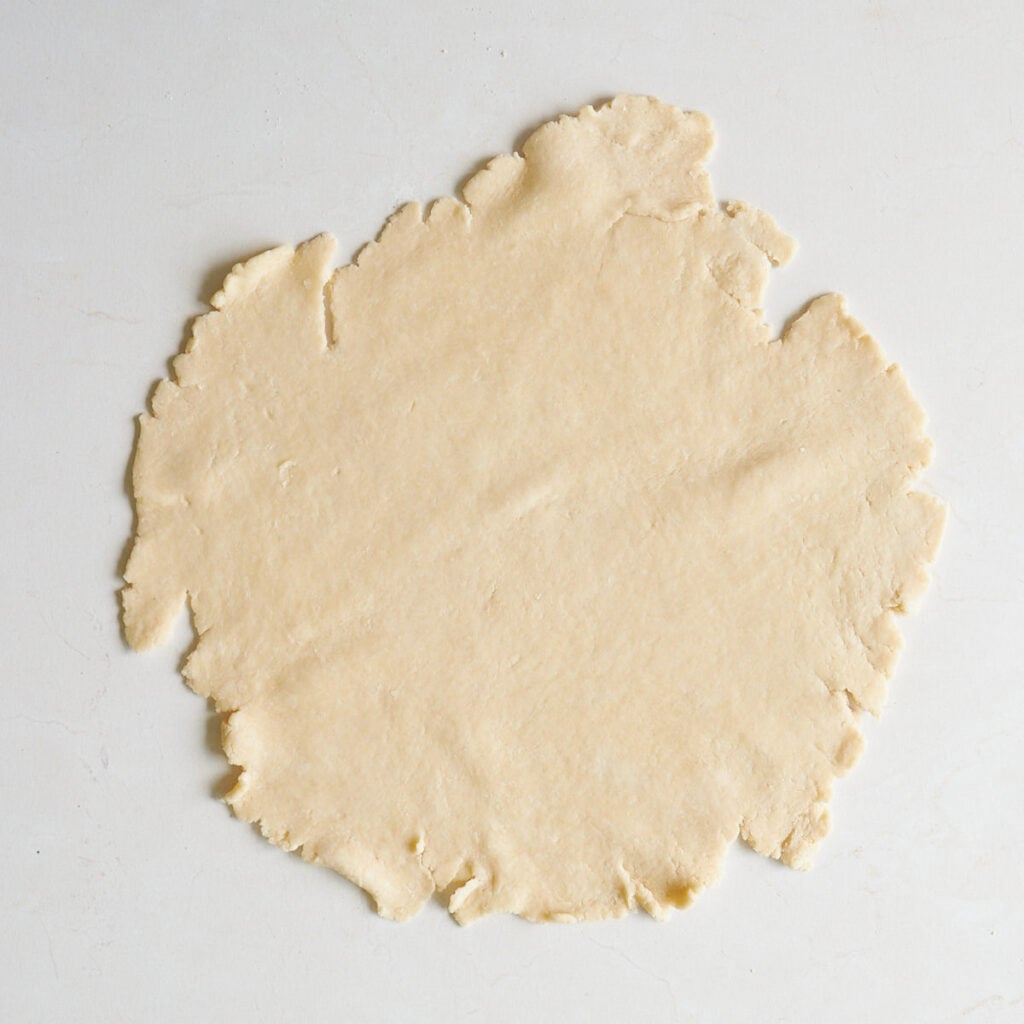
Step 6 – Roll out dough
On a lightly floured surface, roll out the dough with a rolling pin until it is 1–2 inches larger than your pie pan, about 12 inches wide and about ⅛-inch thick.
Tip: If your pie dough has been in the fridge for a long period of time, you will likely need to let it sit out for 5-10 minutes to make it easier to roll.
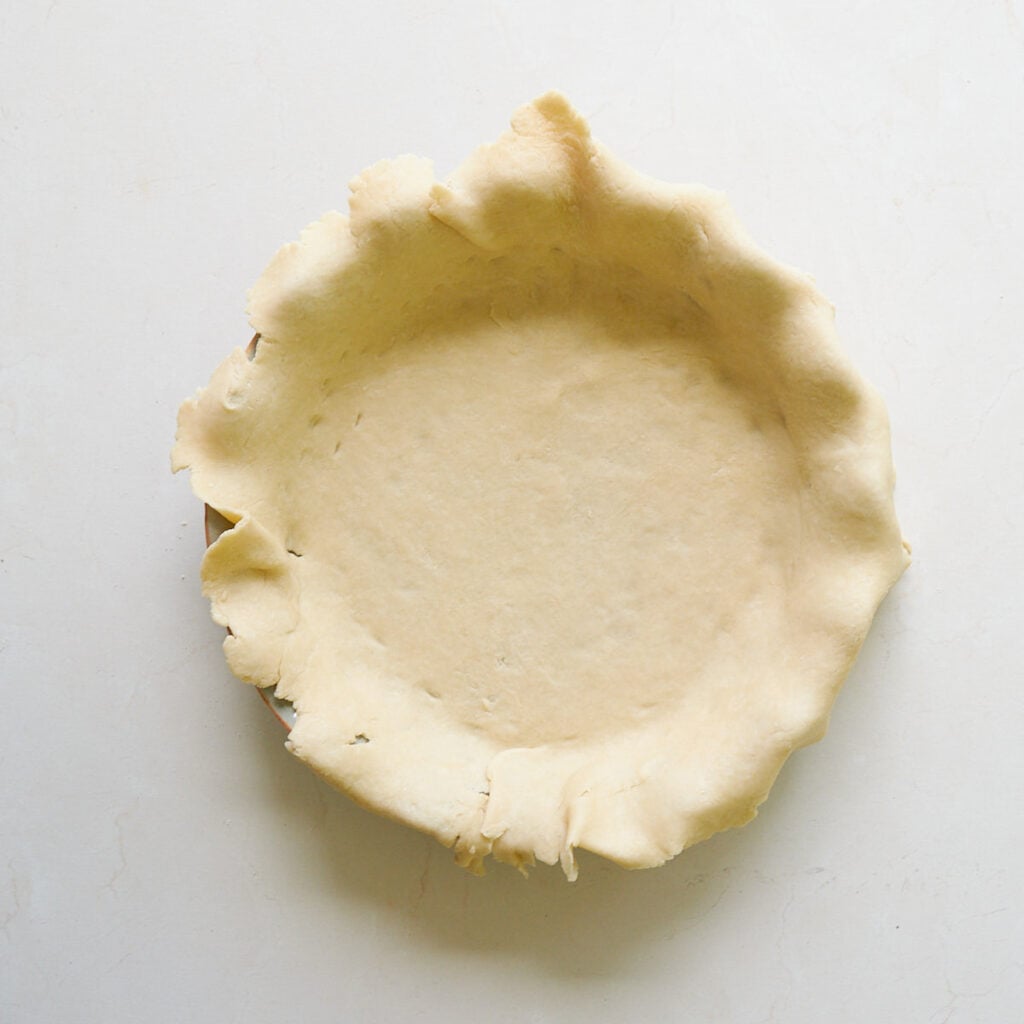
Step 7– Transfer the dough to the pie pan
Gently roll it around your rolling pin, then unroll it over a 9-inch pie pan. You do not need to grease the pan. You can also fold the dough in half, then in half again, place it in the pie pan, and carefully unfold it. Gently press the dough into the bottom and sides of the pan, taking care not to stretch the dough.
For a single-crust pie: Use a fork to poke holes across the bottom of the crust to prevent air bubbles. Bake according to the instructions for your specific pie filling.
Tip: You can use pie weights to keep the crust in place while blind baking, but I found it was just fine without.
For a double-crust pie: Add your filling to the crust, then top with the second rolled-out crust or create a lattice design. Seal the two crusts together by crimping or fluting the edges. If using a full top crust, cut a few slits in the dough to vent.
Whisk together 1 egg and 1 tablespoon of water, then brush the egg wash over the top crust. Bake according to the instructions for your specific pie filling.
How to make a lattice top pie crust
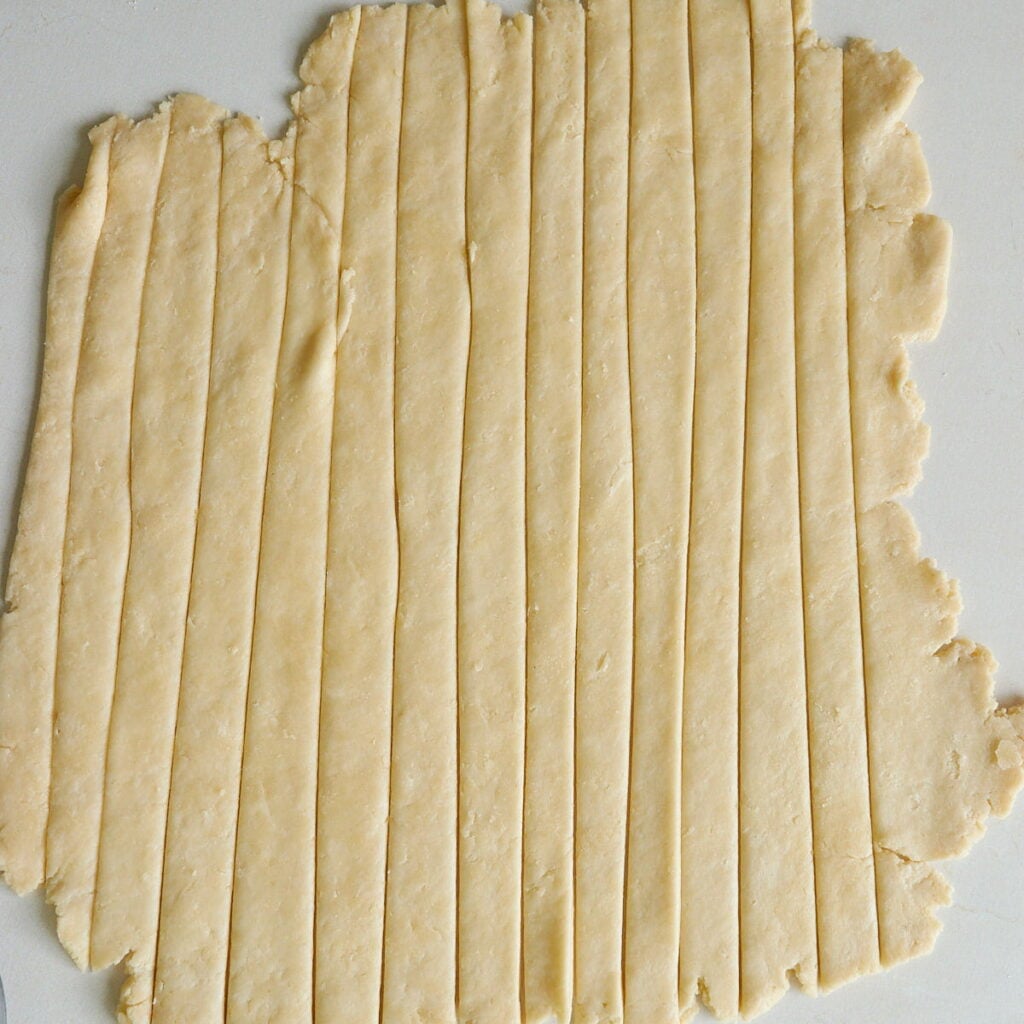
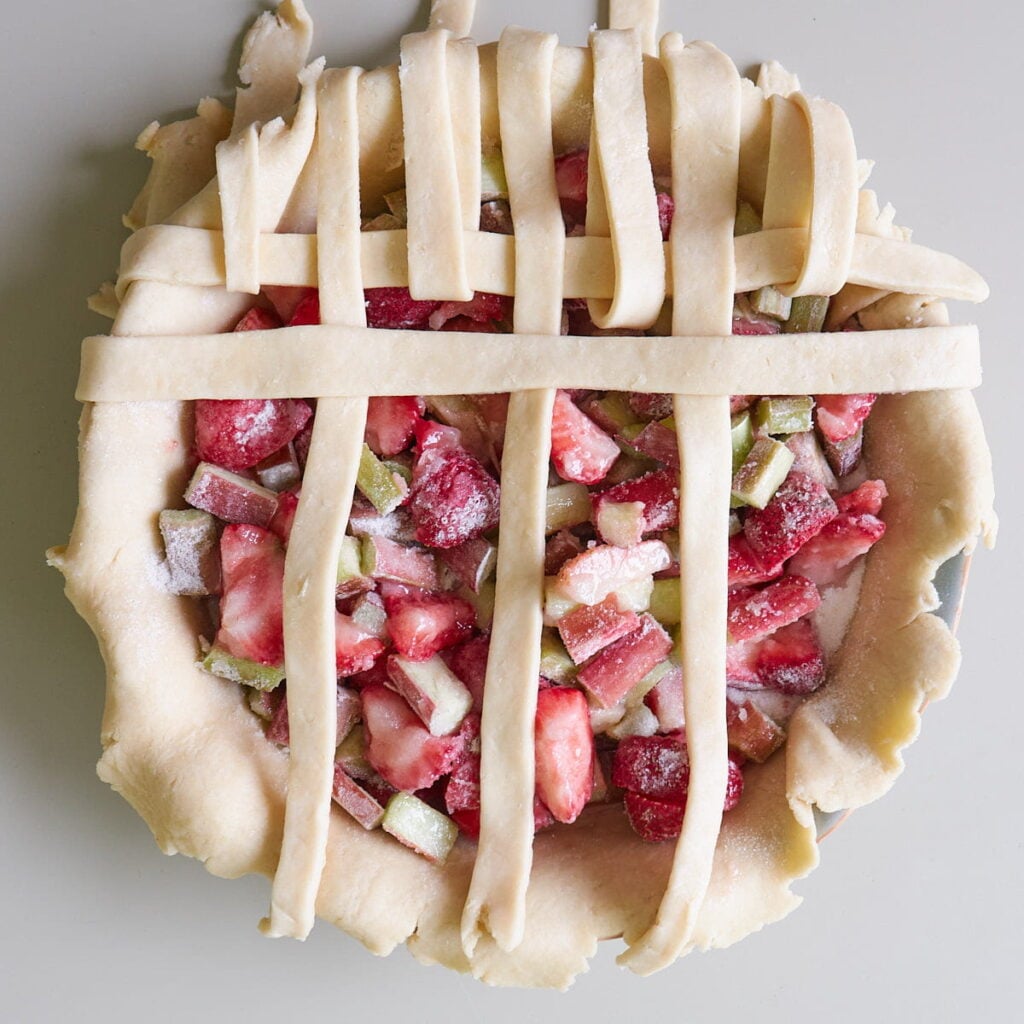
- Roll out the dough on a lightly floured surface and cut it into even strips, about ½ inch wide.
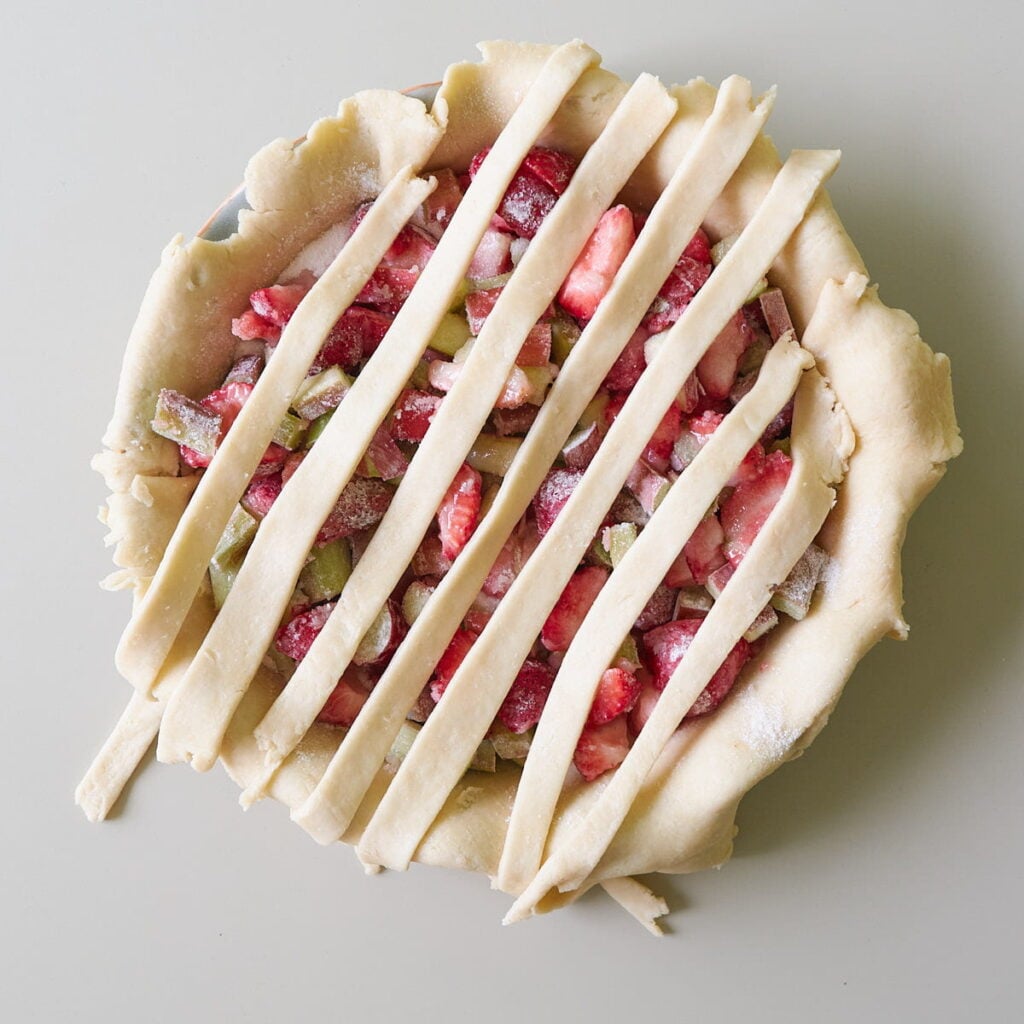
- Lay half of the strips across the pie in one direction, leaving a little space between each strip.
- Fold back every other strip, then place one new strip across the pie in the opposite direction.
- Unfold the strips back over the new strip.
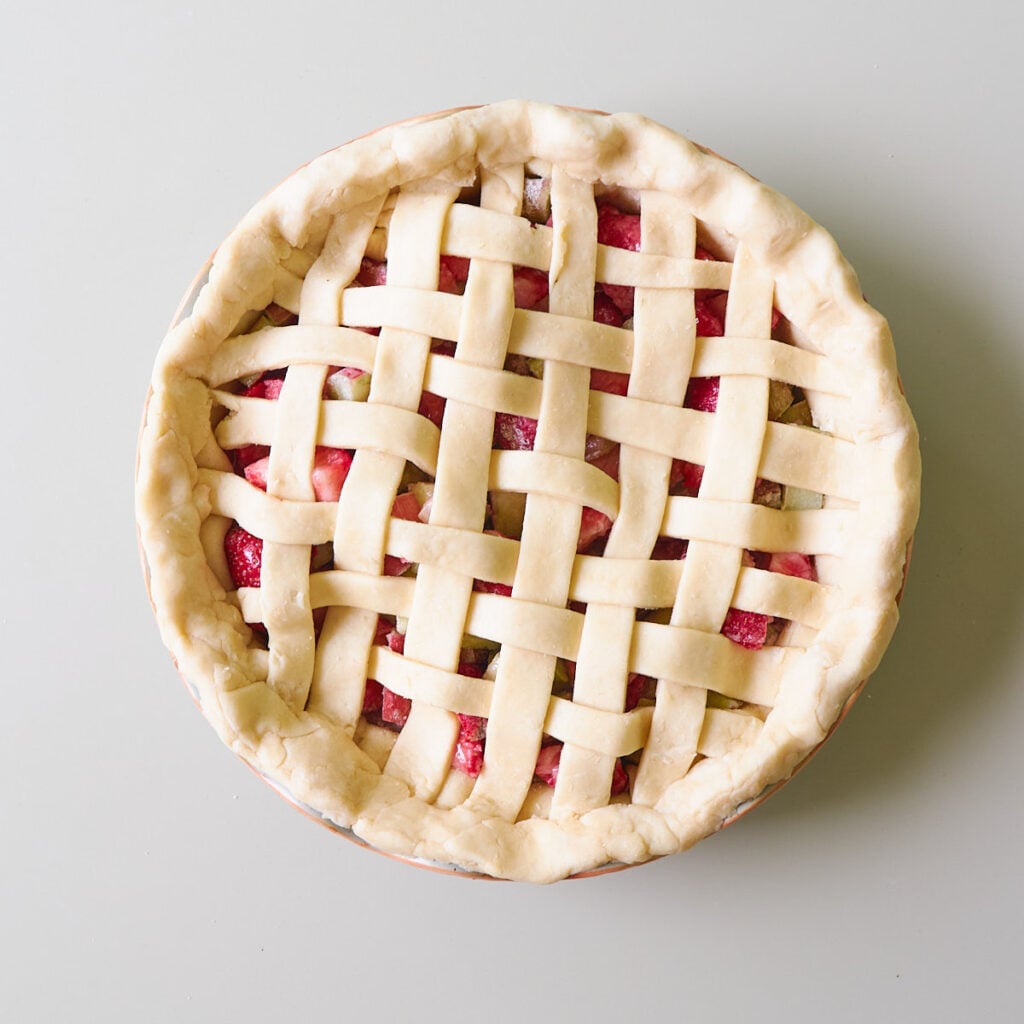
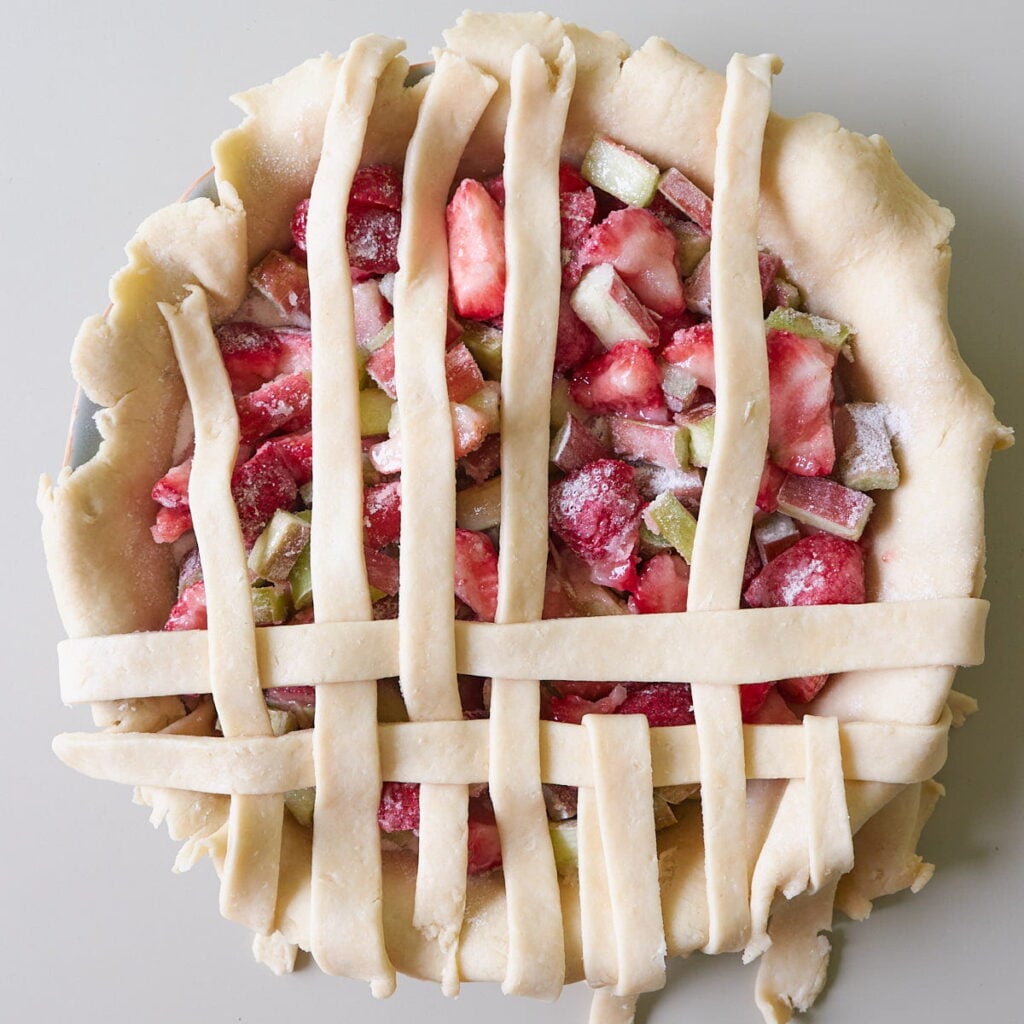
- Fold back the strips that were left flat the first time. Place another strip across the pie in the opposite direction, then unfold the strips back over it. This creates the woven over-under pattern. Continue alternating which strips you fold back each time until the top of the pie is covered in a lattice pattern.
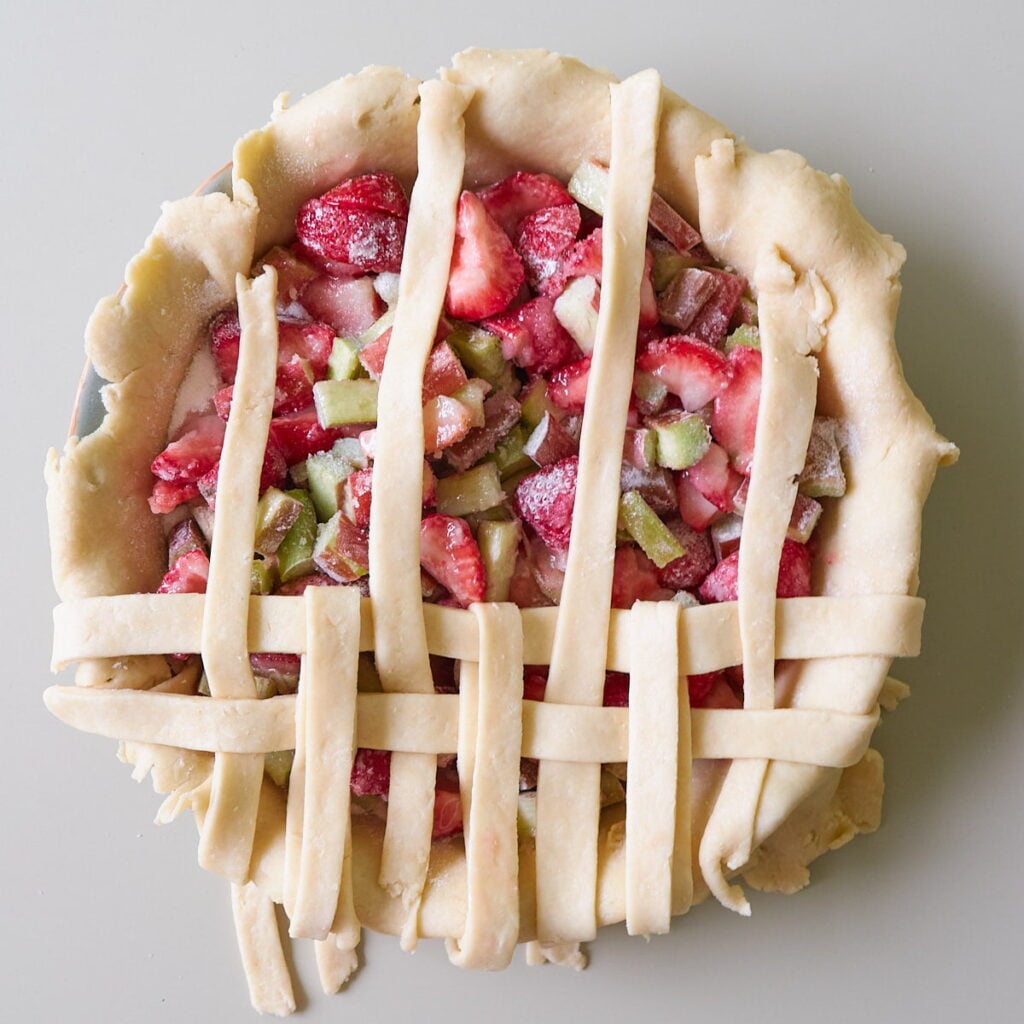
- Trim any excess dough around the edges, then press the top and bottom crusts together.
- Crimp the edges with your fingers or a fork, then brush the top with egg wash before baking.
Sourdough Discard Pie Tips
- Don’t overwork the dough. It will still be a little dry but when you press it together it should easily clump together.
- Use really cold butter and discard to ensure that the butter doesn’t melt, ensuring a flaky crust.
- You only need to blind bake if you are making something like a custard or cream pie, otherwise you can add your filling directly into the raw dough.
- If you find the dough isn’t coming together, add a tablespoon of ice-cold water at a time until it easily comes together when you press it with your hands.
- If the edges are getting too brown, you can cover with foil or a pie cover and continue baking until the middle of the pie is done.
- I love this pie pan because you do not have to crimp or flute the edges together, just simply press it into the pan, and it will look beautiful! If you are using a regular pie pan, find tips on how to crimp and flute your pie edges here.
Troubleshooting Sourdough Pie Crust
The dough will look a little dry and crumbly at first, but it should hold together when you press a handful between your fingers. If it falls apart, add 1 tablespoon of ice-cold water at a time until it clumps together. Try not to add too much water, or the crust can become tough (and sticky) instead of flaky.
This usually happens from overworking the dough. Mix the dough just until it comes together, and avoid kneading it like bread dough, just press it together until it is combined.
If the dough is really sticky and hard to work with, it is likely getting warm, and the butter is melting. Be sure to dust your surface and rolling pin with flour to prevent it from sticking, and if it is too sticky, put the dough back in the fridge to firm up.
The butter likely got too warm. If the dough feels soft, sticky, or hard to handle, place it back in the fridge for 15–20 minutes before rolling or baking.
Pie crust usually shrinks when the dough gets too warm. Make sure to chill the dough before rolling it out, and if it starts to feel soft or warm once it is in the pan, place it back in the fridge for 20–30 minutes before baking.
Another common cause is pulling or stretching the dough to fit the pan. Instead, gently ease the dough into the pan so it sits naturally against the bottom and sides. This helps the crust hold its shape as it bakes.
This can happen with very wet fillings or pies that do not bake long enough. For single-crust pies with custard or wet fillings, partially blind bake the crust first. For double-crust fruit pies, bake until the filling is bubbling and the bottom crust has had enough time to cook through. Using a glass pan can be helpful so you can see when the bottom and sides of the pan are golden.
When & How to Blind Bake Sourdough Pie Crust
When to blind bake
Blind baking is when you bake a pie crust before adding the filling. This is done to help the crust hold its shape and prevent the bottom from getting soggy, especially when making pies with wet, custard, or no-bake fillings.
Whether or not you blind bake depends on the type of pie you are making. If you are making a double-crust pie with a bottom and top crust, such as apple pie or strawberry rhubarb pie, you do not need to blind bake the crust first. The pie will bake long enough in the oven for the bottom crust to cook through.
For pies with only a bottom crust, you will usually need to blind bake it. If the filling will also be baked, such as pumpkin pie, pecan pie, or quiche, you will want to partially blind bake the crust for a shorter amount of time. This helps prevent a soggy bottom while still allowing the crust to finish baking with the filling.
For no-bake fillings, such as banana cream pie or French silk pie, fully blind bake the crust until it is golden brown. Let it cool completely before adding the filling.
How to blind bake
To blind bake the crust, roll out the dough and place it in your pie pan. Gently press it into place without stretching the dough, then crimp or flute the edges. Poke holes in the bottom of the crust with a fork to help prevent it from puffing up, then chill the shaped crust for 20–30 minutes before baking (optional, but it will help with shrinking).
For the best results, line the chilled crust with parchment paper and fill it with pie weights or dried beans to help hold the crust in place as it bakes. Bake at 425˚F for about 15 minutes until the edges are a pale golden. If you are partially blind baking, remove the weights and parchment and bake an extra 2-3 minutes before adding your filling and baking according to the pie recipe.
If you are fully blind baking the crust, remove the weights and parchment, then continue baking at 375˚F for an extra 5-10 minutes until golden brown. Let the crust cool completely before adding any cream or no-bake filling.
Storage & Freezing Instructions
To store the sourdough pie dough, you can keep it in the fridge, shaped as a disk wrapped in plastic for up to 4 days. You can also freeze the dough for up to 3 months. To defrost, keep the dough in the fridge overnight to ensure that the butter stays cold.
A fully blind-baked and unfilled pie crust can be covered and stored at room temperature for 1–2 days. For longer storage, wrap it carefully and freeze it for up to 3 months. Let it cool completely before wrapping so it does not trap steam and soften the crust.
Frequently Asked Questions
Yes, you can prep the dough and keep it in the fridge for up to 4 days before baking. Or you can freeze it for up to 3 months.
Yes, either active starter or discard will work, however be sure that your active starter is cold and not room temperature to ensure that the butter stays really cold.
Yes, if you prefer a less sweet crust, you can reduce the sugar to half a Tablespoon in the recipe.
More sourdough desserts

Sourdough Dessert Recipes
Strawberry Rhubarb Pie (Sourdough Pie Crust)

Sourdough Discard Recipes
Sourdough Buttermilk Biscuits

Sourdough Discard Recipes
The Best Sourdough Strawberry Shortcake Recipe

Fall Sourdough Recipes
Sourdough Apple Pie Pull-Apart Bread with a Vanilla Glaze
Tried this Sourdough Pie Crust or another recipe from the site? I’d love to hear about it! Drop a star rating and share your thoughts in the comments—can’t wait to see what you’re baking!

Sourdough Discard Pie Crust
Equipment
Ingredients
Sourdough Discard Pie Crust
- 280 grams all purpose flour, 2 cups
- 5 grams salt, 1 teaspoon
- 15 grams sugar, 1 Tablespoon
- 150 grams butter, cold, ⅔ cup
- 240 grams sourdough discard, cold, 1 cup
- 45 grams water , cold, 3 Tablespoons
Instructions
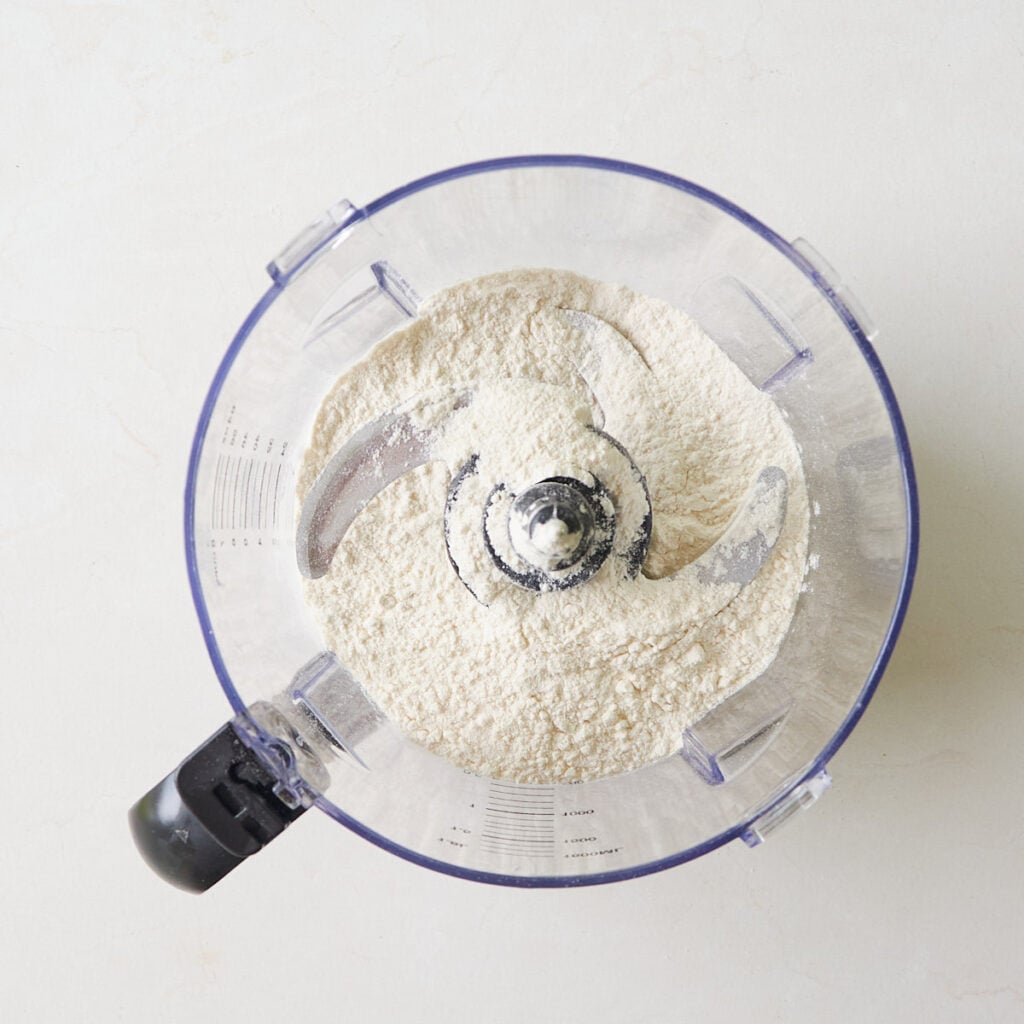
- Combine dry ingredients: Add flour, salt, and sugar to a food processor or mixing bowl.280 grams all purpose flour, 5 grams salt, 15 grams sugar
- Add butter: Dice up the cold butter and scatter it on top. Pulse for about 20 seconds or until the butter is in pea-size pieces. 150 grams butter, coldAlternatively, if you do not have a food processor, you can make the pie dough by hand. You can either use a cheese grater to grate frozen butter into the dry mixture or you can dice the cold butter into the mix and use a pastry cutter to incorporate the butter.
- Add discard: Add the sourdough discard and cold water and pulse until it begins to cling to itself. It will still be a little dry, but if you press it together, it should come together. If not, add one Tablespoon of ice-cold water at a time until it does. 240 grams sourdough discard, cold, 45 grams water If you are mixing by hand, add the discard and water and mix with a fork or Danish dough whisk until the dough begins to come together. It should hold together when pressed between your hands.
- Turn out the dough & chill: Turn the dough out onto a lightly floured surface and form it into a cohesive ball. Divide the dough in half and press into 2 discs about ½ inch thick. Wrap the dough in plastic wrap and put it in the fridge for at least 30 minutes, or up to 4 days.
- Roll out dough: On a lightly floured surface, roll out the dough with a rolling pin until it is 1–2 inches larger than your pie pan, about 12 inches wide and about ⅛-inch thick.
- Transfer the dough to the pie pan by gently rolling it around your rolling pin, then unrolling it over a 9-inch pie pan. You do not need to grease the pan. You can also fold the dough in half, then in half again, place it in the pie pan, and carefully unfold it. Gently press the dough into the bottom and sides of the pan.
- For a single-crust pie: Use a fork to poke holes across the bottom of the crust. Trim the edges and crimp or flute the edges. Bake according to the instructions for your specific pie filling.
- For a double-crust pie: Add your filling to the crust, then top with the second rolled-out crust or create a lattice design. Seal the two crusts together by crimping or fluting the edges. If using a full top crust, cut a few slits in the dough to vent.Whisk together 1 egg and 1 tablespoon of water, then brush the egg wash over the top crust. Bake according to the instructions for your specific pie filling.
Notes
- Don’t overwork the dough. It will still be a little dry but when you press it together it should easily clump together.
- Use really cold butter and discard to ensure that the butter doesn’t melt so that the butter doesn’t leak and will create the flaky layer.
- You only need to blind bake if you are making something like a custard or cream pie that will bake for a short period of time or not at all, otherwise you can add your filling directly into the raw dough.
- If you find the dough isn’t coming together, add a tablespoon of cold water at a time until it easily comes together when you press it with your hands.
- If the edges are getting too brown, you can cover with foil or a pie cover and continue baking until the middle of the pie is done.
Nutrition
Nutrition information is automatically calculated, so should only be used as an approximation.


Do you need to add the sugar? Can the sugar be substituted for Allulose or coconut sugar?
I am so excited to see this recipe! and can’t wait to try it. I’m sure it will be delicious like so many other recipes I have tried (and keep for continued bakes). Thank you!
This recipe has converted me to a pie lover! I’ve always hated pie, well, that is until I developed this recipe. It is so soft and tender with just the right amount of flakiness and buttery flavor. I can’t wait for you to try it!