This post may contain affiliate links . Read my full Disclosure Policy.


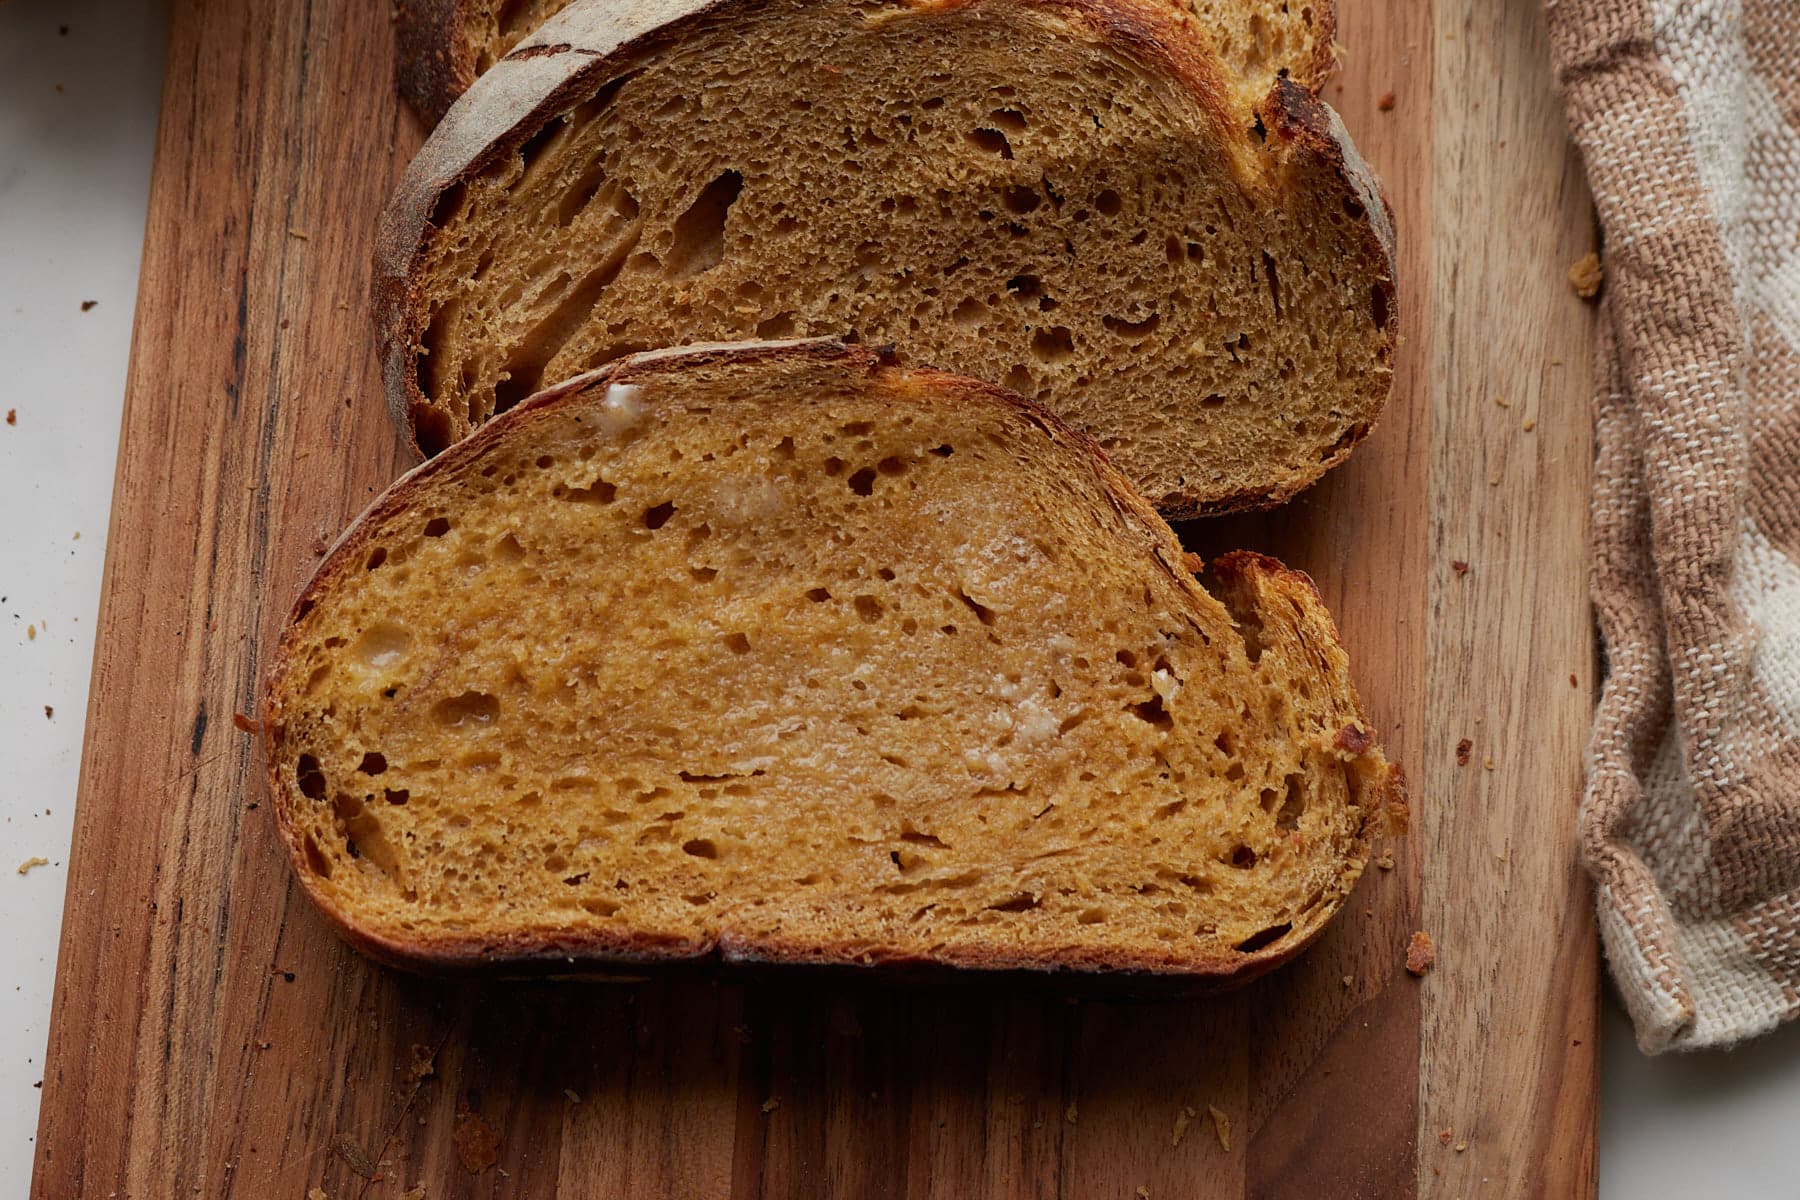
If you love pumpkin and sourdough you have to try this Artisan Pumpkin Sourdough Bread. This sweet pumpkin spice loaf uses pumpkin puree in place of some of the water and is spiced with pumpkin pie seasoning. This loaf is delicious by itself or you can add in chocolate chips or nuts for extra flavor. Or top it with your favorite spreads from pumpkin butter, cream cheese, honey butter, butter, or jams.

I have been making sourdough for a while and decided to try add-ins. Wow. Just wow. Paired it with some homemade maple butter and I’m scared. I may eat the whole loaf myself. -Jennifer
I can’t wait for pumpkin season to roll around every year! From sourdough pumpkin cinnamon roll focaccia, sourdough discard pumpkin bread, sourdough pumpkin pancakes, and sourdough pumpkin cake I love it all! So I knew I needed to make an artisan pumpkin sourdough bread. This recipe is adapted from my same day sourdough bread recipe but with a pumpkin spice flavor. If you’re feeling really festive you can even make it into a pumpkin-shaped sourdough bread.
Why You’ll Love this Pumpkin Sourdough Bread Recipe
- A delicious fall sourdough bread recipe made with a can of pumpkin puree.
- Can be made in one day or left overnight in the fridge to bake the next day.
- Crispy, chewy crust with a soft, fluffy crumb.
- A savory yet sweet bread with delicious pumpkin flavor.
Ingredients for Artisan Pumpkin Sourdough Bread
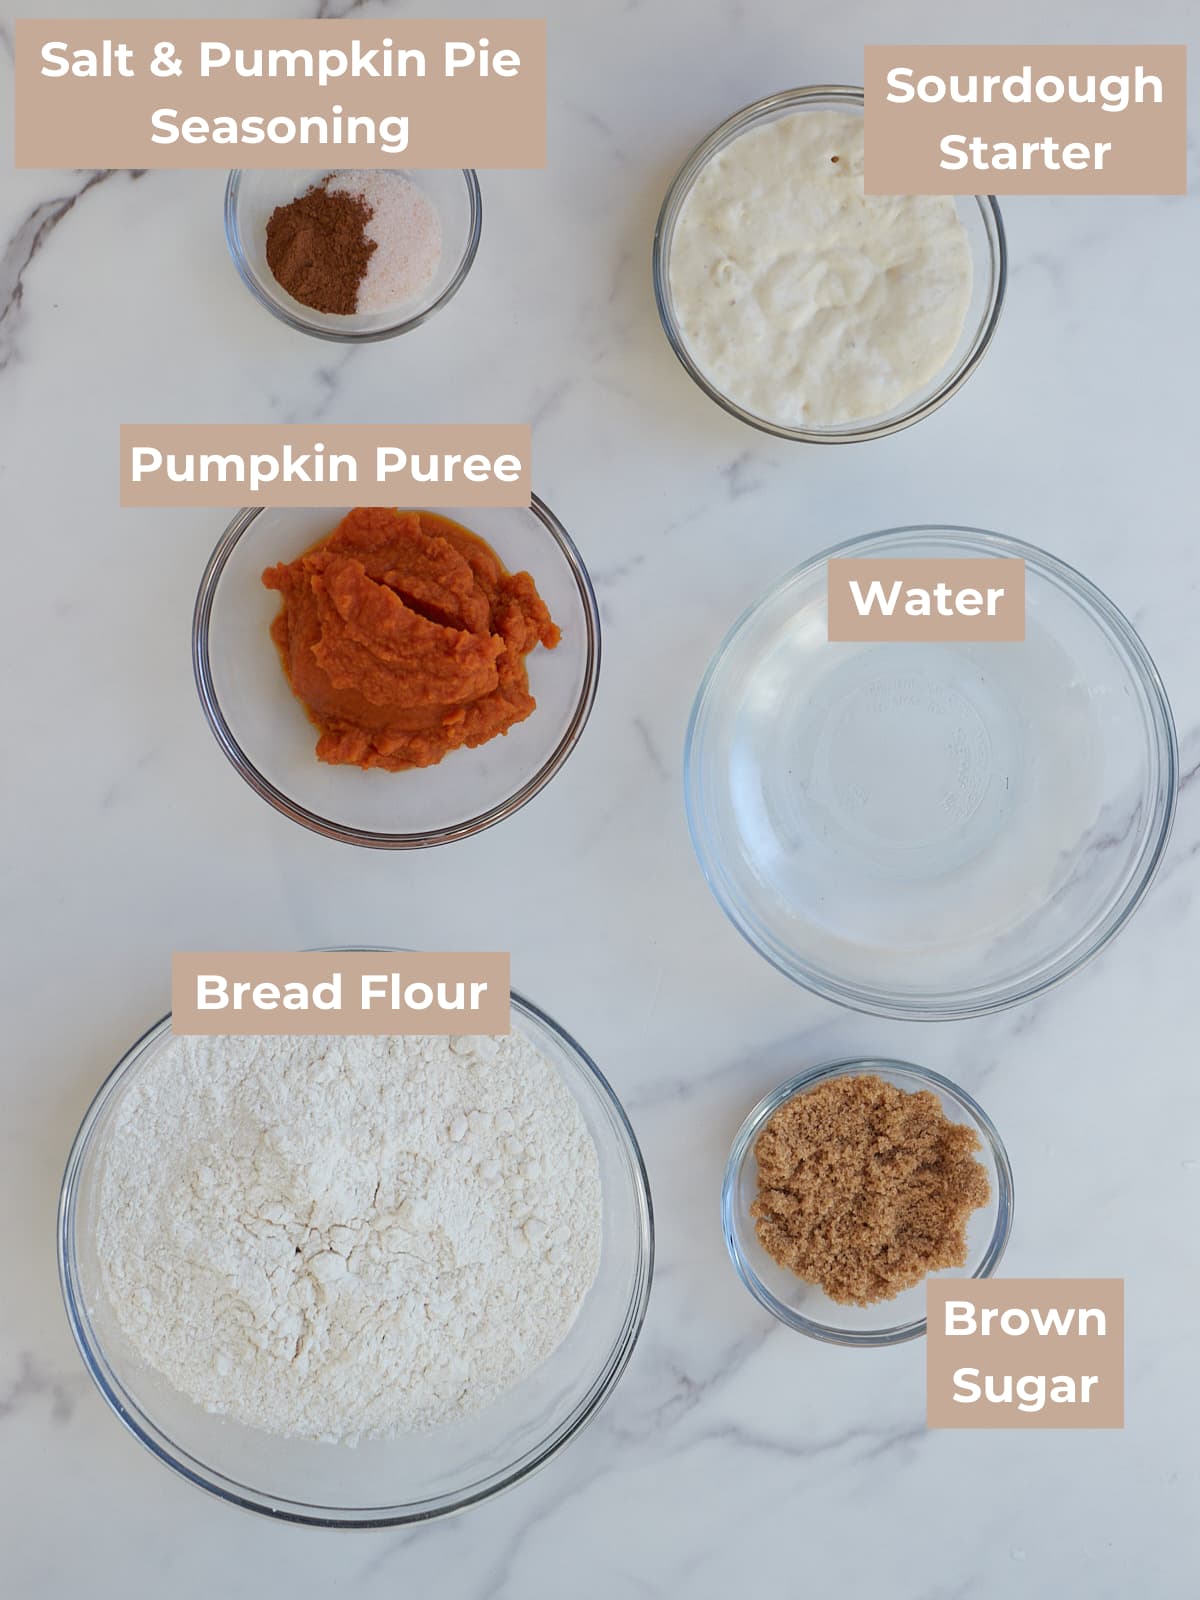
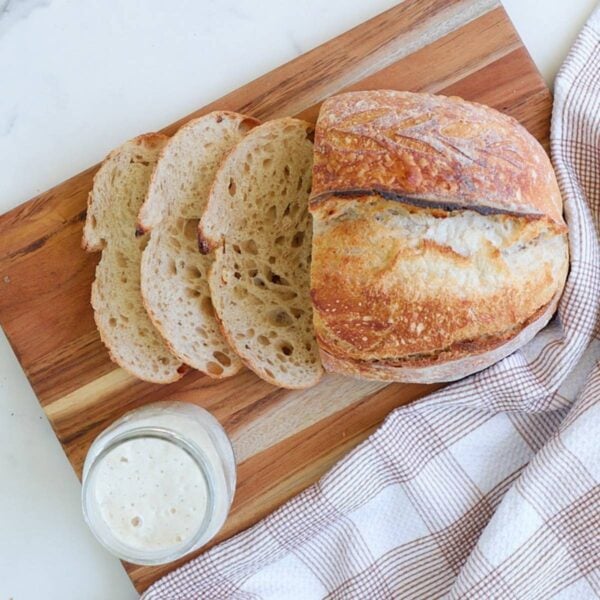
- Sourdough Starter- You will want to use active and bubbly sourdough starter that is at its peak for this recipe. If you don’t have your own sourdough starter yet check out how to make a sourdough starter.
- Pumpkin Puree- Be sure to use canned pumpkin puree not pumpkin pie filling. I haven’t tried this with homemade pumpkin puree, but if you do, just note you may need to remove some of the water as homemade pumpkin puree tends to be more watery. Or you can try to pat it dry with a paper towel to help remove excess moisture.
- Bread Flour- I always recommend using a high-protein bread flour since it absorbs moisture better than all-purpose flour. When using all-purpose reduce the amount of water by 25 grams.
- Brown sugar- I’ve used brown sugar and maple syrup. I prefer the flavor of the brown sugar better but if you use maple syrup reduce the amount by half.
- Pumpkin Pie Seasoning- You can use a premade blend or make homemade pumpkin pie seasoning with cinnamon, ginger, cloves, and nutmeg.
- Chocolate chips are a delicious add-in for this loaf if you want something sweeter or you can add in pecans or walnuts for a more savory flavor.
How To Make Pumpkin Sourdough Bread
Feed Sourdough starter
The first step to making bread is to feed your sourdough starter. The temperature of your house, the activity level of your starter, and how much you feed the starter will all impact how quickly your starter rises. If you are following the same day timeline I recommend feeding your starter the night before and feeding it a 1:5:5 ratio (15 g starter: 75 g flour: 75 g water) and leaving at 72°F. For the overnight timeline I recommend feeding it a 1:1:1 ratio (50 g starter: 50 g flour: 50 g water) and leaving it at 77°F for about 4 hours.

Step 1: Mix together the water, pumpkin puree, and sourdough starter in a straight-edge container (mine is 2 quarts). Then add the brown sugar, salt and pumpkin pie seasoning and flour.

Step 2: Perform three sets of stretch and folds every 30 minutes. It is ok if it is not exact but try to get 3 sets in with a break in between each set. To stretch and fold, grab one side of the dough with a damp hand and gently shimmy the dough up, and then fold it on itself. Repeat this 3 more times rotating the bowl 90 degrees each time. This is one set. If you are adding mix-ins you can add them during the first stretch and fold.
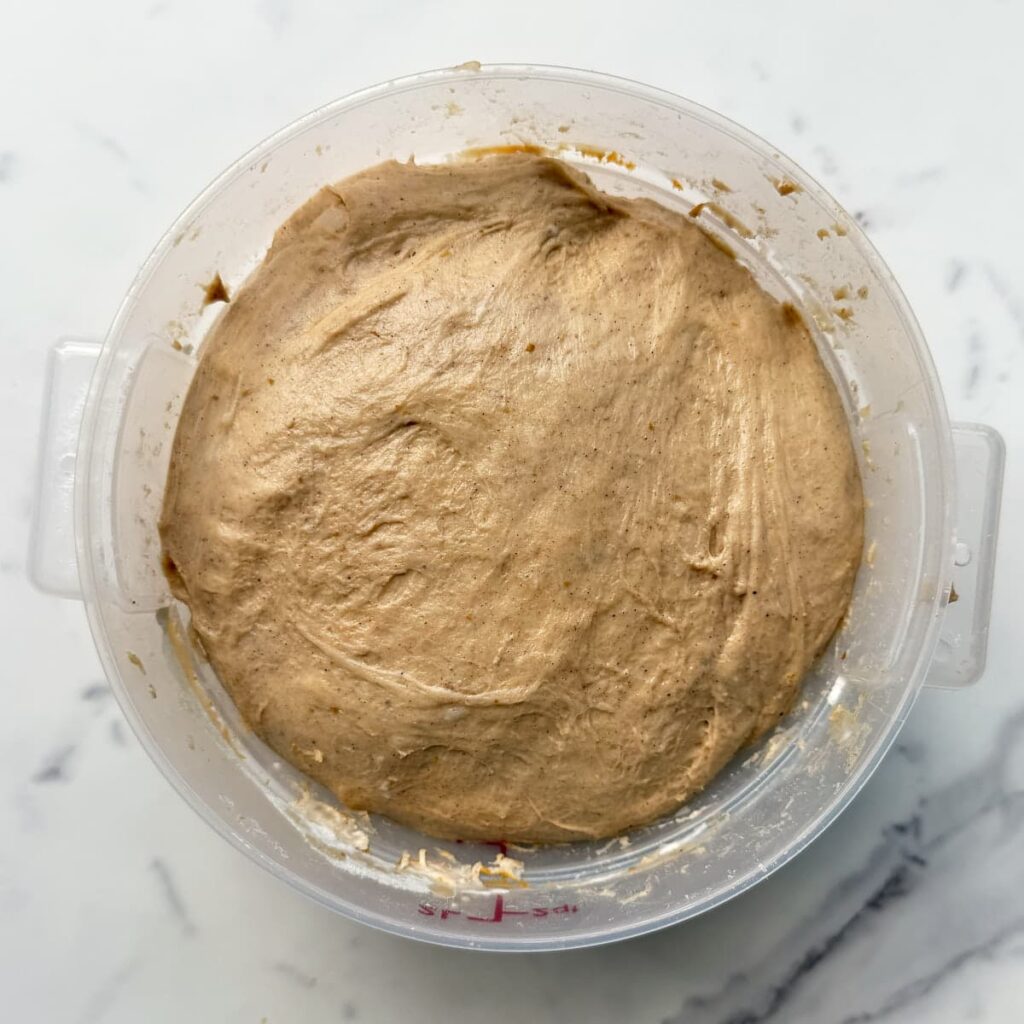
Step 3: Let the dough rest on the counter in a warm spot to finish bulk fermentation. Bulk fermentation is done when the dough is jiggly, domed on top, bubbly on the sides, and risen 50%. If it does not show these signs, continue to let the dough rise, to finish bulk fermentation.At a dough temperature of 75°F my dough is ready in 4-5 hours from the time it is mixed.
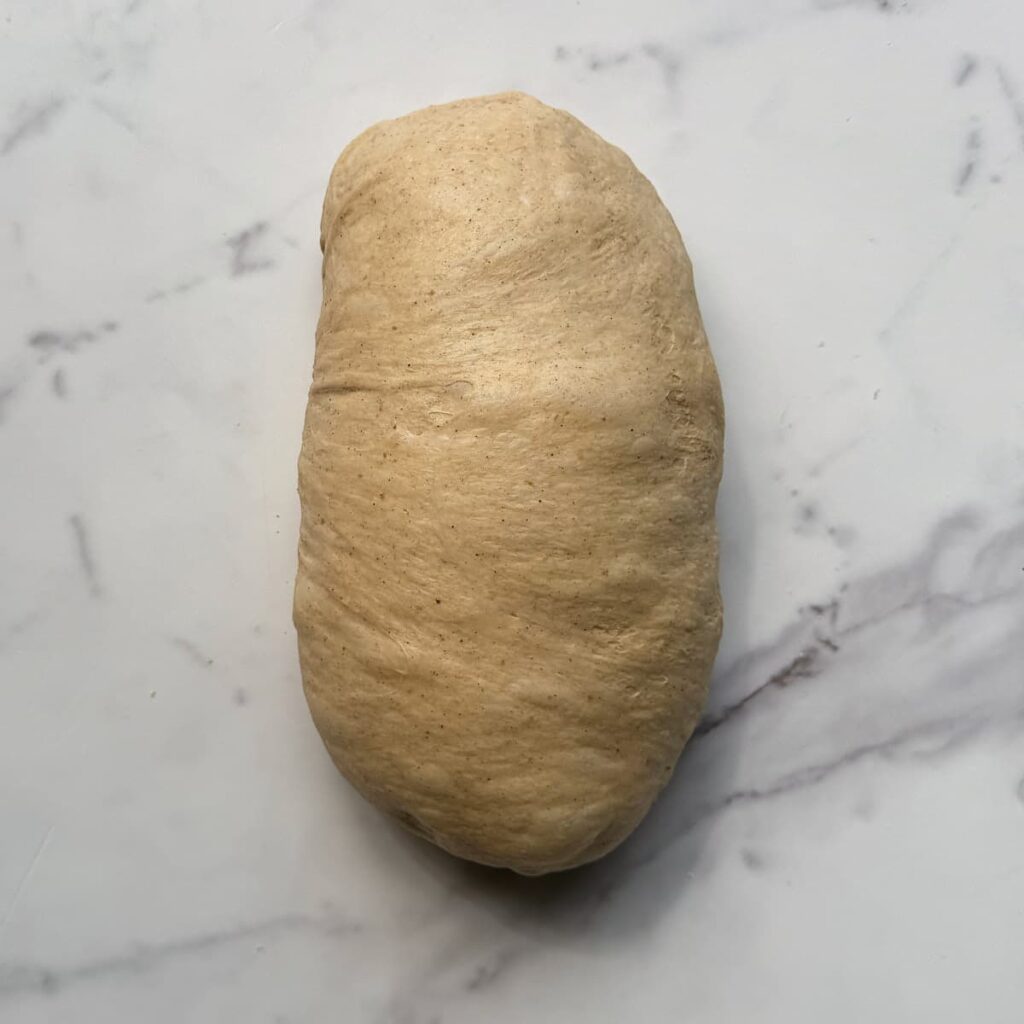
Step 4: Turn the dough onto the counter. To shape it fold the top edge of the dough down toward the center of the dough, pulling gently to create tension. Then, lift the top two corners and fold them toward the center, slightly overlapping. Repeat with the bottom two corners. Finally, roll the dough up like a log. Use your hands to gently pull the dough towards you to create a smooth, taut surface.
For a round shape instead of rolling it like a log, roll it once on top of itself and then take your hands in cupping shape and rotate the dough counter-clockwise towards you to get a smooth surface on top of the dough.
See the same day sourdough bread for step-by-step pictures.
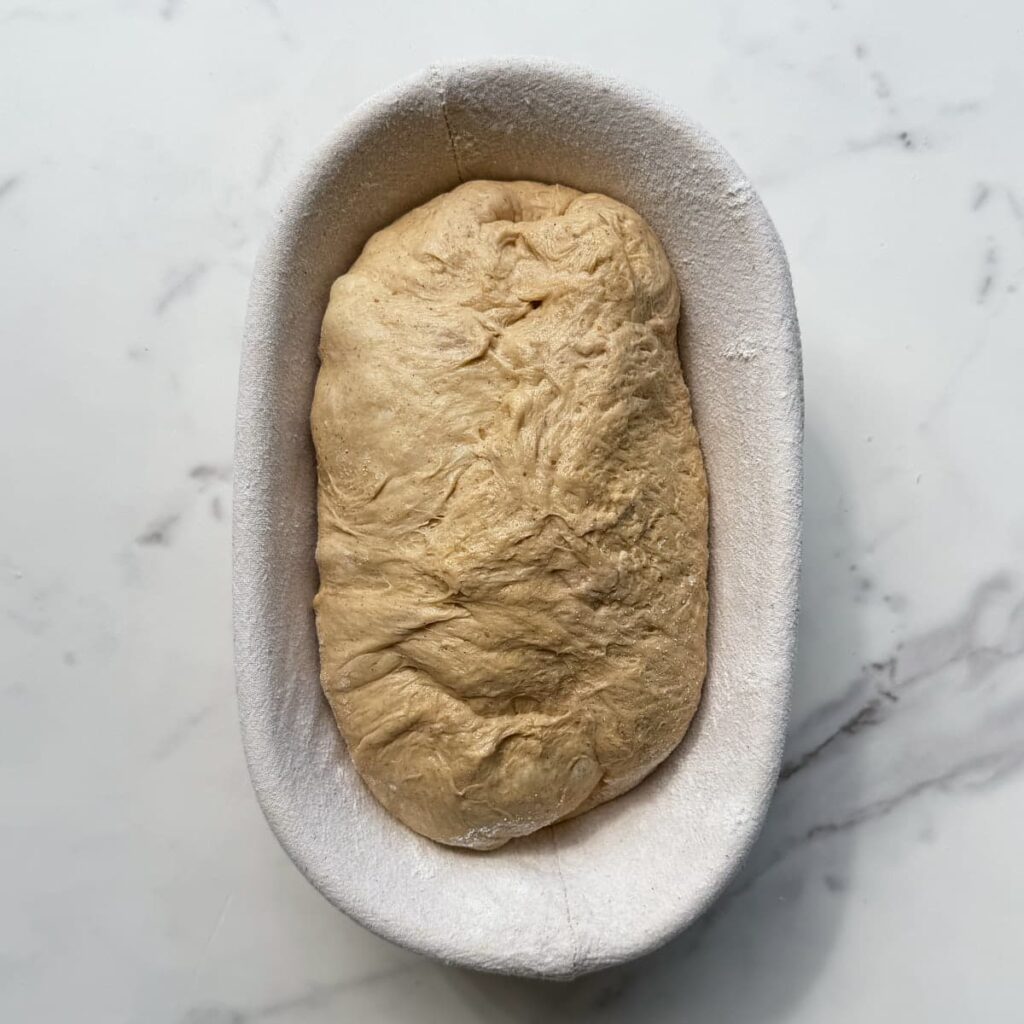
Step 5: Using a bench scraper or your hands, flip the dough upside down, with the seam side up, into an oval or round proofing basket lightly floured with rice flour or well-floured with all-purpose flour. If you do not have a banneton or proofing basket, line a 8-10″ bowl with a floured tea towel and use that instead.
Let the dough sit covered on the counter for 1-3 hours until the dough passes the poke test meaning when you poke the dough with a floured finger it slowly fills in. If it springs back immediately it needs more time, and if it doesn’t spring back at all it is overproofed. Or place the dough in the fridge overnight for 8-12 hours. Bake directly from the fridge.

Step 6: Preheat dutch oven in the oven at 450°F. Flip dough onto a piece of parchment paper and score the bread with a bread lame or sharp knife about a quarter inch deep. This can be one line or multiple depending on your preferences. For more intricate designs hold the blade straight and make shallow cuts.
Bake for 25 minutes with the lid on followed by 10-15 minutes with the lid off. The bread should sound hollow when you knock on the bottom, this will tell you the bread is cooked through. Or check the internal temperature is 205°F.
Remove the bread from the dutch oven and allow to cool on a cooling rack before slicing.
Sample Schedule
This schedule is based on rough estimates. The temperature of your dough, kitchen, humidity, and strength of starter will all impact the times. While this will give you a good estimate it is best to look at the signs the dough is ready to move forward instead of the clock.
Refrigerator method
This is my favorite method! It always turns out, it has more time to develop flavor, and the dough is cold so it is easier to score. This schedule is assuming dough temperature of 75°F.
| Steps | Time |
| Feed starter a 1:1:1 ratio and leave at 77°F (50 grams sourdough starter: 50 grams flour: 50 grams water) *If you do not have extra starter be sure to feed your starter a little more so you have leftover | Day One: 1:00 pm |
| Mix dough | 5:00 pm |
| Stretch & folds | 5:30 pm – 6:30 pm |
| Finish Bulk fermentation | 9:30 pm |
| Shape | 9:30 pm |
| Fridge | 9:30 pm |
| Bake | Day two: Between 8-10 am |
Counter method
This method is great to use to bake your sourdough bread within one day. Before scoring, add the dough to the freezer while the oven preheats so it is easier to make your cuts in the dough. This schedule is based on a dough temperature of 75°F.
| Steps | Time |
| Feed starter a 1:5:5 ratio and leave at 72°F (15 g starter: 75 g flour: 75 g water) | Day One: 10 pm |
| Mix dough | Day two: 8 am |
| Stretch & folds | 8:30 – 9:30 am |
| Bulk fermentation | 12:30 pm |
| Shape | 12:30 pm |
| Final rise on the counter | 2 pm (or whenever dough is passing the poke test) |
| Bake | 2 pm |
Storing Sourdough Bread
Store a whole loaf, or a side that can be placed cut side down with only the crust exposed, on the counter up to 2 days with just a tea towel over it. If the inside of the loaf is exposed I store it in a bread box or in a ziplock back.
Sourdough will not hold its crunch for extended periods of time but can be revived in the oven or toaster. To refresh a loaf preheat the oven to 400°F. Run the loaf quickly under water and then place in the oven for 10-15 minutes until the crust is crispy again.
Sourdough bread also freezes really well. To freeze a loaf, either place the whole or half a loaf into a freezer safe bag. Alternatively, preslice the loaf and place parchment paper in between each slice before placing in a freezer bag.
To thaw, place the loaf on the counter for several hours in the ziplock bag. If you are in a time crunch I’ve used the defrost feature in the microwave to thaw my loaf. Once thawed, use the same refresh instructions as listed above. For individual slices, pulled from the freezer, pop it in the toaster.
Recipe FAQ
I recommend using bread flour because it absorbs more liquid than all-purpose. However, in a pinch you can use all-purpose flour, but I recommend reducing the amount of water added by 25 grams.
If your loaves rise quite a bit in the fridge, your fridge may run a little warm—so be careful not to leave them too long or they might overproof. On the other hand, if they don’t rise much, you can extend the chill time. I recommend baking within 24 hours for best results.
At first, the dough may feel sticky and wet—but as you perform stretch and folds and the gluten develops, it should become stronger and easier to handle. Use damp hands when working with the dough to make it easier. If the dough is still sticky and difficult to shape or score, it’s likely overproofed (see section above). This can happen if the dough gets too warm or is left to proof for too long.
If your sourdough bread is dense and gummy after baking, it is likely underproofed. Try increasing your rise times or increasing the temperature of the dough when bulk fermenting. You can leave your dough in a warm place, or see tips on how to keep your dough warm.
Yes, but I recommend using about half the amount of maple syrup so about 25 grams.
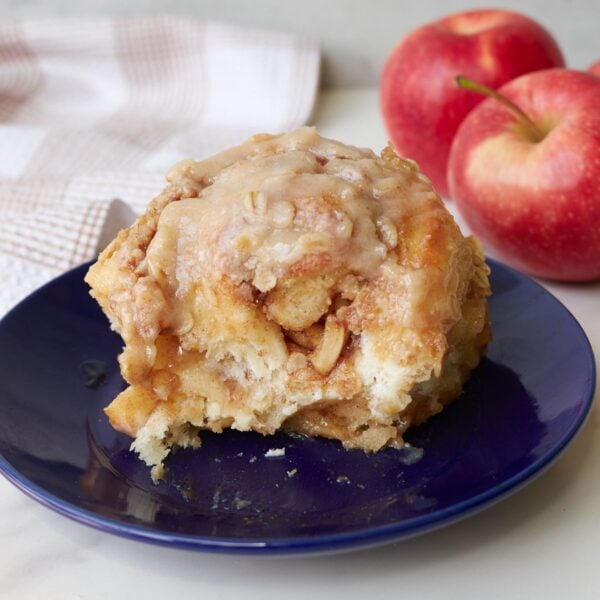
More pumpkin sourdough recipes

Sourdough Bread Recipes
Sourdough Pumpkin Cinnamon Roll Focaccia

Fall Sourdough Recipes
Pumpkin Shaped Bread (with step-by-step photos)

Sourdough Discard Recipes
Sourdough Pumpkin Pancakes with Cinnamon Honey Butter

Sourdough Discard Recipes
Sourdough Pumpkin Bread with Cinnamon Streusel
Tried this Artisan Sourdough Pumpkin Bread or another recipe from the site? I’d love to hear about it! Drop a star rating and share your thoughts in the comments—can’t wait to see what you’re baking!

Artisan Pumpkin Sourdough Bread
Equipment
Ingredients
- 200 grams water, ¾ cup + 1 Tablespoon
- 150 grams active sourdough starter, scant ⅔ cup
- 50 grams brown sugar, ¼ cup
- 200 grams pumpkin puree, heaping ¾ cup
- 500 grams bread flour, 3½ cup
- 10 grams salt, 1½ teaspoon
- 3 grams pumpkin pie seasoning, 2 teaspoons
Instructions
- Mix the dough: Mix together the water, sourdough starter, and pumpkin puree. Add in the dry ingredients: bread flour, brown sugar, salt, and pumpkin pie seasoning until the dough becomes a shaggy dough and the flour is incorporated. 200 grams water, 150 grams active sourdough starter, 200 grams pumpkin puree500 grams bread flour, 50 grams brown sugar, 10 grams salt, 3 grams pumpkin pie seasoning
- Stretch and folds: Perform a set of stretch and folds (pull dough out and then fold over itself, turn bowl and perform on other 3 sides) every 30 minutes. Perform 3 sets. If you would like to add mix-ins like chocolate chips or nuts you can add them during the first set of stretch and folds.
- First Rise: Let the dough rest on the counter in a warm spot to finish bulk fermentation. Bulk fermentation is done when the dough is jiggly, domed on top, bubbly on the sides, and risen 50%. If it does not show these signs, continue to let the dough rise. At a dough temperature of 75°F my dough is ready in 4-5 hours from the time it is mixed.
- Shape: Turn the dough onto the counter. To shape it fold the top edge of the dough down toward the center of the dough, pulling gently to create tension. Then, lift the top two corners and fold them toward the center, slightly overlapping. Repeat with the bottom two corners. Finally, roll the dough up like a log. Use your hands to gently pull the dough towards you to create a smooth, taut surface. For a round shape instead of rolling it like a log, roll it once on top of itself and then take your hands in cupping shape and rotate the dough counter-clockwise towards you to get a smooth surface on top of the dough.
- Add to proofing basket: Using a bench scraper or your hands, flip the dough upside down, with the seam side up, into an oval or round proofing basket lightly floured with rice flour or well-floured with all-purpose flour. If you do not have a banneton or proofing basket, line a 8-10″ bowl with a floured tea towel and use that instead.
- Final Rise:Counter Method (opt 1)- Leave the dough on the counter covered for 1-3 hours (this will vary depending on temperature of kitchen and strength of starter). Once it passes the "poke" test, meaning when you poke the dough with a lightly floured finger the dough will slowly fill in. If the dough springs back immediately it needs more time and if it does not fill back in at all it is overproofed and needs baked immediately. Place the dough in the freezer while your oven preheats. Refrigerator Method (opt 2)- Place the dough in the fridge overnight for 8-12 hours. Bake the dough directly from the fridge.
- Preheat the dutch oven in the oven at 450℉. To prevent the bottom of the loaf from burning, place a heavy-duty baking sheet on the rack below.
- Flip dough onto parchment paper and score the bread with a bread lame or sharp knife.
- Bake bread for 25 minutes with the lid on then take the lid off and bake for another 10-15 minutes. To check for doneness, remove the loaf from the pan and tap the bottom of the loaf—it should sound hollow, indicating it’s fully baked. Or check that the internal temperature reaches 205°F.
- Let the bread cool on a cooling rack. To ensure the loaf is fully baked through wait at least 2 hours before cutting. Or if you are like me slice it warm and enjoy warm bread!
Notes
- For best results I recommend using the gram measurements instead of cups, as it will be much more accurate.
- Timing will depend on the temperature of your dough and the activity level of your starter. Watch your dough versus the clock.
- This is delicious topped with cream cheese and a little bit of cinnamon. Or pumpkin butter is also yummy.
Nutrition
Nutrition information is automatically calculated, so should only be used as an approximation.


Great pumpkin flavor! The dough was easy to work with. Will definitely make it again!
Thanks so much Eileen! So glad you liked the recipe.
So delicious!! You can definitely taste the pumpkin. I had it with a honey pecan cream cheese that went perfectly, but regular cream cheese would also be super good!
Delicious loaf!! You can definitely taste the pumpkin. I had it with a honey pecan cream cheese and it was so good; regular cream cheese would be great too!
Whoa I need to try honey pecan cream cheese, that sounds incredible! Thanks for sharing.
Saw this recipe on insta and you mentioned using maple syrup instead of brown sugar, which sounds great! Would you use the same amount by weight? Thanks!
Hi Olivia! I would do 25 grams of maple syrup.
I made this and I enjoy it. A more versatile take on Pumpkin bread- usually pumpkin breads are all quick breads and they’re inherently VERY sweet. This can be French toast, sandwiches, toasted with butter, anything. Awesome! Thanks for sharing
I agree I love how versatile it is. Thanks for sharing Breann.
Made this today. I added raisins, (soaked first) . It raised beautifully. Tastes wonderful. Even my husband, who doesn’t like sourdough likes it!!!
I will be looking at your other recipes. Thank you!!
So happy to hear that! Thanks for sharing Cindy.
Thank you for a great recipe. It baked up beautifully
Thanks Alicia! I’m so glad you enjoyed it.