This post may contain affiliate links . Read my full Disclosure Policy.


Bring an Italian flare to your loaf with this mozzarella and sun-dried tomato sourdough bread. Our overnight recipe ensures a fluffy, flavorful loaf, perfectly seasoned with Italian herbs. Enjoy it with a drizzle of olive oil and balsamic vinegar or make it into the most incredible garlic bread you’ve ever had.

Save & Summarize
I love how flavorful this loaf is. The Italian seasoning and sun dried tomatoes pack a punch making for a sweet, tart, and slightly peppery flavor. Then add in the sweet, milky flavor of mozzarella cheese and you have a delicious combination. It’s the perfect side for your next Italian themed dinner. If you love tomatoes, be sure to also check out my Bruschetta Sourdough Focaccia recipe.

This loaf starts with my Simple Sourdough Bread Recipe. It is left overnight to rise and then baked the next day. Just be careful this summer with the warmer temperatures, as your loaf will most likely ferment much quicker than in the winter.
Before adding mix-ins, I recommend making a traditional loaf a few times until you are comfortable with the process. Once you are, you can start experimenting with flavors such as Hot Honey, Parmesan, and Asiago, Jalapeno Cheddar and Bacon, Cinnamon Honey Butter and Lemon Blueberry. For a full list of ideas, check out my post, 21 Mix-In Flavor Combinations You Need to Try.
Ingredients
- Bread flour: Sourdough bread is a higher hydration dough, so using flour that is efficient at absorbing water is ideal. Bread flour has a high protein content and works well for that purpose. You can use all-purpose flour if bread flour is unavailable, but I recommend reducing the water by 25 grams.
- Active sourdough starter: Ideally, you should use your starter to make bread when it has recently been fed, is bubbly, and has doubled in size to set your loaf up for success. That way, you don’t need active dry yeast in the recipe.
- Water: Despite what many people say about only being able to use filtered water, I’ve always used tap water with no issues. If your house is warm this summer, use really cold water to make the dough as that will help slow down the fermentation time. In the winter, you can use warm water to help bring up the temperature of the dough.
- Salt: You can use any type of salt for this.
- Italian Seasoning: You don’t have to use this or you can use a different type of seasoning. One of my favorites is Trader Joe’s Italian Style Soffritto Seasoning Blend.
- Mozzarella Cheese: Freshly shredded or cubed work great. Shredded will be better incorporated throughout whereas cubed will give you cheesy bites.
- Sun-Dried Tomatoes: I use the bag of Julienne cut sun-dried tomatoes. You can also use the ones in a jar but you will want to dab off most of the oil before adding it to the dough.
How to Make Mozzarella & Sun-Dried Tomato Sourdough Bread
FEED SOURDOUGH STARTER
The first step to making bread is to feed your sourdough starter. The temperature of your house, activity level of your starter, and how much you feed the starter will all impact how quickly your starter rises. A 1:1:1 ratio, meaning 1 part starter: 1 part flour: 1 part water, will rise in about 4-6 hours. Whereas a 1:5:5 ratio, meaning 1 part starter: 5 parts flour: 5 parts water, will rise in about 12 hours. Feed based on the timing you want to make bread. Once the starter doubles or exceeds its size and becomes bubbly, it is ready for use. If you can’t use the starter while it is at peak, place it in the fridge until you are ready to use it.
MIX INGREDIENTS
Mix together the flour, water, salt, italian seasonings, and sourdough starter in a large mixing bowl with a Danish dough whisk (10% off with link), spoon, or hands until incorporated. The dough will look shaggy at this point. Cover the bowl with a lid or dinner plate and let it sit for 30 minutes at room temperature.
STRETCH AND FOLDS
Stretching the dough helps build strength and aerates the dough. Typically, I aim to get 2-3 sets in with 30 minutes in between each set. Stretch and folds help to build strength in the dough. Cover the dough with a dinner plate, plastic wrap, aluminum foil, or a lid between sets.

To stretch and fold, grab one side of the dough with a damp hand and gently shimmy the dough up and then fold it on itself. Repeat this 3 more times, rotating the bowl 90 degrees each time.
Adding mix-ins
You can either add the cheese and sun dried tomatoes during the stretch and folds or during shaping. If you aren’t comfortable with the cheese being left in the dough overnight I would recommend adding it while shaping. However, I highly recommend adding the sun dried tomatoes during stretch and folds so they are evenly distributed in the dough.
FIRST RISE
After stretch and folds, let the dough sit overnight on the counter covered, about 10-14 hours (depending on the temperature) until the dough has risen about 75%, not completely doubled. In the summer, it may be closer to 8 hours depending on how warm your house and the dough is. The dough should be aerated with bubbles showing on the sides and bottom of the dough and jiggle when the bowl is shaken. If it does not show these signs, continue to let the dough sit, preferably in a warm spot, to finish bulk fermentation.
If the dough is very pillowy, sticky, and deflates when working with it, it is overproofed. At this point, you can try to bake it if it will hold some shape. Personally, my favorite thing to do with overproofed dough is to make focaccia. Put it in an oiled 9×13 pan with more oil on top. Dimple the dough and bake at 425°F for 25-30 minutes.

SHAPE DOUGH
The goal of shaping is to create a taut, outer skin on the dough. The skin creates tension, helping the dough to hold its shape when baked, which translates to a good rise and a crispy, golden brown crust.
Shaping Instructions:
- Dump the dough on an unfloured surface and gently spread the dough into a chubby rectangle. If you are adding cheese at this point sprinkle a layer on the dough.
- Gently pull the bottom of the dough up, creating tension on the surface of the dough, and bring the dough on top of itself about halfway.
- Fold one side of the dough up and over, bringing it two-thirds of the way onto the dough.
- Fold the other side of the dough on top. Add another layer of cheese.
- Starting on one side, roll the dough on top of itself into a ball shape, bringing the smooth side on top.
- Take your hands in a cupping shape and rotate the dough counter-clockwise towards you to get a smooth surface on top of the dough.
- Using a bench scraper or your hands, flip the dough upside down into a proofing basket lightly floured with rice flour or well floured with all-purpose flour. If you do not have a banneton, line a 9-10″ bowl with a floured tea towel and use that instead.
- Cover the basket with something to keep the moisture in. Optional: pinch the seams together once the dough is in the basket to solidify the taut skin on the surface and tighten the ball.
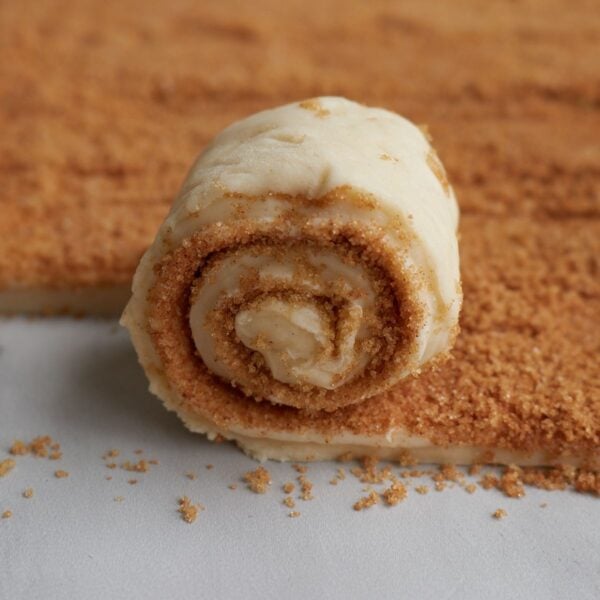
- To make an oval shape versus round, on step 5, instead of one roll into a ball, roll the dough up like a cinnamon roll. Pinch the sides to seal them and then use your hands to gently pull the dough towards yourself to smooth the surface.
SECOND PROOF
Place the dough in the fridge, covered, for the final proof. The fridge slows down fermentation, which allows your dough to sit for longer periods. You can bake anytime after the two-hour mark, but ideally, you will wait 8+ hours. Longer fermentation times will make for a more sour loaf.

SCORING
Preheat the oven with the Dutch oven to 450°F once the dough is ready. Flip the dough onto a bread sling or piece of parchment paper and score the dough. Hold the blade at a slight angle and quickly slice the bread about 1/2 inch deep.
BAKING
Bake the loaf at 450°F in a Dutch oven. I like to have a baking stone on the rack underneath to help prevent the bottom of the loaf from burning. Begin with the lid on for 30 minutes, followed by an extra 12-15 minutes with the lid off. The loaf should sound hollow when you tap on the bottom. That is how you know it is baked through. If you have an instant-read thermometer, you can also take the temperature. The internal temp should read 205°F when it is baked through. Once done baking, remove from the Dutch oven and place onto a wire rack to cool.

Sample Baking Schedule
This schedule is based on rough estimates. The temperature of your dough, kitchen, humidity, and strength of the starter will all impact the times, so while this will give you an estimate, it is best to look at the signs the dough is ready to move on. You are looking for about a 75% rise.
There is flexibility in this schedule to make it work for you. If 8 a.m. is not a convenient time to feed your sourdough starter, you could opt for a smaller feeding ratio like 1:1:1, 4-6 hours before mixing the dough. If you don’t have time to bake the bread around dinner time, you can always leave the dough in the fridge for an extra day or two. Do what works for you!
If you are looking for more precise timelines based on the temperature of your dough, The Sourdough Journey put together a great resource. It looks at different temperatures and percentages of sourdough starter to give you an estimate of how long the first rise will take. My recipe below calls for 10% sourdough starter.
| Steps | Time |
| Feed sourdough starter 1:4:4 ratio (i.e. 10 g starter: 40 g flour: 40 g water) | 8 am |
| Mix dough | 7:00 pm |
| Stretch & folds | 7:30 pm-8 pm |
| Shape | ~7 am |
| Final proofing in fridge | 8 am-4 pm |
| Bake | 4 pm |

How Temperature Affects Sourdough
Temperature is very important when it comes to sourdough and fermentation. If your house is cooler than 68°F, the dough will have a hard time rising. If your house is cold, I recommend using a dough mat (use code country10 for 10% off) or finding a warmer spot in your house. Placing the dough in a draft-free area like a turned-off oven or microwave may help. You could also try placing it near a heating vent.
If your house is above 75°F, I wouldn’t recommend leaving the dough overnight, as it is more likely to overproof. You can try using cold water to help cool down the dough, place it in the fridge for 30 minutes or so before bed to cool it down, and/or stick to a shorter timeline like 8 hours.

Ideas for eating Mozzarella and Sun-Dried Tomato Sourdough Bread
- Turn it into the most incredible garlic bread to have with pasta. Slice the loaf and coat the tops of each slice with a mixture of roasted garlic, sun dried tomatoes and butter. I did 1/2 cup of butter, 1 head of softened garlic and 3 sun dried tomatoes. Top with mozzarella cheese and then place on a cookie sheet and bake at 450°F for 8-10 minutes until crispy. Another recipe that makes amazing garlic bread is my Sourdough Discard French Bread!
- Turn it into a chicken salad sandwich or roasted bell pepper and chicken panini.
- Dip slices in a balsamic vinegar and olive oil blend. Here’s a recipe for an oil bread dip.

Mozzarella & Sun-Dried Tomato Sourdough Bread
Ingredients
- 50 grams sourdough starter, doubled in size and bubbly, ¼ cup
- 500 grams bread flour, 3 ¼ cups
- 350 grams water, 1 ½ cups
- 10 grams salt, ½ Tablespoon
- 5 grams Italian Seasoning, ½ Tablespoon
- 125 grams mozzarella cheese, shredded or cubed, 1 ¼ cup
- 90 grams sun-dried julienne-cut tomatoes, chopped, 1 cup
Instructions
- Mix together active starter, water, flour, Italian seasoning and salt until a shaggy dough is formed.50 grams sourdough starter, doubled in size and bubbly, 350 grams water, 500 grams bread flour, 5 grams Italian Seasoning, 10 grams salt
- After 30 minutes get your hand damp and then perform a set of stretch and folds. Cover and let rest. You now have 2 options: if you will be home and have time, add in 1 or 2 more sets of stretch & folds every 30 minutes or leave the dough to sit on the counter for the remainder of the time. Adding additional stretch & folds does help the loaf to rise more in the oven but both options make delicious bread.
- On the second stretch and fold add in the mozzarella cheese and chopped sun-dried tomatoes. Or if you prefer to not have the cheese sit overnight, you can add it during shaping.125 grams mozzarella cheese, shredded or cubed, 90 grams sun-dried julienne-cut tomatoes, chopped
- Once the dough has risen 75%, domed on top, has bubbles on sides it is ready to shape (roughly 10-14 hours later). Dump the dough onto an unfloured surface. Turn the dough over and gently spread the dough in a chubby rectangle. Fold the dough like an envelope, starting at the bottom and pulling up to build tension and then bring on top of the dough halfway. Bring each side up and out and then place slightly over the middle of the dough. Pull the top of the dough out and up and bring it on top of the dough, rolling the dough back over. Cup your hands and begin rotating counter clockwise while sliding the dough towards you. Once you have a taut round ball place the dough upside down in a banneton basket or a floured bowl with a tea towel. Cover with something that will keep the moisture in.
- Place the dough in the fridge for about 8+ hours or up to 2 days.
- Preheat dutch oven in the oven at 450℉.
- Flip dough onto parchment paper and score the bread with a bread lame or sharp knife.
- Bake bread for 30 minutes with the lid on. Take the lid off and bake for another 12-15 minutes depending on how dark of a crust you would like. I prefer mine a little on the lighter end so I pull at 15 minutes. The bread should sound hollow when you knock on the bottom, this is an indicator the bread is cooked through.
- Let the bread cool on a cooling rack. To ensure the loaf is fully baked through wait at least 2 hours before cutting. Or if you are like me slice it warm and enjoy warm bread!
Notes
Nutrition
Nutrition information is automatically calculated, so should only be used as an approximation.


I’m slightly confused by the 50g bubbly and doubled in size. Does this just mean I need 50g of active starter that is bubbly and has already doubled from feeding? Or am I feeding only 50g and using all of it once it is bubbly and doubled? Thank you!
Hi yes 50 grams of active starter that is bubbly and doubled from a feeding.
can I use more starter if I have refrigerated it overnight?
You could use my same day recipe with 150g starter: https://countryroadssourdough.com/same-day-sourdough-bread/
Thank you! I have used that recipe and it turned out excellent. A little wetter than I am used to, I’m relatively new to this journey. Developed my own starter on Oct. 27 and made my first loaf five weeks later. As a matter of fact, I was thinking of doing exactly as you suggested. You’re the best! enjoy your weekend.
Thanks so much!