This post may contain affiliate links . Read my full Disclosure Policy.
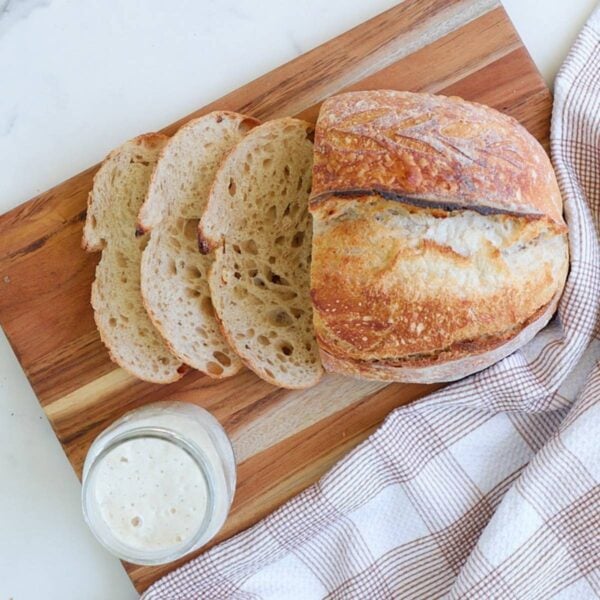
If you’re looking for a simple sourdough bread recipe that requires minimal-fuss and a forgiving timeline, this is the recipe for you. This artisan sourdough bread recipe produces a crispy, caramelized crust and a soft, fluffy inside with just four ingredients: flour, water, salt, and sourdough starter. This recipe is sure to become a family-favorite.
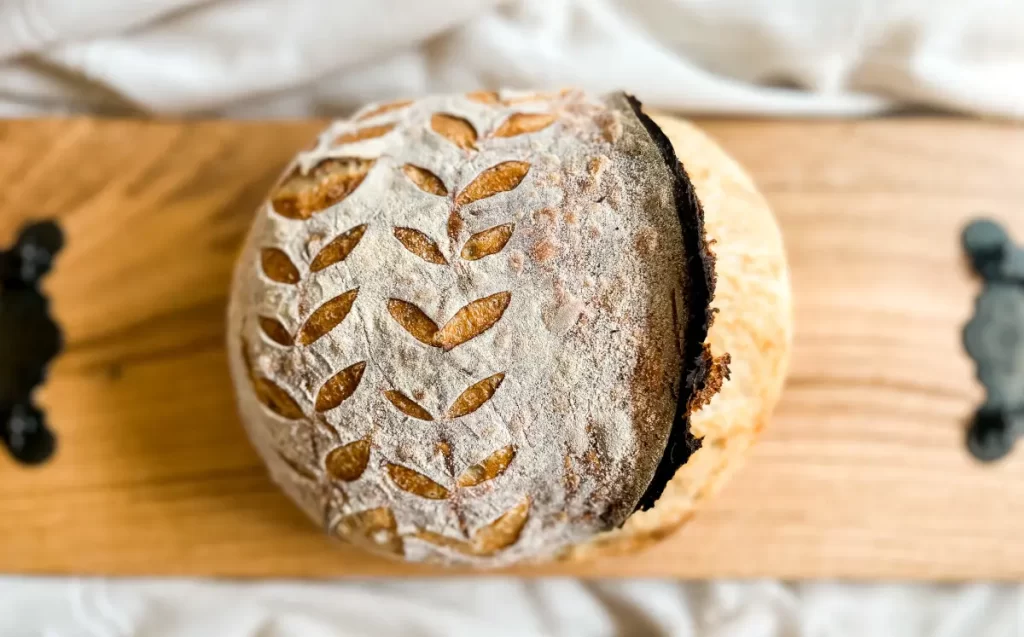
Table of Contents
- Simple Sourdough Bread Recipe Guide
- What is Sourdough Bread?
- How to Make a Sourdough Starter
- What makes this recipe different?
- Tools for Getting Started
- Sourdough Bread Ingredients
- How to Incorporate Add-Ins
- Sample Baking Schedule
- How Temperature Impacts Sourdough
- How To Make Simple Sourdough Bread
- Troubleshooting Sourdough Bread
- Storing Sourdough Bread
- Overnight Sourdough Bread Recipe
Simple Sourdough Bread Recipe Guide
What is Sourdough Bread?
Sourdough bread is known for its distinct flavor, chewy texture, and enhanced digestibility. But what really sets sourdough bread apart from all other breads is its unique leavening agent, sourdough starter. Instead of leavening with commercial yeast, sourdough bread is made with a wild yeast referred to as sourdough starter.
Flour and water create a live fermented culture known as sourdough starter. Basically what’s happening is when you let flour and water ferment, wild yeast and good bacteria begin to colonize. To keep sourdough starter alive it needs to be fed flour and water. The microorganisms in the starter eat the flour and release carbon dioxide which produces bubbles. When the starter is bubbly and doubles in size it is considered active and can be used to leaven your bread.
Take My Online Class
Ready to start making sourdough bread? My online class will teach you everything you need to know to make delicious artisan bread from home on any schedule and at any skill level. Set yourself up for success with clear, concise explanations, easy to follow recipes, and a few extra bonuses. Plus, get access to my private mentoring group, my eBook All Roads Lead to Sourdough, and some of my 100+ year old dehydrated sourdough starter (if you live in the USA).
How to Make a Sourdough Starter
You can make a sourdough starter in as little as two weeks. To make a starter you will need a kitchen scale, a pint-size mason jar, unbleached flour, and water.
Find my Sourdough Starter Recipe here ->

What makes this recipe different?
This Overnight Sourdough Bread recipe has a slower rise time because there are only 50 grams of sourdough starter added when mixing the dough. The longer fermentation time gives more of a tangy sourdough flavor and can be better for those with gluten sensitivities.
The slower rise also allows more wiggle room within the schedule, which makes it an easy recipe to adjust to your day. If you prefer a quicker rise time, check out my Same Day Sourdough Bread recipe. Both recipes will yield delicious bread so try them both out to figure out which schedule works better for you and your lifestyle.
If you are looking for sourdough recipes made with whole grains, try this Einkorn Sourdough Bread and Whole Wheat Sourdough Bread.
Tools for Getting Started
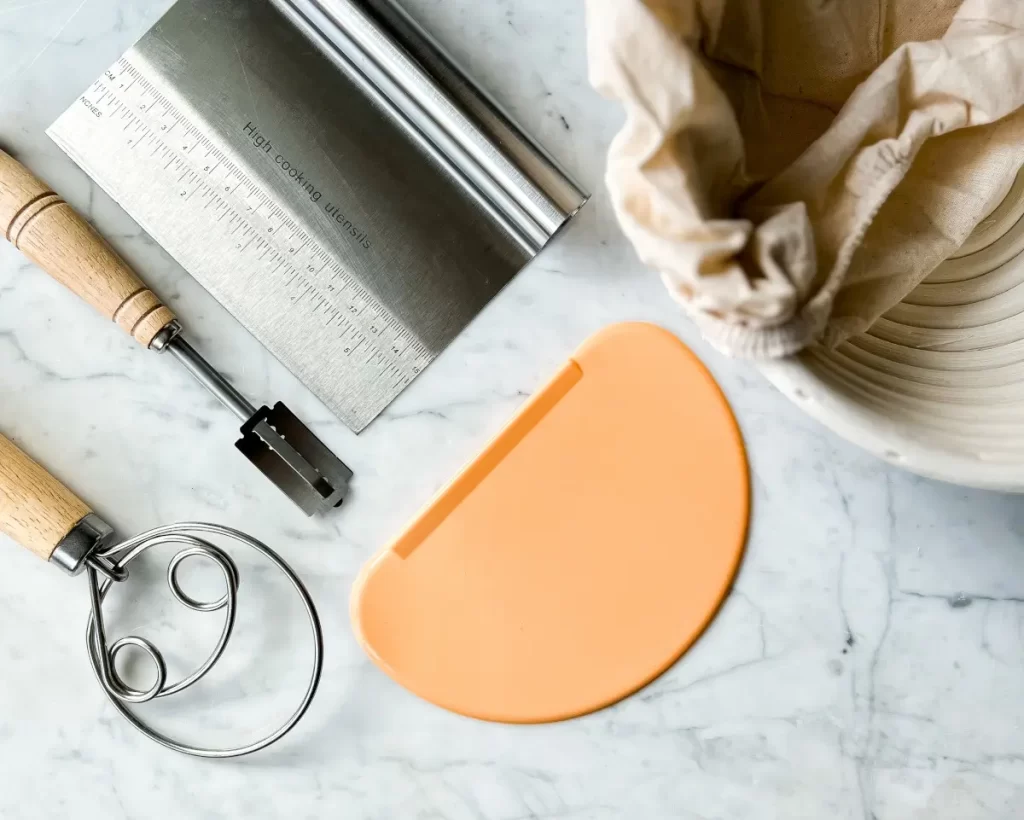
Kitchen scale
Using a scale instead of cups can feel intimidating at first but I promise it will make your life easier. It’s much easier to feed your starter and make sourdough bread with a scale and provides much more accuracy than cups. Plus as an added bonus it decreases the number of dishes you have to wash.
Large Mixing Bowl
You will want at least a 4qt mixing bowl. I prefer to use a transparent glass bowl so I can see the dough from all angles. You can use a plastic or stainless steel bowl if needed.
Proofing Basket
Proofing baskets are available in round (boule) or oval (batard) shapes. I find the best value is to buy the baskets in a kit, like this one. A proofing basket is what you will place the dough into for the second rise. If you prefer not to get a basket you can use a 9-10″ medium-sized bowl lined with a tea towel.
Bread Lame
A bread lame (pronounced lahm) is the tool used to score sourdough bread dough. Scoring involves making a slash in the dough just before baking, allowing steam to escape. Shallow cuts can also be made to create designs on the bread. You can use a really sharp knife if needed but a blade provides a cleaner cut.
Dutch Oven or Bread Oven
Find a dutch oven or bread oven that is 5-7 qt (4qt can work if necessary but it is tight) and is approved for temperatures up to 450F. While you can bake without a dutch oven, it takes some practice figuring out what will work for your oven, which is why I recommend starting with one for best results.
Bread Sling or Parchment Paper
When transporting dough into the dutch oven it is easier to place the dough on parchment paper or a bread sling first. I personally prefer to use reusable bread sling which prevents the bottom of the loaf from getting wavy from the parchment paper indents.
Bread Knife
Once you bake your loaf you will want a sharp bread knife to cut your bread with. I love this bread knife and have had it for years.
For a more in-depth video on sourdough tools check out this free preview lesson from my online class.
You can also find more details on my blog post 14 Sourdough Baking Tools to Make Your Life Easier. Or find a list of all my discount codes and sourdough favorites.
Sourdough Bread Ingredients
- Bread Flour– Flour with a higher protein content, like bread flour, is ideal for sourdough bread. Sourdough bread is a higher hydration dough so it needs a flour that is efficient at absorbing water like bread flour is.
- Active Sourdough Starter– An active sourdough starter refers to starter that was recently fed and is bubbly and doubled in size.
- Water- Despite what many people say about only being able to use filtered water I’ve always used tap water with no issues.
- Salt- Any type of salt will work.
How to Incorporate Add-Ins
When it comes to sourdough inclusions there are so many possibilities. Some of my favorites are jalapeno cheddar, everything but the bagel, chocolate, cinnamon honey butter, and more.
You can add inclusions during the stretch and fold phase or during lamination. I personally use both methods depending on the type of add-ins. Most of the time, I add my extra ingredients 30 minutes after making my dough. I prefer this method as it does a better job of incorporating the inclusions throughout the bread. However, when using ingredients like honey or cream cheese, I prefer to add them during lamination as these ingredients can dramatically change the texture.
Lamination is performed after the dough is finished with bulk fermentation and is ready to be shaped. To laminate the dough, gently pull it into a chubby rectangle and add the mix-ins on top. Fold the bottom two-thirds of the dough on itself and again sprinkle more of the mix-ins to the top layer of the fold. Then fold the top third over it and add one more layer to the top. Once added, roll it up like a cinnamon roll and using cupping hands shape the dough into a ball. Tearing can sometimes happen, depending on the type of add-ins, so be gentle with the dough.
If the dough begins to tear quickly get it into the bowl/basket for the second proof. Continuing to touch the dough will only make it worse. Trust me, stop while you are ahead.
Need inspiration? Check out 21 Unique Sourdough Add-Ins you Need to Try. Or you can make naturally dyed sourdough bread like this Pink Sourdough Bread recipe!

Sample Baking Schedule
This schedule is based on rough estimates. The temperature of your dough, kitchen, humidity, and strength of starter will all impact the times so while this will give you an estimate it is best to look at the signs the dough is ready to move on. You are looking for about a 75% rise.
There is flexibility in this schedule to make it work for you. If 8am is not a good time to feed your sourdough starter you could do a smaller feeding like 1:1:1, 4-6 hours before mixing the dough. If you don’t get around to baking bread around dinner time you can always leave the dough in the fridge for an extra day or two. Do what works for you!
If you are looking for more precise timelines based on the temperature of your dough The Sourdough Journey put together a great resource. It looks at different temperatures and percentages of sourdough starter to give you an estimate of how long the first rise will take. My recipe below calls for 10% sourdough starter. To determine the percentage of sourdough starter in a recipe you would use this formula (amount of starter / the total amount of flour) x 100 = starter percentage.
| Steps | Time |
| Feed sourdough starter 1:4:4 ratio (i.e. 10 g starter: 40 g flour: 40 g water) | 8 am |
| Mix dough | 7:00 pm |
| Stretch & folds | 7:30 pm-8 pm |
| Shape | ~7 am |
| Final proofing in fridge | 8 am-4 pm |
| Bake | 4 pm |
How Temperature Impacts Sourdough
Temperature is very important when it comes to sourdough and fermentation. If your house is cooler than 68F the dough will have a hard time rising. If your house is cold I recommend using a dough mat or finding a warmer spot in your house. Placing the dough in a draft-free area like a turned off oven or microwave may help or near a heating vent.
If your house is above 75F I wouldn’t recommend leaving the dough overnight as it is more likely to overproof. You can try using cold water to help cool down the dough and stick to a shorter timeline like 8 hours as that may help it from getting too warm.
How To Make Simple Sourdough Bread
Feed Sourdough starter
The first step to making bread is to feed your sourdough starter. The temperature of your house, activity level of your starter, and how much you feed the starter will all impact how quickly your starter rises. A 1:1:1 ratio meaning 1 part starter: 1 part flour: 1 part water will rise in about 4-6 hours. Whereas a 1:5:5 ratio meaning 1 part starter: 5 part flour: 5 part water will rise in about 12 hours. Feed based on the timing you want to make bread. Once the starter doubles or exceeds its size and becomes bubbly, it is ready for use. If you can’t use the starter while it is at peak place it in the fridge until you are ready.
Mix ingredients
Mix together the flour, water, salt, and starter together with a danish dough whisk (10% off with link), spoon or hands until incorporated. The dough will look shaggy at this point. Cover bowl with a lid or dinner plate and let it sit for 30 minutes.
stretch and fold
Stretching the dough helps build strength and aerates the dough. Typically I aim for 3-4 sets in my traditional recipe but with this simplified version I aim for 1 or 2. If you do 2 sets wait 20-30 minutes in between the sets to let the dough relax. You can also do more sets if you have time. Cover the dough in between sets.
To stretch and fold grab one side of the dough with a damp hand and gently shimmy the dough up and then fold it on itself. Repeat this 3 more times rotating the bowl 90 degrees each time.

first rise
After stretch and folds let the dough sit overnight on the counter covered, about 10-14 hours (depending on the temperature) until the dough has risen about 75%, not completely doubled. The dough should be aerated with bubbles showing on the sides and bottom of the dough and jiggle when the bowl is shook. If it does not show these signs continue to let the dough sit, preferably in a warm spot to finish bulk fermentation.
If the dough is very pillowy, sticky, and deflates when working with it, it is overproofed. At this point you can try to bake it if it will hold some shape. Personally my favorite thing to do with overproofed dough is to make focaccia. Put it in an oiled 9×13 pan with more oil on top and add seasoning and cheese. Dimple the dough and bake at 425F for 25-30 minutes. Check out my tutorial.
shape dough
The goal of shaping is to create a taut, outer skin on the dough. The skin creates tension, helping the dough to hold its shape when baked, which translates to a good rise and a crispy crust.
Shaping instructions:
- Dump the dough on an unfloured surface and gently spread the dough into a chubby rectangle.
- Gently pull the bottom of the dough up, creating tension on the surface of the dough, and bring the dough on top of itself about halfway.
- Fold one side of the dough up and over, bringing it two-thirds of the way onto the dough.
- Fold the other side of the dough on top.
- Starting on one side roll the dough on top of itself into a ball shape bringing the smooth side on top.
- Take your hands in cupping shape and rotate the dough counter-clockwise towards you to get a smooth surface on top of the dough.
- Using a bench scraper or your hands, flip the dough upside down into a banneton basket lightly floured with rice flour or well floured with all purpose. If you do not have a banneton, line a 9-10″ bowl with a floured tea towel and use that instead.
- Cover the basket with something to keep the moisture in. Optional: pinch the seams together once the dough is in the basket to solidify the taut skin on the surface and tighten the ball.
- To make an oval shape vs round on step 5 instead of one roll into a ball, roll the dough up like a cinnamon roll. Pinch the sides to seal them and then use your hands to gently pull the dough towards yourself to smooth the surface.
second proof
Place dough in the fridge covered for the final proof. The fridge slows down fermentation which allows your dough to sit for longer periods of time. You can bake anytime after the two hour mark or after. Ideally, within 48 hours of placing it in the fridge. Longer fermentation times will make for a more sour loaf.
scoring
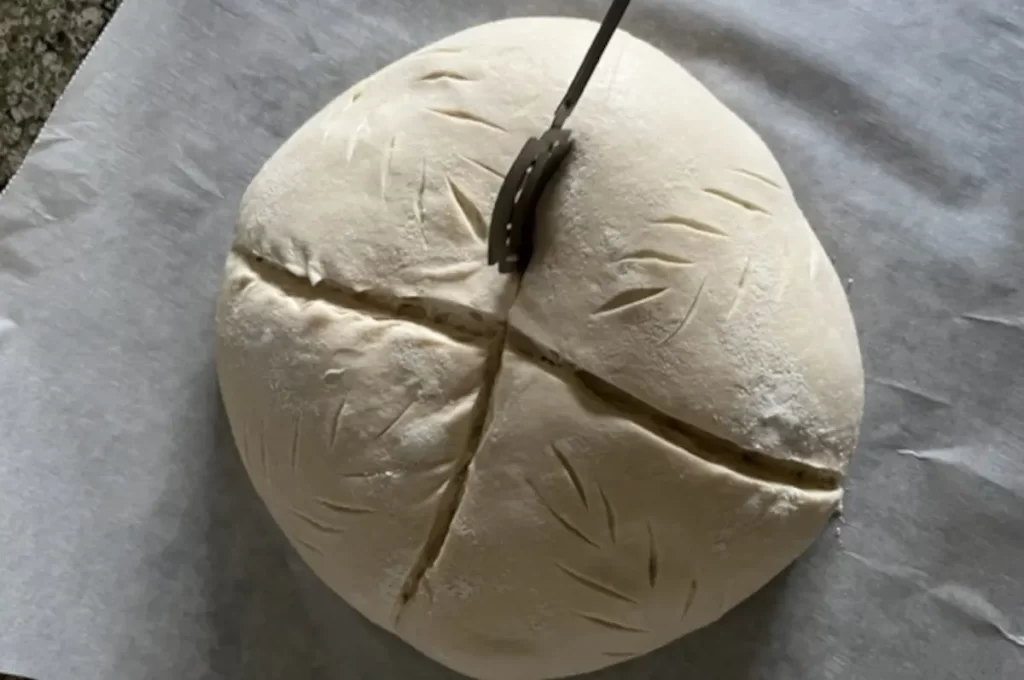
Preheat the oven with the dutch oven to 450F once the dough is ready. Flip the dough onto a bread sling or parchment paper and score the dough. Hold the blade at a slight angle and quickly slice the bread about 1/2 inch deep. This can be one line or multiple depending on your preferences. For more intricate designs hold the blade at 90 degrees and make shallow cuts.
Baking
Bake the loaf at 450F in a dutch oven. Begin with the lid on for 20 minutes followed by an extra 15-20 minutes with the lid off. The loaf should sound hollow when you tap on the bottom. That is how you know it is baked through. Once done baking, remove from the dutch oven and place onto a cooling rack to cool.
Troubleshooting Sourdough Bread
There are 3 common reasons your sourdough bread did not turn out as you hoped.
1. A Weak Starter
If you made a starter from scratch it should be at least 10 days old, bubbly and doubling consistently, before baking with it. No matter the age of your starter if it is not doubling and getting bubbly with each feeding it is best to strengthen it before baking with it. To strengthen it leave it on the counter and feed it daily until it is doubling.
2. underproofing
This is when your dough does not have long enough to ferment. This is especially common in the winter months because fermentation is slower in cooler temperatures.
Your loaf may be underproofed if the dough does not rise, the crumb is dense and gummy, the crust is pale with a doughy center even with long bake times, or has large holes at the top with dense areas surrounding it. If your loaf is underproofed extend the time your dough is on the counter for the first proof, find a warmer spot for it to rise, or increase the amount of starter to 75 grams.
3. Overproofing
This happens when the dough is left for too long to rise. The gluten bonds begin to wear out and the loaf rises too much resulting in the loaf collapsing.
Your loaf may be overproofed if the dough won’t hold shape, puffy and sticky dough, flat loaf with lots of small holes through out. If your loaves are overproofing, shorten the time your dough is on the counter for the first proof or find a cooler temperature.
Storing Sourdough Bread
Store a whole loaf, or a side that can be placed cut side down with only the crust exposed, on the counter up to 2 days with just a tea towel over it. If the inside of the loaf is exposed I store it in a bread box or in a ziplock back.
Sourdough will not hold its crunch for extended periods of time but can be revived in the oven or toaster. To refresh a loaf preheat the oven to 400F. Run the loaf quickly under water and then place in the oven for 10-15 minutes until the crust is crispy again.
Sourdough bread also freezes really well. To freeze a loaf, either place the whole or half a loaf into a freezer safe bag or preslice the loaf and place parchment paper in between each slice before placing in a freezer bag.
To thaw, place the loaf on the counter for several hours in the ziplock bag. If you are in a time crunch I’ve used the defrost feature in the microwave to thaw my loaf. Once thawed, use the same refresh instructions as listed above. For individual slices, pulled from the freezer, pop it in the toaster.
Overnight Sourdough Bread Recipe
Ingredients
- 50 grams sourdough starter, doubled in size and bubbly, ¼ cup
- 500 grams bread flour, 3 ½ cups
- 350 grams water, 1 ½ cups
- 10 grams salt, ½ Tablespoon
Instructions
- With a danish dough hook, hands, or large spoon mix together active starter, water, and salt in a straight edge container or clear bowl to break up the starter. Add the flour and mix. Cover and let sit for 30 minutes on the counter.50 grams sourdough starter, doubled in size and bubbly, 500 grams bread flour, 350 grams water, 10 grams salt
- After 30 minutes get your hand damp and then perform a set of stretch and folds. At this point you can add in mix-ins. Cover and let rest. You now have 2 options: if you will be home and have time, add in 1 or 2 more sets of stretch & folds every 30 minutes or leave the dough to sit on the counter for the remainder of the time. Adding additional stretch & folds does help the loaf to rise more in the oven but both options make delicious bread.
- Once the dough has risen 75%, domed on top, has bubbles on sides it is ready to shape (roughly 10-14 hours later). Dump the dough onto an unfloured surface. Turn the dough over and gently spread the dough in a chubby rectangle. Fold the dough like an envelope, starting at the bottom and pulling up to build tension and then bring on top of the dough halfway. Bring each side up and out and then place slightly over the middle of the dough. Pull the top of the dough out and up and bring it on top of the dough, rolling the dough back over. Cup your hands and begin rotating counter clockwise while sliding the dough towards you. Once you have a taut round ball place the dough upside down in a banneton basket or a floured bowl with a tea towel. Cover with something that will keep the moisture in.
- Place the dough in the fridge for about 8+ hours or up to 2 days.
- Preheat dutch oven in the oven at 450℉.
- Flip dough onto parchment paper and score the bread with a bread lame or sharp knife.
- Bake bread for 20 minutes with the lid on. Take the lid off and bake for another 15-20 minutes depending on how dark of a crust you would like. I prefer mine a little on the lighter end so I pull at 15 minutes. The bread should sound hollow when you knock on the bottom, this is an indicator the bread is cooked through.
- Let the bread cool on a cooling rack. To ensure the loaf is fully baked through wait at least 2 hours before cutting. Or if you are like me slice it warm and enjoy warm bread!
Notes
- For best results I recommend using the gram measurements instead of cups, as it will be much more accurate.
- Timing will depend on the temperature of your dough and the activity level of your starter. Watch your dough versus the clock. See the blog post for a sample schedule.
Nutrition
Nutrition information is automatically calculated, so should only be used as an approximation.



Turned out perfectly. This is my first loaf that produced a distinctive ear.
So happy to hear that! Thanks for sharing Kyla.
How would I divide this to use 2 qt Dutch ovens ? how long would baking Time be ?
Right before shaping split into 2. Baking time will be about 20 minutes covered, followed by 10-12 minutes uncovered.
I’ve baked bread for years but was new to sourdough. I tried many other recipes and they just didn’t come out right. Overnight bulk fermentation was a game changer! This recipe was super easy to follow and has produced many delicious (and beautiful) loaves. Would recommend to anyone. Thanks!
Thanks so much Ashley! I’m so happy to hear that.
Hi Emily!
I LOVE your recipes and they are all my go-to for sourdough bread & dessert. Would it be okay to use all purpose flour for this recipe? If so, do I need to adjust the measurements?
Thanks Joanne! If you use all-purpose flour I recommend reducing the amount of water by 15-25 grams.
Hi Emily, Cheffy here, long-time chef (now retired), but new to baking. I love your simplicity approach. I’ve tried numerous recipes unsatisfactorily, looking for one that is simple and repeatable. Now I’m trying yours. It looks promising, as the timing fits my schedule.
So, one question, assuming this try works out well: can I substitute some whole wheat flour for some of the bread flour, and if so, what ratio would be best without adjusting the schedule? Should I sift out the bran or leave it? I only bake once a week or two. What’s your method of cold storing my starter, which is 1/4/4, with a 50/50 bread/whole-wheat flour mixture. It’s mature, almost a year old and very dependable.
Thanks.
Cheffy
http://www.jeffskitchen.net
Hi Cheffy! I wouldn’t do more than 20% whole wheat to start so 400g bread flour 100g whole wheat. It’s up to you whether you sift out the bran but sifting it will create a lighter, fluffier loaf.
The key to success with a recipe is temperature and % rise. So if your dough is about 68F then you want to let it rise until it hits 75%. If your dough is warmer like 75-80F you want to do a shorter rise like my same day sourdough bread- https://countryroadssourdough.com/same-day-sourdough-bread/
For storing your starter I have an article on that here: https://countryroadssourdough.com/feeding-sourdough-starter/
hey, thanks for the recipes. I’m really excited to try them. I’ve already made the chocolate bread twice. big hit with my family. I have question about this one though. it only calls for 50 gr. of starter. It is surprisingly less than many recipes i found on line that call for 100-125 gr for the same amount of flour. I wonder why. even you chocolate bread call for more. Just curious. and form reading the reviews it works. but why is such a big difference in the amount of starter?
Less starter means a longer rise time so since this bread proofs overnight it needs less starter. If you prefer a shorter rise time you can use my same day sourdough bread recipe: https://countryroadssourdough.com/same-day-sourdough-bread/
Hi Emily
Stumbling into your page as a novice sourdough baker is a godsend. I love the details on the steps to make sourdough successfully. Tried both overnight and 1 day recipes and both turned out great.
I do have few doubts, what size dutch pan ( le creuset) to use for both of the recipes and which size banneton basket to use for it.
I hardly get oven spring when baking the bread, so wondering if the size matters or not.
Hi Ema, so glad to hear the recipes are turning out well for you. As far as the banneton size I recommend 8-10″. For the dutch oven I would recommend 5-7 quart. Thanks!
Thank you 😊