This post may contain affiliate links . Read my full Disclosure Policy.


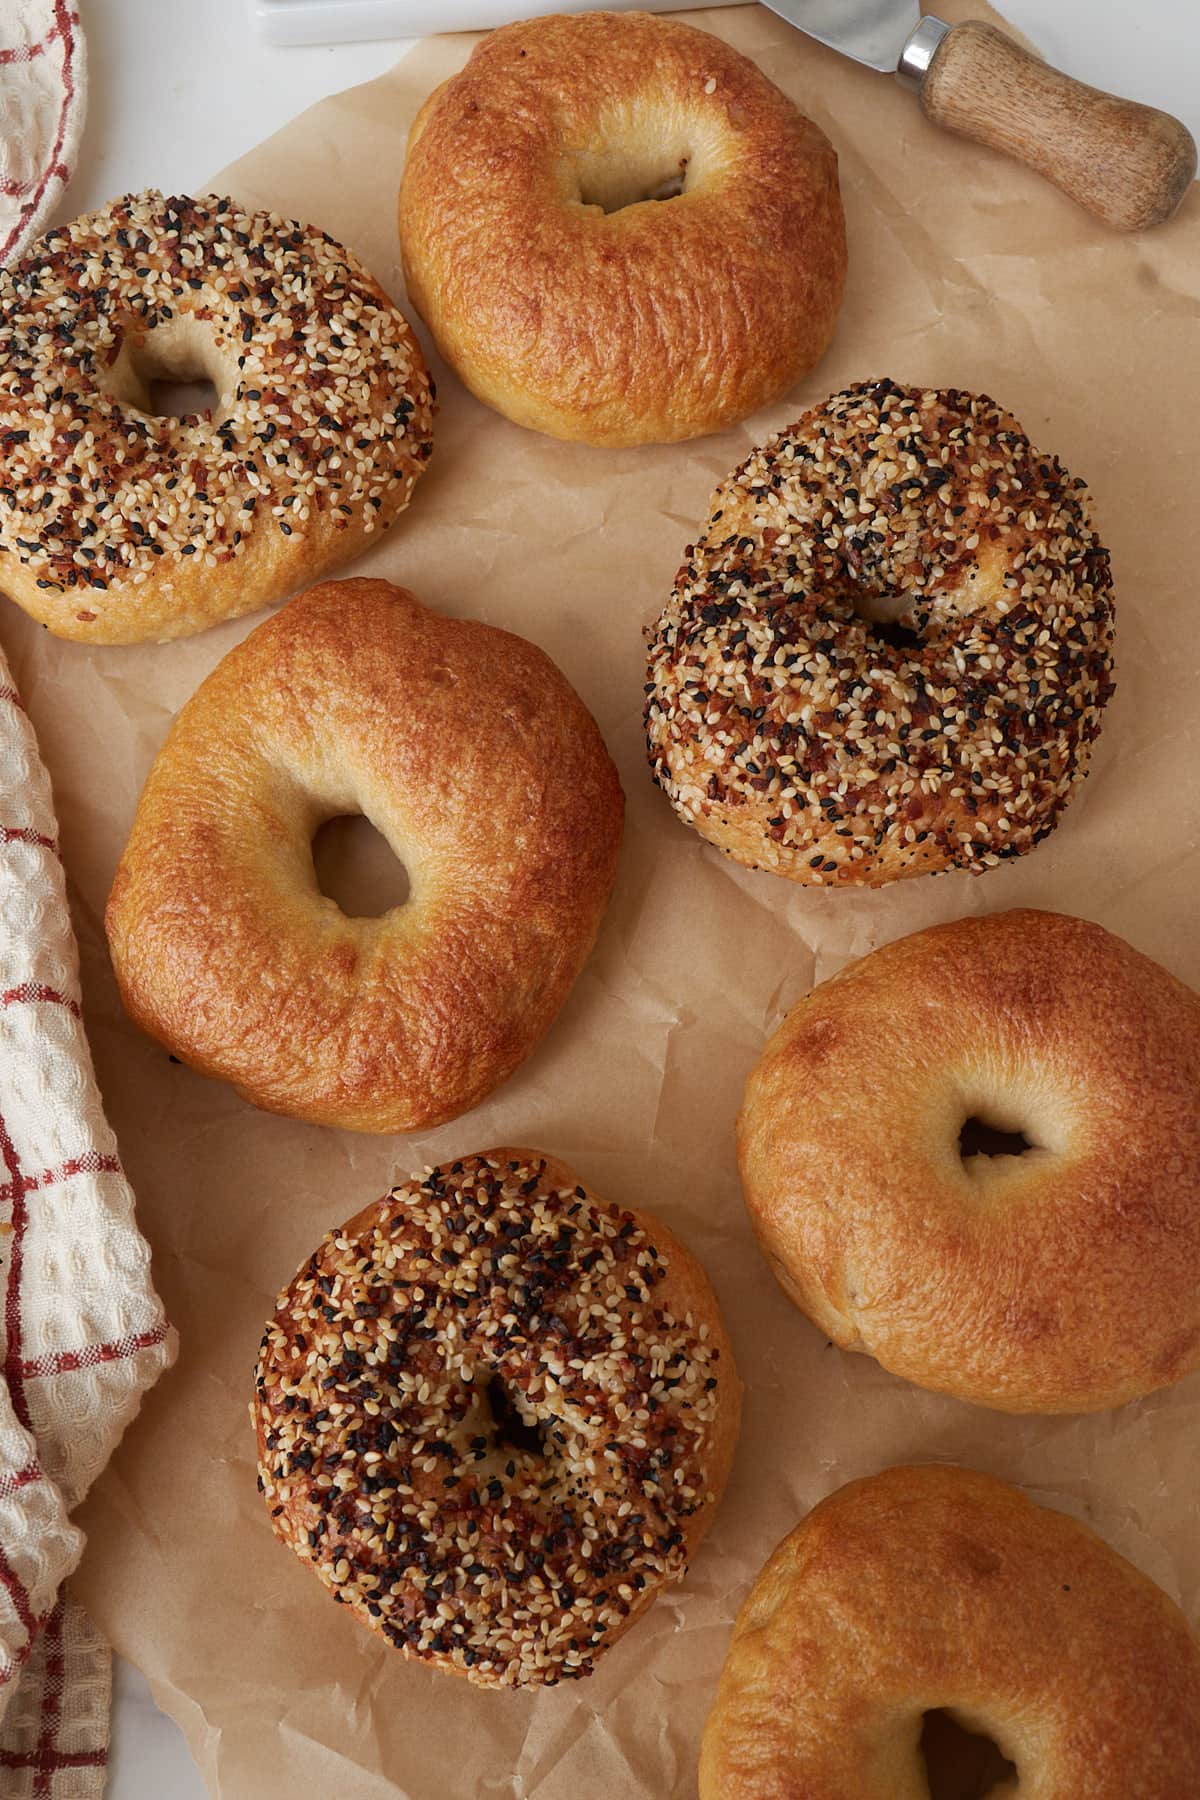
This easy, overnight Sourdough Bagel Recipe is everything you love about a classic bagel, chewy, flavorful, and satisfying, but even better. Made with active sourdough starter, they rise naturally overnight and develop that signature tangy flavor. Keep them simple as plain bagels or customize with your favorite seasonings and toppings for the perfect homemade bagel every time.
Save & Summarize
“Wow! I just have to say what a perfect recipe!” – Stephanie
I know it may seem intimidating to make bagels, but I promise they are pretty easy to make and use basic household ingredients you probably have on hand. They pair well with butter or cream cheese, or you can use them to make breakfast sandwiches with your favorite fillings, like an over-easy egg and bacon. If you’re looking for a way to switch things up from baking your usual sourdough bread, this sourdough bagel recipe is just what you need!
If you are short on time, try Sourdough Discard Bagels that are done in under 2 hours with the addition of yeast.
Important Ingredients and Substitutions

- Bread flour- I like to use bread flour for this recipe to get the best chewy texture. In a pinch, you can use all-purpose flour but I recommend reducing the water by 25 grams.
- Active Starter – This replaces commercial yeast in the recipe and is what leavens the dough. An active starter means that it has been recently fed, bubbly, and doubled in size. Learn more about your starter here.
- Sugar- This helps balance the tang of the starter and adds just a hint of sweetness. You can swap the sugar for the same amount of honey or maple syrup if you prefer.
See all the ingredients and amounts in the recipe card below.
Sourdough bagel flavors
While I love a plain bagel, it is fun to add different flavors and toppings to the bagels. The toppings are added to the bagels after they are boiled, before baking them in the oven. You can make all the bagels the same, or have fun with different flavors! It can be fun to do some savory and some sweet. Here are a few flavor ideas for you to try:
- Shredded Cheese -You can use any type of cheese you like, but I love cheddar, pepper jack, or colby cheese. Sprinkle the shredded cheese on top of the bagel.
- Everything But the Bagel Seasoning– To easily get the seasoning all over the bagel, I like to pour some seasoning on a plate and dip the freshly boiled bagel into the seasoning. If you can’t find this seasoning, you could use a mix of sesame seeds, poppy seeds, dried onion, and dried garlic. Pro tip: make sure the bagel is damp when dipping it in the seasoning or it won’t stick well.
- Jalapeno & cheddar cheese – Sprinkle the cheese and set the jalapeno slices on top of the bagel. I prefer to use pickled jalapenos, but fresh ones work too. (If you love this flavor combination, be sure to checkout my Jalapeno Cheddar Sourdough Bread and Jalapeno Cheese Sourdough Biscuits recipes.)
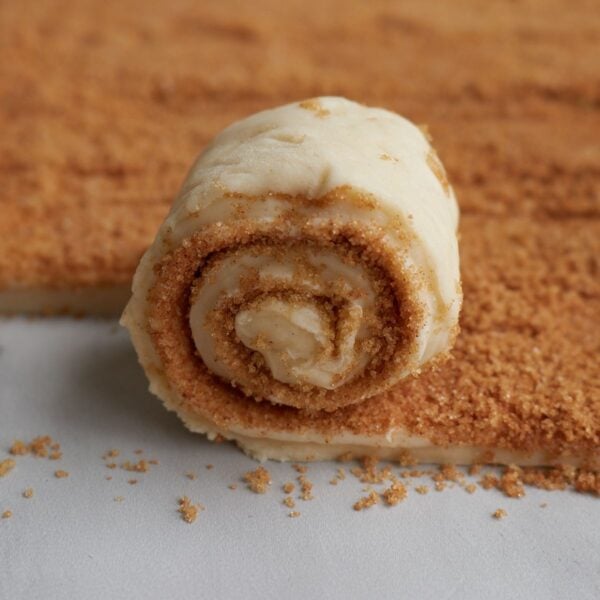
- Cinnamon sugar – Using the same technique as the seasoning above, add the cinnamon and sugar to a plate and then dip the top of the boiled bagel into the cinnamon and sugar mixture.
How to Make Sourdough Bagels
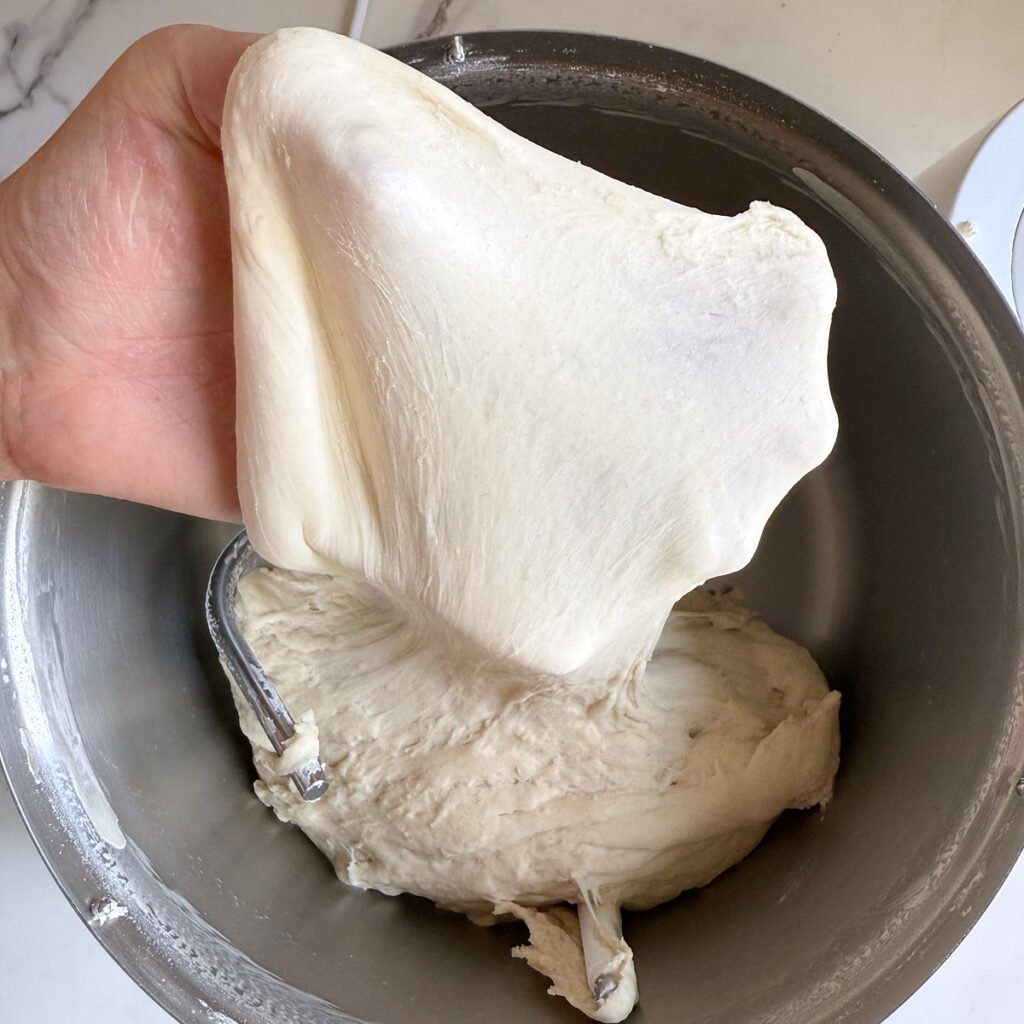
Mix & Knead: Add all the ingredients, except the toppings, to the bowl of a stand mixer. Using your dough hook, knead the dough for about 15-20 minutes or until the dough can pass the windowpane test. The windowpane test is used to see how well the gluten has developed. When the dough is able to stretch thin enough that you can see light through, without it tearing, it has passed. You can also mix this dough in a bowl and then knead it by hand.
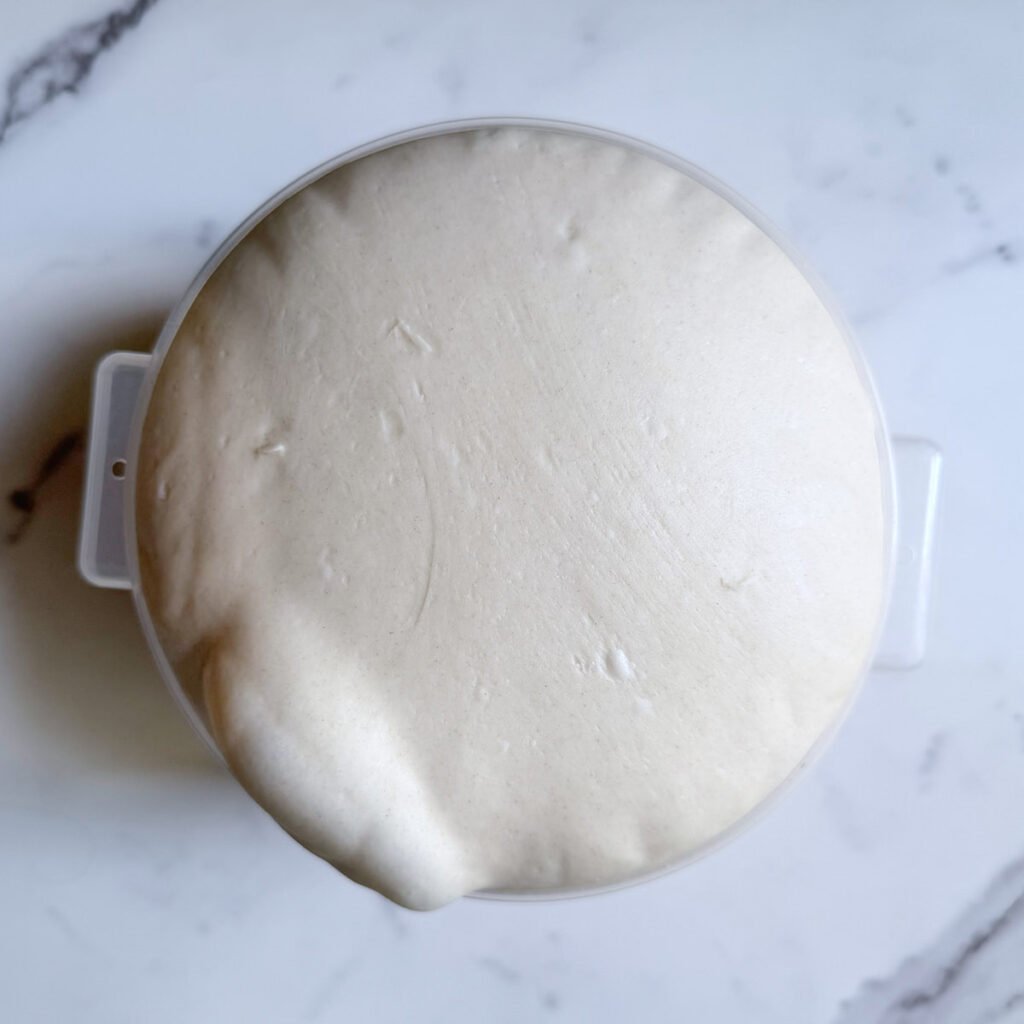
Bulk Fermentation (First Rise): Transfer the bagel dough to a bowl or straight-edge container and let it rise on the counter overnight, covered, until doubled in size. This will take about 8 hours, depending on the temperature of your house. At 72°F, my dough doubled in 8 hours. If your house runs warmer or you need a longer rise time, you can reduce the amount of starter in the dough to 125 grams to slow down the process.
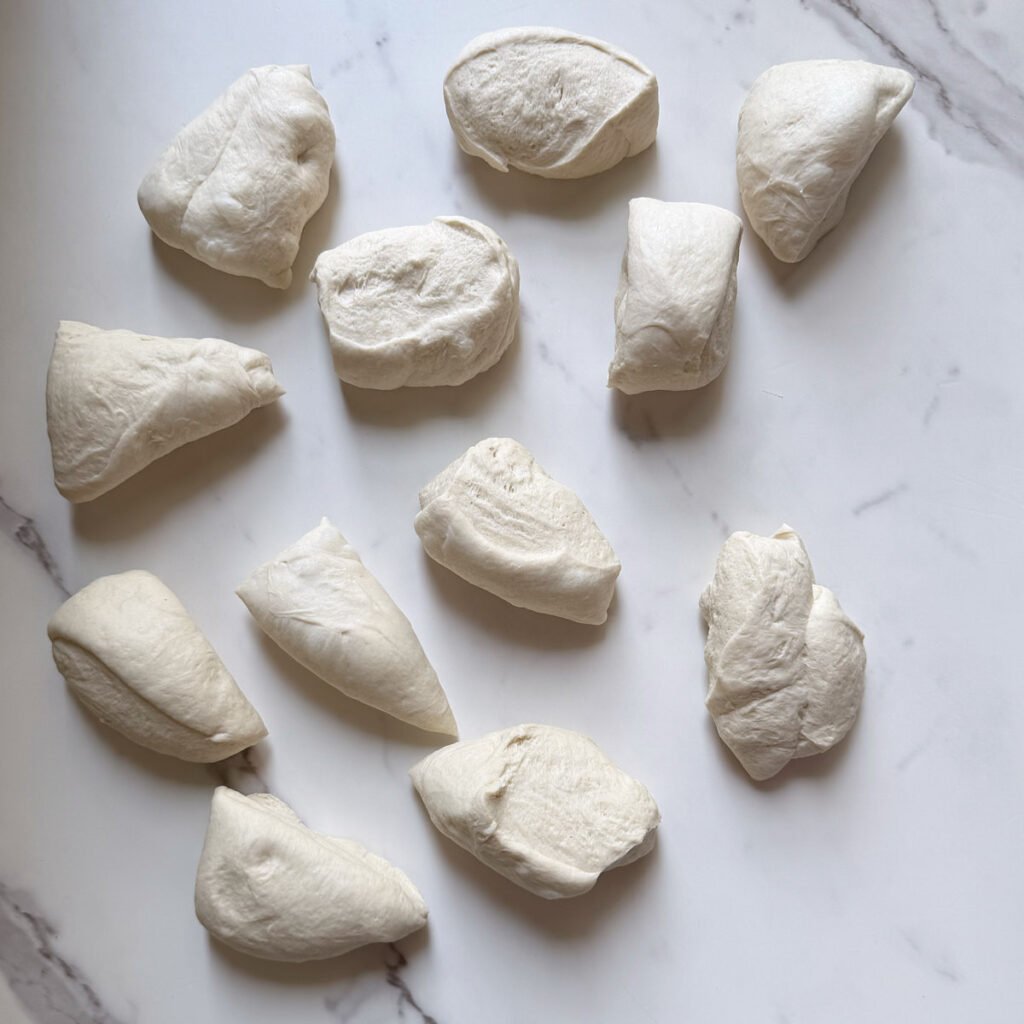
Divide dough: Once doubled in size, punch down the dough and divide it into 12 equal pieces, about 108 grams each. I like to use a bench scraper for this.
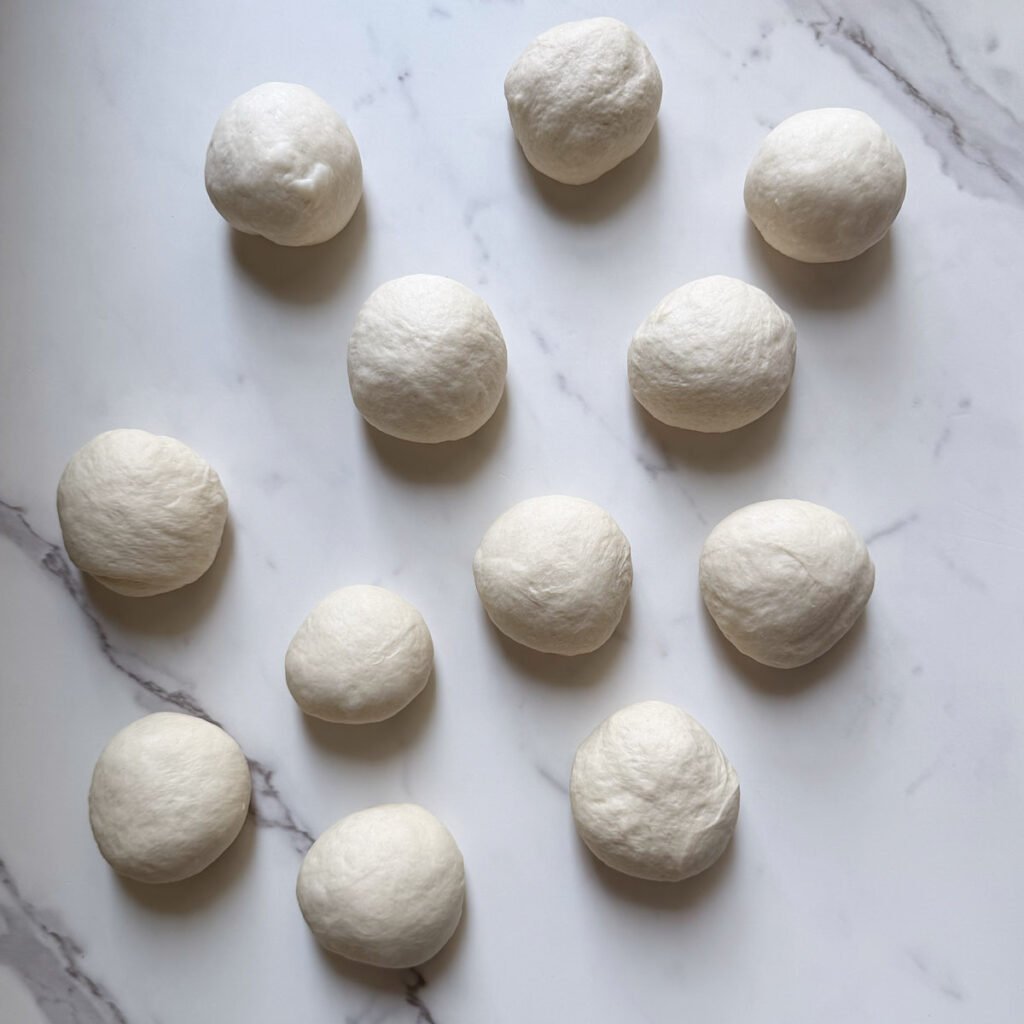
Form into balls: Taking one section at a time, form the dough into a ball by pulling the sides to the middle of the dough and then flipping it over. With your hand in a cupping shape, rotate the dough ball a few times in a circle. Repeat with the remaining 11.
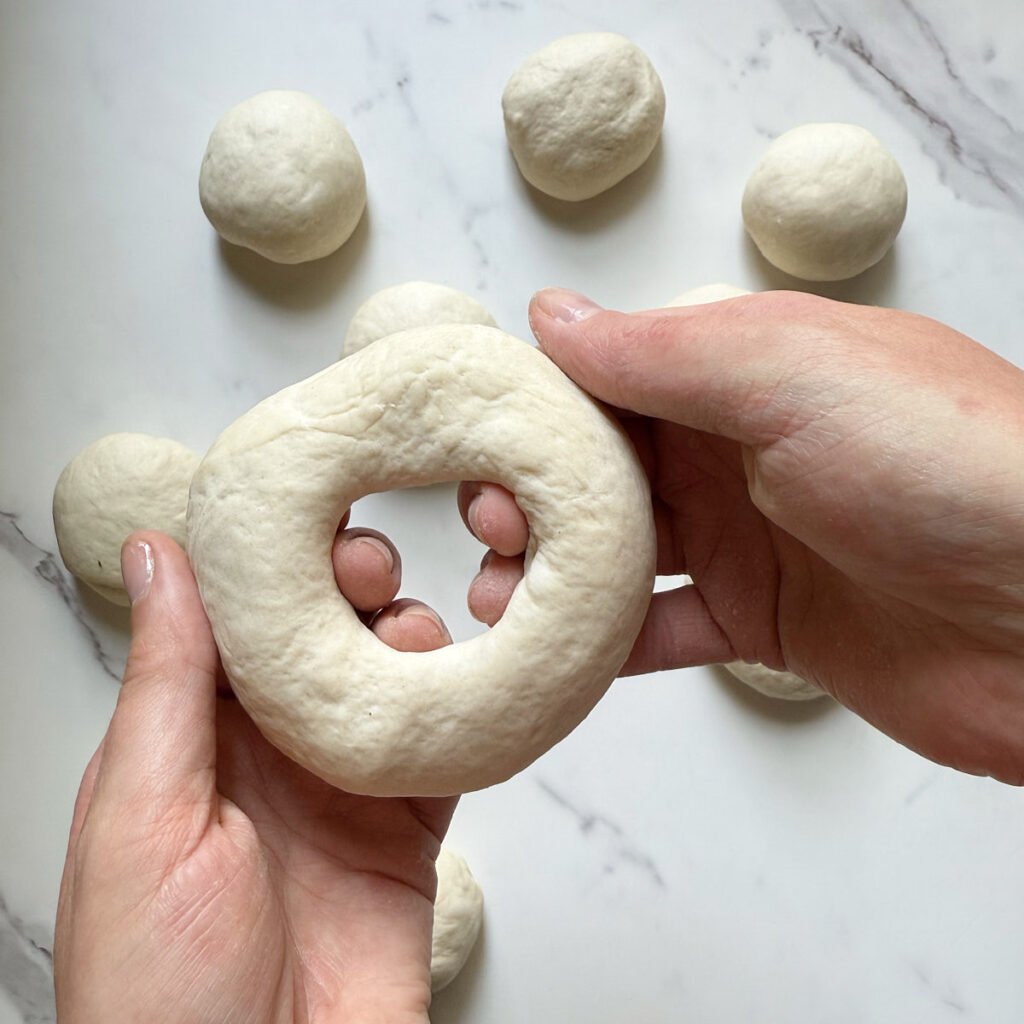
Shape into bagels: Poke a hole in the middle of the dough and then, using both pointer fingers inserted on each side, rotate your fingers around each other, making a hole in the middle of the dough. Ideally you want the size of the hole to be 1.5-2 inches.
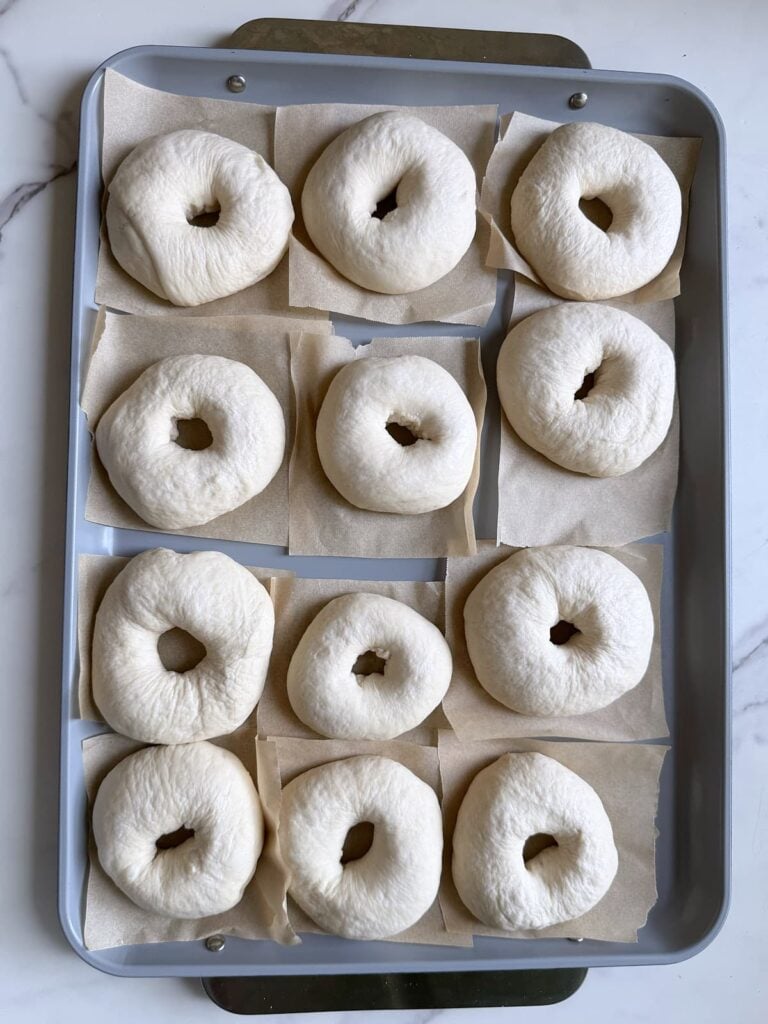
Second rise: Cut twelve 4×4-inch squares of parchment paper. Place a shaped bagel on each piece of parchment paper, and then place all 12 of them on a large baking sheet. Cover with a slightly damp tea towel and let the bagels rise for another 30 minutes to an hour to relax and get puffy. The bagels will not double in size.
Alternatively, you can place all 12 of them on a silicone mat, but when you pick them up to boil them the shape of the bagel can change.
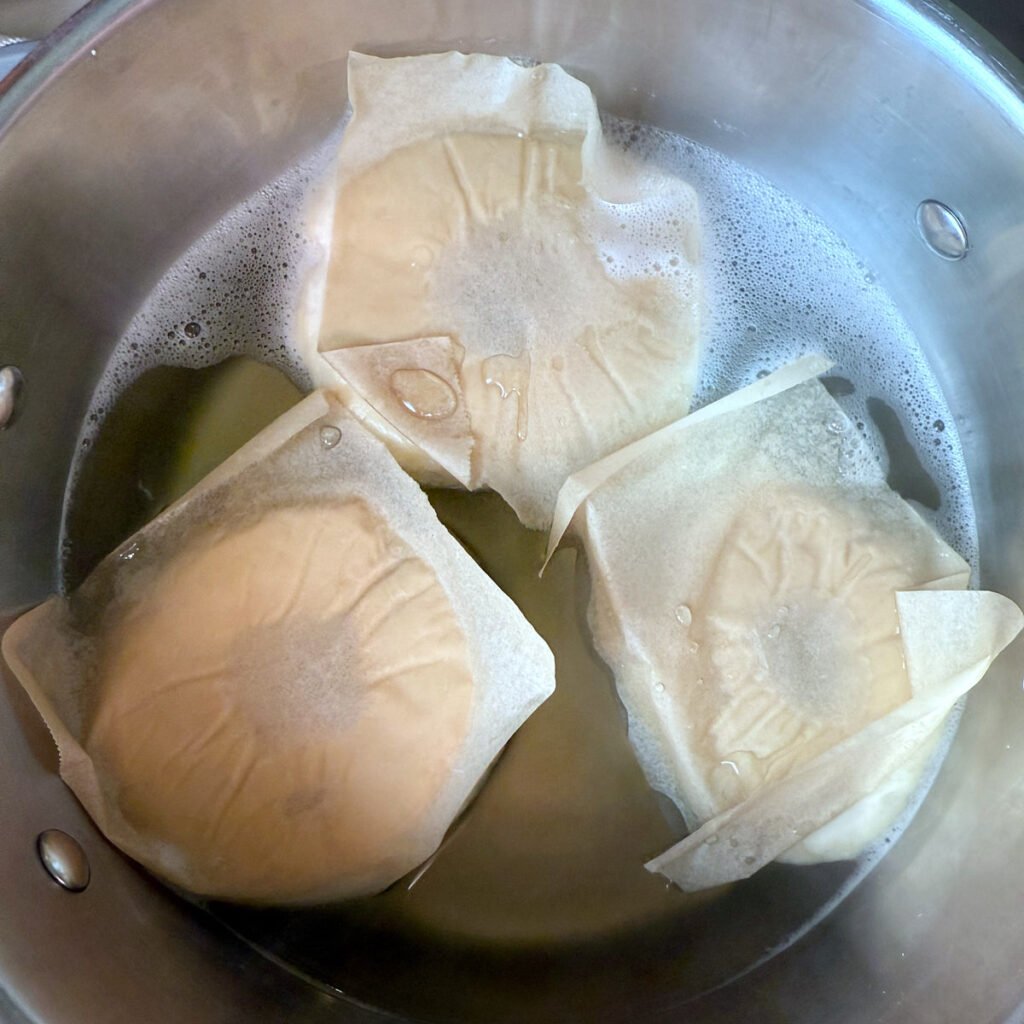
Boil: After the bagels have had a chance to rise, preheat your oven to 425°F. Bring a large pot of water to a boil and add 1 tablespoon of baking soda. Add a few bagels at a time to the boiling water, parchment paper side up, and boil them for about 1 minute on each side. Once the bagels are in the water, you can easily remove the parchment paper from the dough. Use a slotted spoon or spider strainer to easily remove the bagels from the water and drain excess liquid.
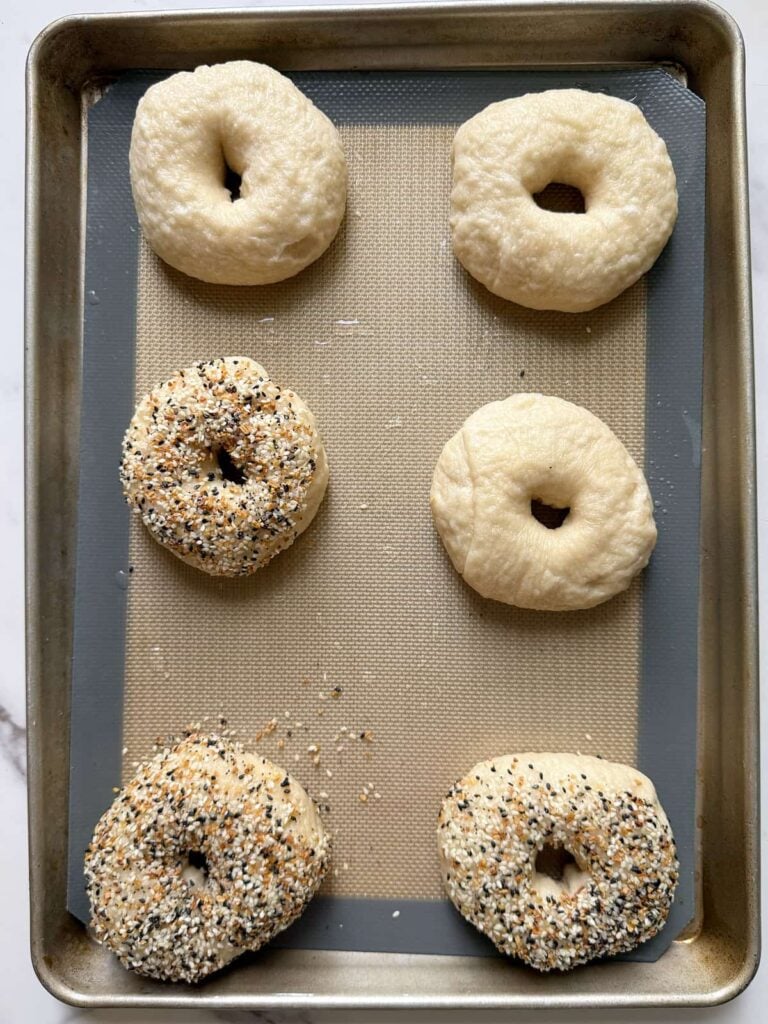
Add toppings: Place the bagels on lined sheet pans, 6 to each pan. Add your toppings of choice to the tops (see notes on flavor options above and for tips on adding to bagels).

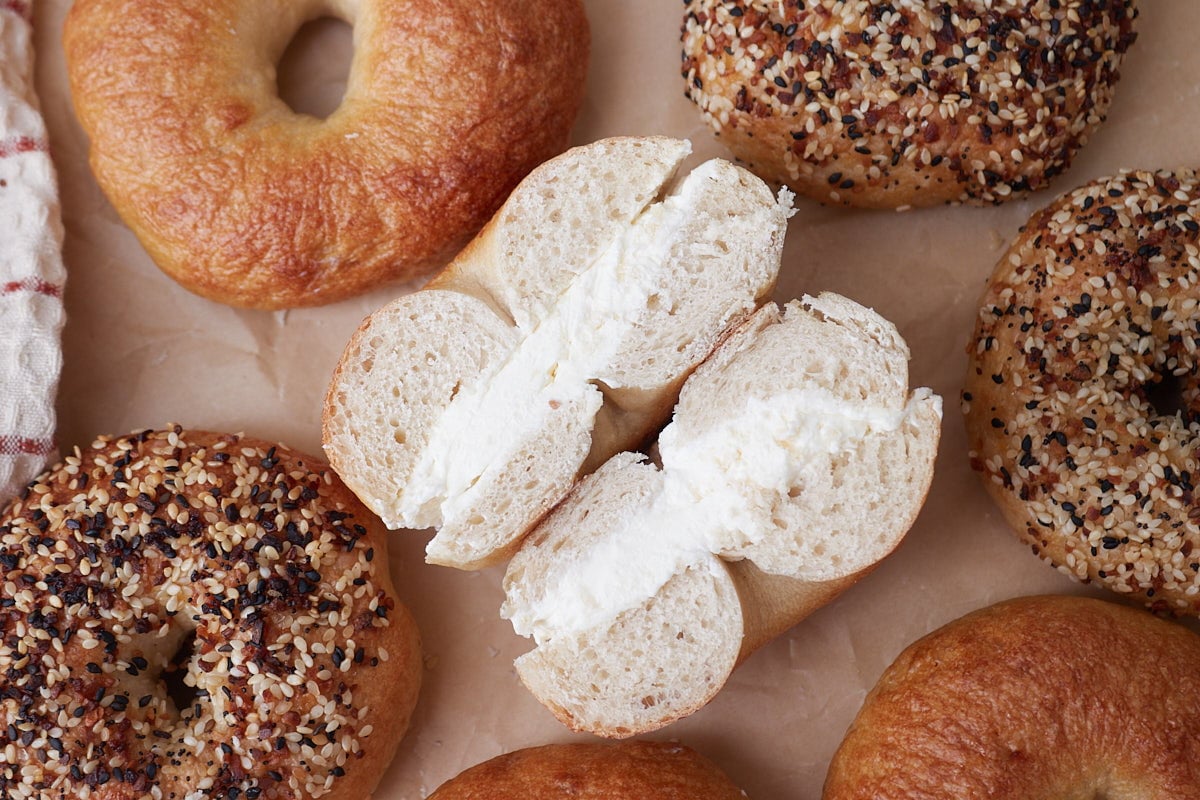
Bake: Bake for 18-20 mins or until lightly golden brown. Let the bagels cool on a wire rack and then enjoy them with butter or cream cheese.
Sourdough Bagels Recipe Tips
- I highly recommend making individual parchment paper squares for the bagels to rise on. It makes it easier to put the bagels into the boiling water without messing up the shape.
- If room temperature is 65°F or lower, use a temperature-regulated dough mat (use code country10 for 10% off) or proofing box to keep it warmer. Learn more about tips to keep your dough warm here.
- Knead the dough until it passes the windowpane test. This ensures proper gluten development in the dough.
- Use your sourdough starter at peak. Using a bubbly and active starter will set you up for success and help your dough to rise. Learn more about how to feed and care for your sourdough starter.
- Add toppings, especially seasonings and seeds, when the bagels are damp to help them stick to the bagels.
Sourdough Bagels Sample Schedule
Here is a sample schedule for baking the sourdough bagels. The timeline can depend on the temperature and the activity of your starter, so your time may vary. This schedule assumes the dough temperature is around 72°F.
* Note: if you need a longer rise time than 8 hours, keep the dough in a cooler spot, use cooler water when mixing the dough, or reduce the amount of starter in the recipe by 25 grams.
| Step | Time |
| Feed starter a 1:5:5 ratio and leave at 72°F (15 g starter: 75 g flour: 75 g water) | Day one: 10 am |
| Mix the dough together First rise | Day one: 10 pm |
| Shape the bagels Second rise | Day two: 6 am |
| Boil the bagels and bake. | Day two: 7 am |
How to store and freeze Sourdough Bagels
You can store these bagels on the counter in a plastic or paper bag for about two to three days. To store the bagels longer, you can freeze them for three to four months. You can either freeze them whole or sliced, and then add them to a freezer gallon bag. To defrost the bagels, pop them in your toaster or oven on a low setting.
Recipe FAQ
Similar to my sourdough pretzel bites, bagels are boiled in water before baking. This gives bagels that chewy texture and shiny crust we all love.
No, baking soda makes the water more alkaline which helps form the shiny, browned crust and chewy texture. You can add honey to the water as well, to create a sweeter flavor, but it’s not necessary in my opinion.
Yes, either honey or sugar will work in this recipe. You will use the same amount regardless. You could also use maple syrup or molasses.
I prefer to use bread flour because it helps yield a chewy texture, but in a pinch, you can use all-purpose flour and reduce the water by 25 grams.
Yes, you can put the dough or the bagels in the fridge before baking. I prefer to refrigerate the shaped bagels so that they are ready to go the next day. Just be sure to allow the bagels to rise and become puffy before baking.
I have a 5qt Kitchen Aide mixer and mine is not strong enough to knead this dough. Unless you have one of the more powerful Kitchen Aide mixers I don’t recommend it as it can burn up the motor. I use my Bosch mixer to knead this dough. Or you can knead by hand.
This can be a sign of overproofing. When the dough is left to rise for too long it can overproof, which deflates the dough, leading to a flatter, wrinkly bagel. By shortening the rise time or reducing the amount of starter in the recipe by 25 grams, it can help prevent overproofing.
Malt is used in some bagel recipes to give the bagels a “malty” smell and flavor and can help with the browning crust. My recipe does not use either of these, as I don’t find it necessary, nor is it a common ingredient everyone has on hand in their kitchen. If you want to add malt syrup to the boiling water, or in place of the honey in the dough, you absolutely can do that.
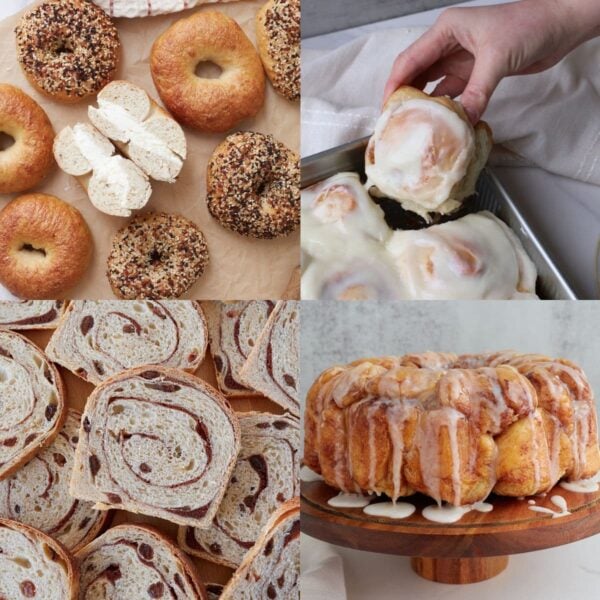
More sourdough Bread Recipes
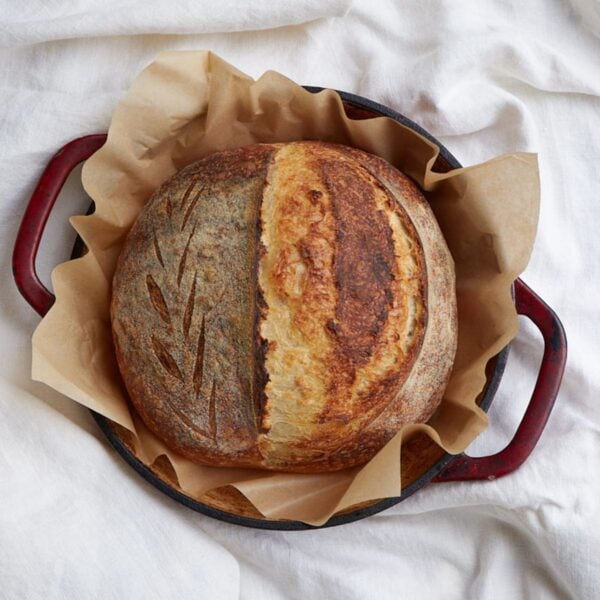
Sourdough Artisan Bread Recipes
Easy Sourdough Bread Recipe
Sourdough Bread Recipes
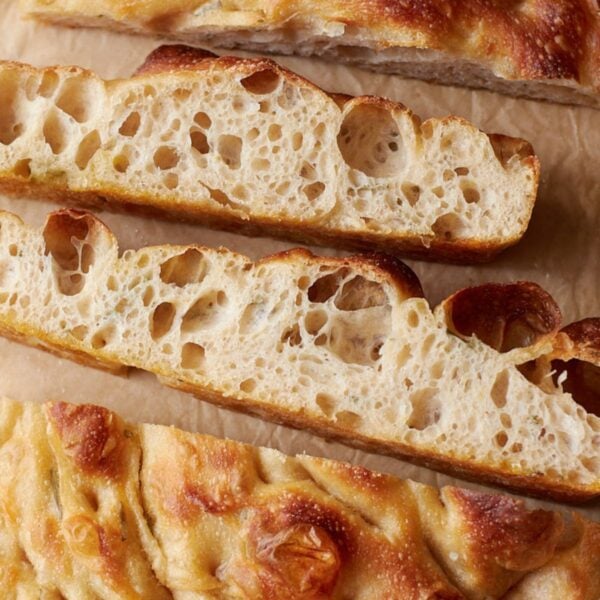
Same Day Sourdough Focaccia Recipe

Sourdough Bread Recipes
Overnight Sourdough Cinnamon Rolls Recipe

Soft Sourdough Bread Recipes
Same Day Sourdough Dinner Rolls
Tried this Sourdough Bagels Recipe or another recipe from the site? I’d love to hear about it! Drop a star rating and share your thoughts in the comments—can’t wait to see what you’re baking!

Sourdough Bagel Recipe
Equipment
Ingredients
- 150 grams starter, ½ cup + 2 Tablespoons
- 400 grams water, 1 ¾ cups
- 15 grams sugar or honey, 1 tablespoon
- 15 grams salt, 2 ½ teaspoons
- 750 grams bread flour, 5 ¼ cups
- Optional toppings
- 14 grams baking soda , 1 Tablespoon
Instructions
- Feed your starter: Add flour and water to your sourdough starter and let it sit in a warm spot until it is doubled or more in size and is done growing. It should be bubbly on the sides and top. If you want to feed your starter about 12 hours prior to mixing the dough I recommend a 1:5:5 ratio (15 g starter: 75 g flour: 75 g water) and leaving it at about 72°F. For a quicker rise, you could feed your starter a 1:1:1 ratio (55 g starter: 55 g flour: 55 g water) 4-5 hours ahead of time and leave it at about 77°F.
- Mix & Knead: To the bowl of a stand mixer add active sourdough starter, water, sugar, salt and bread flour. Using your dough hook, knead the dough for about 15-20 minutes or until the dough can pass the windowpane test. You can also mix this dough in a bowl and then knead it by hand.The windowpane test is used to see how well the gluten has developed. When the dough is able to stretch thin enough that you can see light through, without it tearing, it has passed. 750 grams bread flour, 150 grams starter, 400 grams water, 15 grams sugar or honey, 15 grams salt
- Bulk Fermentation (First Rise): Transfer the bagel dough to a bowl or straight-edge container and let it rise on the counter overnight, covered, until doubled in size. At 72°F, my dough doubled within 8 hours. If your house runs warmer or you need a longer rise time, you can reduce the amount of starter in the dough to 125 grams to slow down the process.
- Divide dough: Once doubled in size, punch down the dough and divide it into 12 equal pieces, about 108 grams each. I like to use a bench scraper for this.
- Form into balls: Taking one section at a time, form the dough into a ball by pulling the sides to the middle of the dough and then flipping it over. With your hand in a cupping shape, rotate the dough ball a few times in a circle. Repeat with the remaining 11.
- Shape into bagels: Poke a hole in the middle of the dough and then, using both pointer fingers inserted on each side, rotate your fingers around each other, making a hole in the middle of the dough. Ideally you want the size of the hole to be 1.5-2 inches.
- Second rise: Cut twelve 4×4-inch squares of parchment paper. Place a shaped bagel on each piece of parchment paper, and then place all 12 of them on a large baking sheet. Alternatively, you can place all 12 of them on a silicone mat, but when you pick them up to boil them the shape of the bagel can change. Cover with a slightly damp tea towel and let the bagels rise for another 30 minutes to an hour to relax and get puffy. The bagels will not double in size.
- Boil: After the bagels have had a chance to rise, preheat your oven to 425°F. Bring a large pot of water to a boil and add 1 tablespoon of baking soda. Add a few bagels at a time to the boiling water, parchment paper side up, and boil them for about 1 minute on each side. Once the bagels are in the water, you can easily remove the parchment paper from the dough. Use a slotted spoon or spider strainer to easily remove the bagels from the water and drain excess liquid.
- Add toppings: Place the bagels on lined sheet pans, 6 to each pan. Add your toppings of choice to the tops (see notes on flavor options above and for tips on adding to bagels).
- Bake: Bake for 18-20 mins or until lightly golden brown.
- Cool: Let the bagels cool on a wire rack and then enjoy them with butter or cream cheese.
Video
Notes
Topping ideas:
- Shredded Cheese -You can use any type of cheese you like, but I love cheddar, pepper jack, or colby cheese. Sprinkle the shredded cheese on top of the bagel.
- Everything But the Bagel Seasoning– To easily get the seasoning all over the bagel I like to pour some seasoning on a plate and dip the boiled bagel into the seasoning. This gives the bagel an even coat.
- Jalapeno & cheddar cheese – Sprinkle the cheese and set the jalapeno slices on top of the bagel. I prefer to use pickled jalapenos but fresh works too.
- Cinnamon and sugar – Using the same technique as the seasoning above, add the cinnamon and sugar to a plate and then dip the top of the boiled bagel into the cinnamon and sugar mixture.
Tips for success:
- I highly recommend making individual parchment paper squares for the bagels to rise on. It makes it easier to put the bagels into the boiling water without messing up the shape.
- If the room temperature is 65°F or lower, use a temperature-regulated dough mat (use code country10 for 10% off) or proofing box to keep it warmer. Learn more about tips to keep your dough warm here.
- Knead the dough until it passes the windowpane test. This ensures proper gluten development in the dough.
- Use your sourdough starter at peak. Using a bubbly and active starter will set you up for success and help your dough to rise. Learn more about how to feed and care for your sourdough starter.
- Add toppings, especially seasonings and seeds, when the bagels are damp to help them stick to the bagels.
Nutrition
Nutrition information is automatically calculated, so should only be used as an approximation.


What a fantastic recipe, thank you so much. For a first timer venturing away from just sourdough, I will put these at the top of my “Must Bake” list. I can never buy store bought bagels ever again.
So happy to hear that! Thanks Mickey!
Emily, thanks for your amazing sourdough recipes, I made my first loaf of focaccia bread (salsa recipe) and received several compliments. I might cut back some of the oil next time.
I use my ThermoPen for internal temp, doing a thump test was my reliable in my past. Would you ever consider adding an internal temp to the recipes or can you provide a guide line?
can I shape and then pop in fridge until the morning?
Yes I just wouldn’t leave them longer than 12 hours.
I have made 2 batches in 2 days. My family has devoured them. We’ve used a bunch of different toppings, eaten them plain, and loved using them for sandwiches. I will definitely be coming back to this recipe! Thank you!
Thanks so much, Leslie!
So good! Easy to follow, my bagels came out great the very first try!
So glad you like the recipe. Thanks for sharing.
Hello, I’m a bit confused as I begin to navigate my sourdough era (lol). Please help me understand the starter feeding for this recipe. Do I take out some starter from my current counter starter and feed just the small amount called for this recipe? Then feed my original counter starter again? Could raisins be added to these bagels too?!!
What I typically do is discard down to the small amount I need before feeding and then feed in my original jar. But you can also just take a little bit out of your original jar and feed it in a new jar just make sure you also feed your original starter daily or store in the fridge and feed about once a week. Either way will work so it’s just whatever you prefer.
Yes you can add raisins!
Can you do partial bulk fermentation on the counter and cold proof until morning? My starter was ready earlier than I thought so now bulk fermentation on the counter puts me at 1 am shape time.
Yeah that will be fine!
Think I could put the dough in my proofing box at 78 with my other sourdough instead of on the counter? For a same day bake?
Yeah absolutely! Sometimes I bump up to 80 to speed up the process.
I’m a beginner. So happy I found you! Your recipes are easy to follow and come out great! I will definitely get your book. I tried these bagels last night/ this morning. Delicious! I would like to make and freeze some, but the hand kneading was a lot for me. I was ready to jump in and pick up a Kitchen Aide mixer, then I noticed in the questions that bagel dough requires a strong mixer. I clicked the link for the one you have. That’s a big purchase. Silly question, but would I need another mixer if I had the Bosch one? Are there things you can’t do or make with it and need to use your Kitchen Aide instead? Thank you!
Hi Kristine! I’m so happy you enjoyed the recipe. I find at least the 4.5 & 5qt KitchenAid mixers can overload with thicker doughs. Sadly, I learned the hard way burning up the motor on my last one. The bosch mixer is better equipped to handle doughs like this. The bosch mixer is a bigger purchase but they do last for years and years so that’s the good news. You can use the bosch for cookie doughs, cake batters, bread doughs, etc so it is possible to use it for most of your mixer needs.
Thanks so much!
I just made these! I’m super new to sourdough baking but wanted to try them. They’re edible but hard to chew. I’m curious if I boiled them too long or what would cause the outside to be so tough. Other than that they were pretty good!
Hmm boiling too long could be a possibility. Another thought was if they were overproofed. Did the bake up fluffy or were they deflated?